
Learn how to oven roast green chile peppers to throw a whole lot of flavor and a little bit of heat into your meals. Hatch green chile peppers have a short season from late summer to early autumn, and are perfect for preserving. Literally get them while they’re hot and enjoy them all year round!

Want to save this post for later?
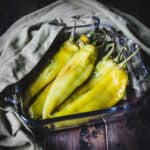
Hatch Chile Peppers for Roasting
Oven roasted green chile peppers, or hatch peppers as they are commonly known, taste super flavorful!
Hatch peppers are perfect for buying in bulk to roast and preserve, and can be used throughout the year.
This recipe has only one ingredient: chile peppers! Roasting these in-season peppers is a great project to take on during the transition from summer to fall.
Hatch chile peppers come from the Hatch Valley of New Mexico and are known for their depth of flavor. While they do have some heat to them, it’s about 1/3 the amount of spice as a jalapeño pepper.
They add a delicious and flavorful kick to any dish you want to add them to, and can be used in a variety of foods from savory to sweet!
Green chile peppers are truly more flavor than spice, which is exactly why I adore them. They’re great for stirring into just about any family meal, adding flavor without over-spicing a dish.
These oven roasted Hatch peppers are loved by adults and kids alike here at my house!

Oven Roasted Green Chile Peppers Recipe
This oven roasting method is one I find simple and accessible for almost anyone to do, however there are other methods available to roast your chile peppers if you are interested.
Here, find methods for grilling or stovetop roasting green chiles.
You can use any green chile from New Mexico for this recipe, but Hatch is the most common variety. Many other types of peppers will also work such as anaheim, poblano, banana peppers, or even bell peppers.

Roast the Green Chile Peppers
Place the peppers in a single layer on a sheet pan.

Roast in an oven preheated to 450° for 5-8 minutes or until the skin has started to brown.
Then flip peppers and roast them again for 5-8 minutes more or until the skins are charred brown all over.
Steam and Peel the Peppers
Place the roasted green chile peppers into a container with a lid (or a zip top bag will work just as well) to steam for 15-20 minutes. This helps to release the skin.

Wearing gloves, peel the skin off of the peppers. Gloves are recommended because the peppers have some spice to them which can burn the skin (some people are more sensitive to it than others).
The skin should come off fairly easily, but if you have trouble you can put the peppers under running water while you peel.
Then the peppers are ready to use!

Use or Freeze the Green Chile
After the chile peppers have been roasted and the skins removed they should be stored in the refrigerator, either whole or chopped. They can also be frozen for later use.
I personally love having these green chile peppers on hand and available to use in some of my favorite recipes such as enchiladas, tacos, burritos, chili, or to add a kick to mac and cheese night.
I even found a recipe for green chile jam that sounds amazing!
Roasted hatch peppers have a very versatile flavor and can be used in a wide range of dishes, so you can get creative with these flavor forward peppers.

More Pepper Recipes
Here are more ways to prepare and preserve your peppers!
- Quick Refrigerator Pickled Pepperoncini Peppers
- Pickled Jalapeño Peppers: Quick Refrigerator Recipe
- How to Dehydrate Peppers for Food Storage
- Fermented Jalapeño Hot Sauce
- Fermented Pepperoncini Hot Sauce
- How to Make Fermented Hot Sauce
- Fermented Chili Paste
- How to Make Pepper Jelly: Mild or Hot
Oven Roasted Hatch Chile Peppers
Instructions
- Preheat the oven to 450°F.
- Place the chile peppers in a single layer on a sheet pan.
- Roast for 5-8 minutes or until the skins of the peppers begin to brown.
- Flip the peppers and roast 5-8 minutes or until the skins of the peppers are charred brown all over.
- Place the chile peppers in a container with a lid, or in a sealed zip top bag, and let it steam for 15-20 minutes so the skins will release easily.
- Wearing gloves, peel the skins off of the chile peppers.
- Store the peppers in the refrigerator or freeze for later use. They can be kept whole or chopped.
Notes
- You can use any green chile from New Mexico for this recipe, but Hatch is the most common variety. Many other types of peppers will also work such as anaheim, poblano, banana peppers, or even bell peppers.
- Gloves are recommended when peeling because Hatch peppers have some spice to them which can burn the skin (some people are more sensitive to it than others).
- The skin should come off fairly easily, but if you have trouble you can put the peppers under running water while you peel.
- After the chile peppers have been roasted and the skins removed they should be stored in the refrigerator, either whole or chopped. They can also be frozen for later use.

Place roasted chilies in a plastic bag like you get at a grocery store. Tie off top of bag and chilies will sweat. After about 15 minutes, take the chilies out and softly remove the skins which slip off easily. Works like a dream. I used to live near Hatch, NM. Love these chilies
Our family has grown & roasted green chili for more than 4 generations.
One tip we live by is, upon removal from oven while still in the pan, place a wet dish towel over the chili for the steaming process. Leave for 10-15 minutes. Peeling is then so much easier! Then place in air tight container to store.
Great tip, Michelle. Thanks for sharing!
Wow!!! I’ll definitely follow this guide.