

Lavender kombucha made with green tea starter is a perfect light and fizzy drink for warm summer days! With a long history of use as a calming aromatic herb, lavender makes a lovely second fermentation to flavor kombucha.
Want to save this post for later?
Edible Lavender Flowers
Lavender is a wonderful spring and summer flower with amazing aromatics and tons of benefits. With internal and external uses, beautiful purple blooms, and calming nature, no wonder it’s a garden favorite!
This flower has a long history of use for it’s aromatics, skin benefits, and soothing capabilities. I like to use lavender to make salve, cooling lemonade, and herbal popsicles.
Whether you grow your own lavender and dry it on a rack, or buy dried lavender, it has a light floral and earthy taste that makes for a super soothing tea. Which, in turn, makes a tasty kombucha too!
When you add lavender tea to kombucha, the health benefits are an amazing silver lining to the light and floral summery flavor. Lavender is known for balancing mood, and historically was used as an herb for passion.
Lavender is helpful for sleep, is pain relieving and anti-inflammatory, as well as helps digestion. Combined with the antioxidant powers of green tea and probiotic rich kombucha, this recipe makes an amazingly beneficial drink.
SCOBY For Life
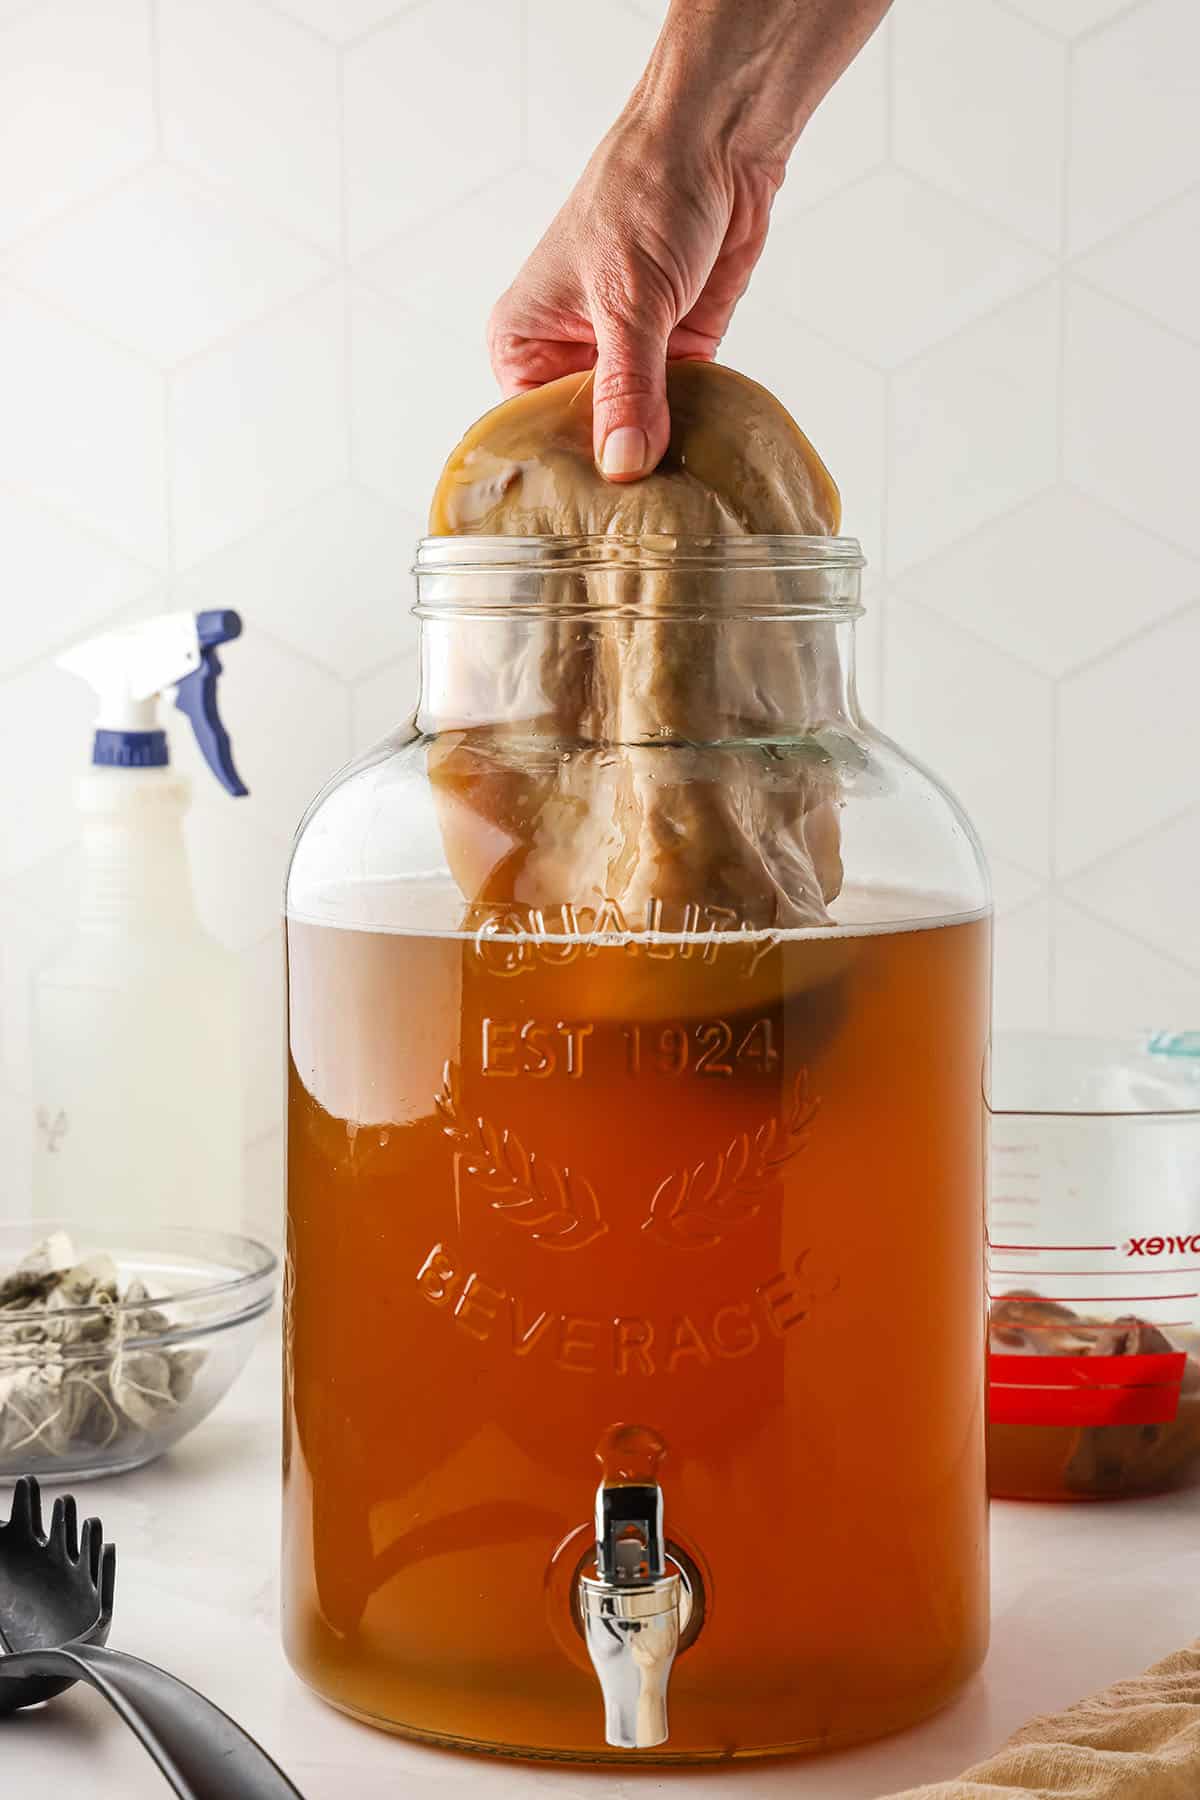
I prefer to use green tea kombucha in this recipe so the lavender flavor isn’t overpowered. Making lavender kombucha is a second fermentation, so it doesn’t need a SCOBY (Symbiotic Culture of Bacteria and Yeast).
If you’re new to brewing kombucha, a SCOBY is a slimy-pancake-looking thing full of all of the good bacteria and yeast that fuels the first kombucha fermentation, and creates the fizz and bubbles.
SCOBYs are alive, and they bring their powerful goodness and energy to every original brew. And the best part? They multiply! So it’s easy to keep your kitchen kombucha factory rolling, as well as fueling the brews of your friends and neighbors.
I like to think of a SCOBY as a friend, and it can be a lovely connection to share with your fellow ‘booch lovers. Is it kinda weird looking? Yes, but it is alive, healthy, and makes a lovely gift for those who know!
To read more about how to brew a basic kombucha first fermentation and a continuation of my love of SCOBYs, read this recipe here.
If you need to purchase a SCOBY, I recommend buying the mother culture from from Kombucha Kamp.
If SCOBYs aren’t your thing and you’re just in it for the second fermentation, it’s okay to use bottled kombucha from the store that hasn’t been flavored yet. With second ferments, a SCOBY isn’t needed.
There are so many options for kombucha second ferments! Some of my favorites are strawberry, rose, ginger, and dandelion. Each herb brings different benefits to kombucha, and lavender is a wonderful herb to use!
Lavender Kombucha Recipe
This recipe starts with brewing lavender tea and making it into a sweet simple syrup. I find that making a syrup is the best way to get the most fizz and bubbles, since sugar is what fuels the fermentation process.
It’s okay to use less sugar, but keep in mind that the end result post fermentation won’t be a sugar laden drink. Most of the sugar will be metabolized by the yeast from the original kombucha added during fermentation.
Ingredients
Dried lavender flowers: Use any edible lavender flowers from your garden and dry them, or buy dried lavender. It’s also okay to use fresh lavender flowers!
Fresh lemons: I like to use freshly squeezed lemons!
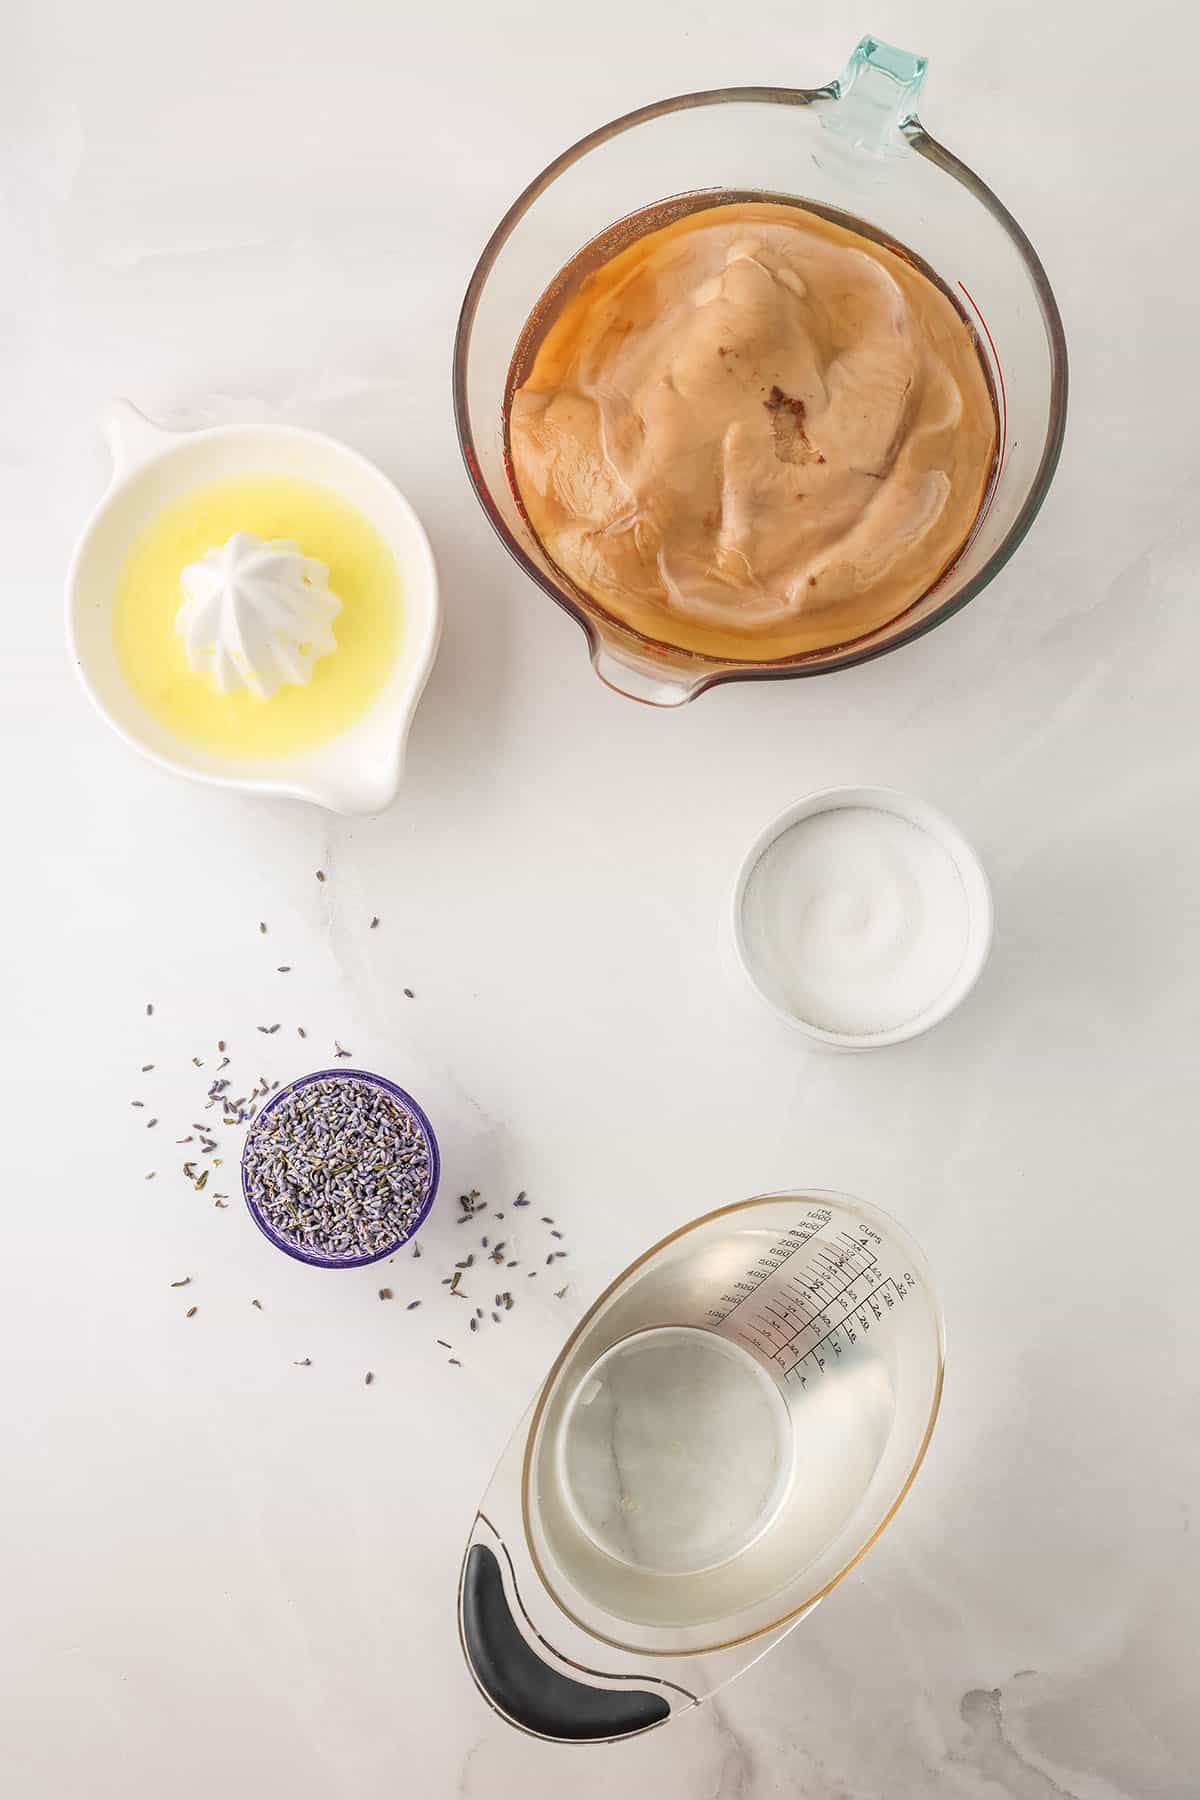
Sugar: Sugar is necessary to fuel the fermentation process, but the amount is somewhat flexible. I use organic granulated sugar. It works just as well to substitute the sugar with honey.
Fermented kombucha: I recommend using green tea kombucha, it’s light flavor and fizz are a perfect pairing with lavender flavor. You can use black tea kombucha, but I feel the flavor overpowers the lavender.
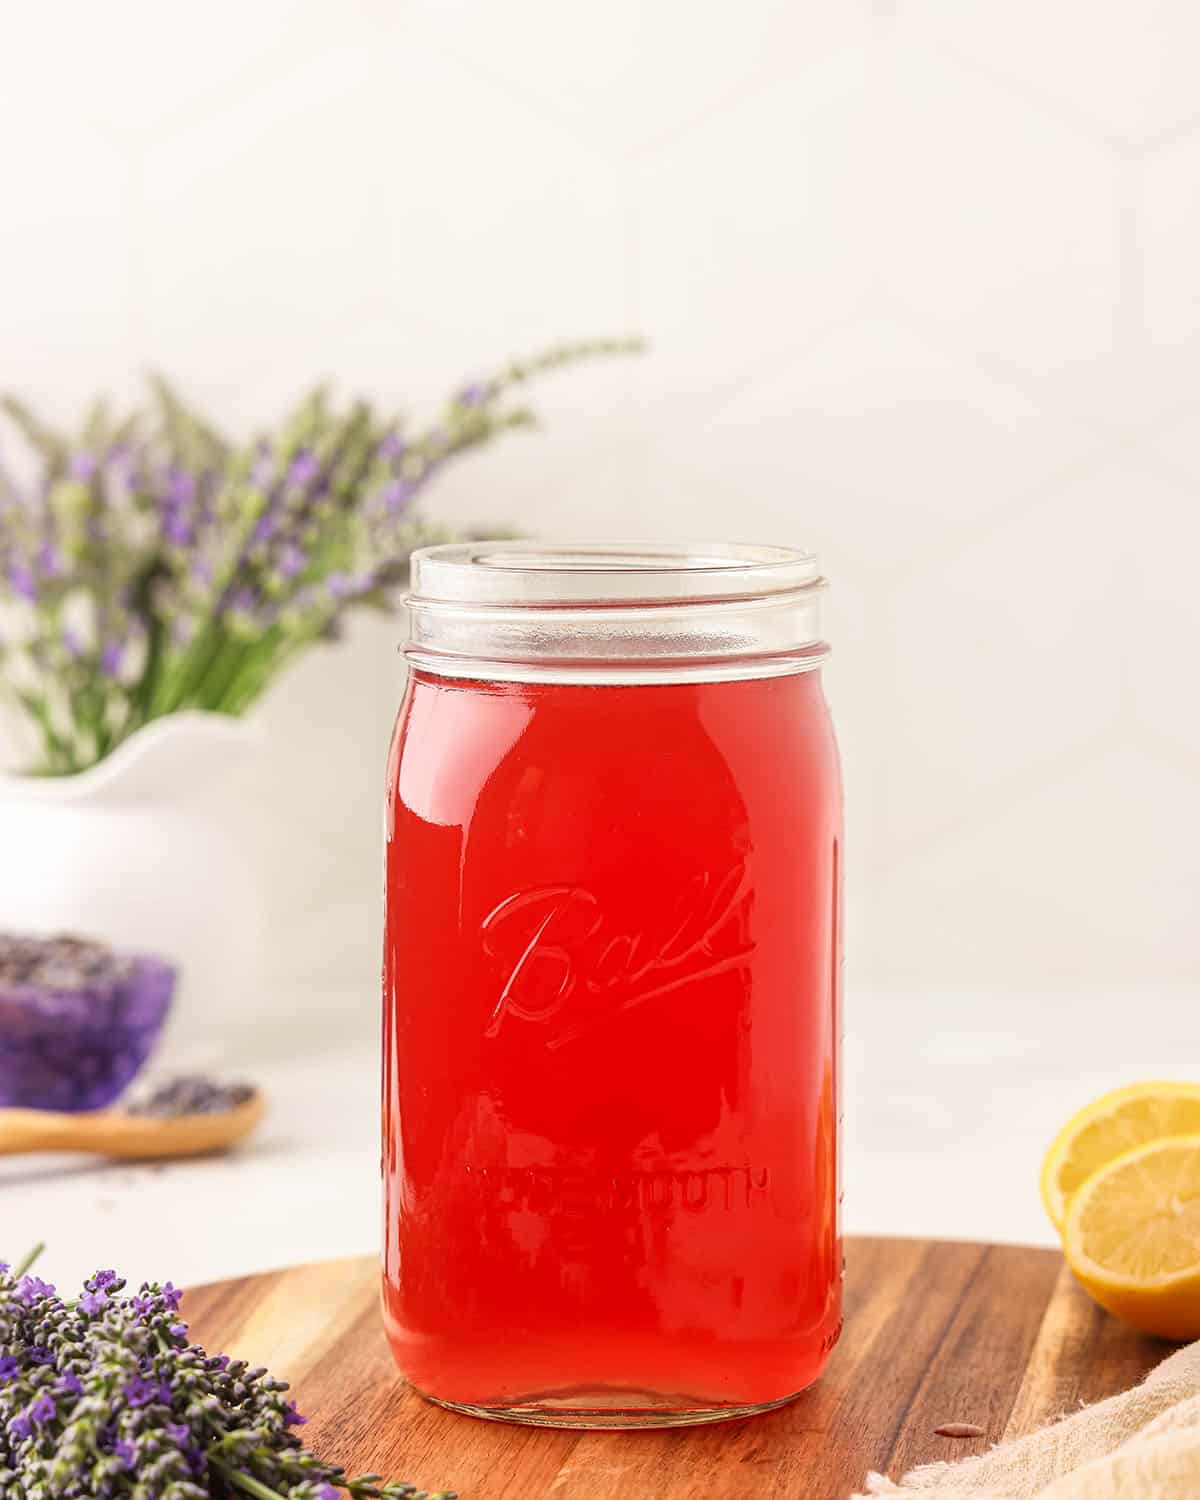
Make Lavender Syrup
First, put the lavender flowers, water, and lemon juice into a pot and bring to a gentle boil over medium heat.
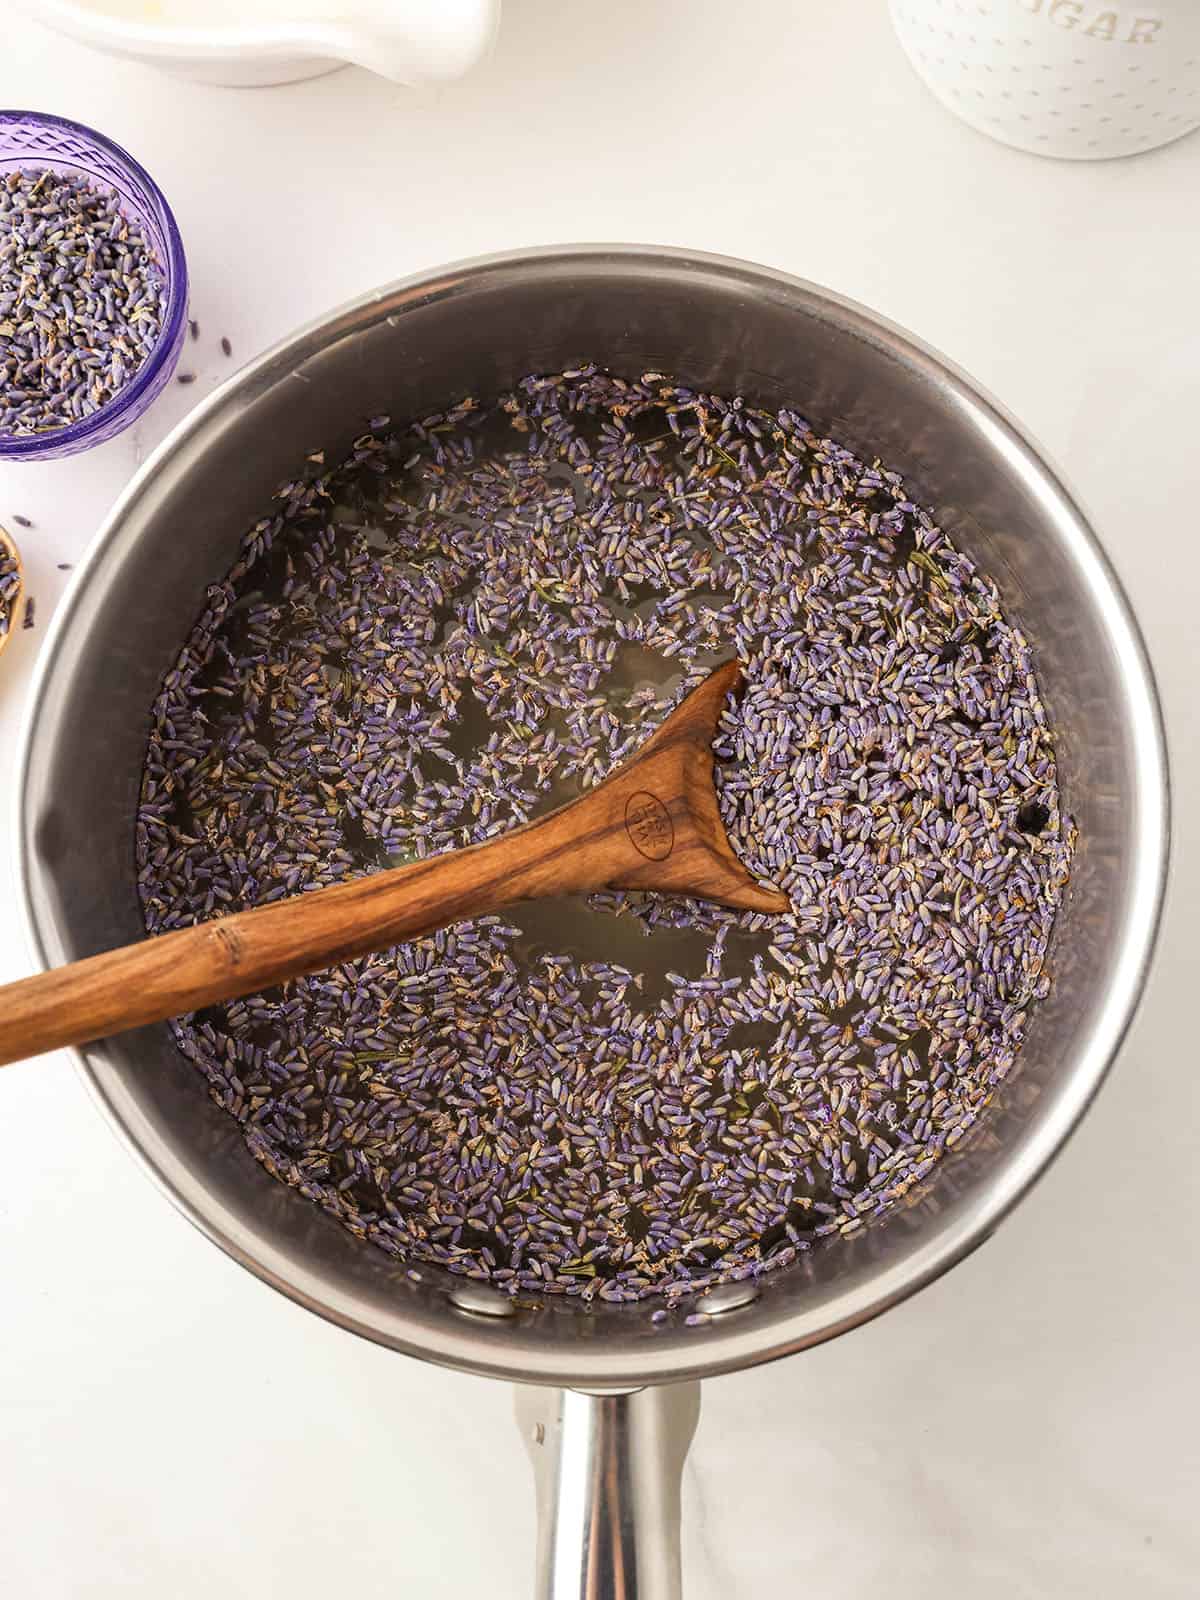
Once the water is boiling with the herbs and other ingredients, then add the sugar and stir until it dissolves.
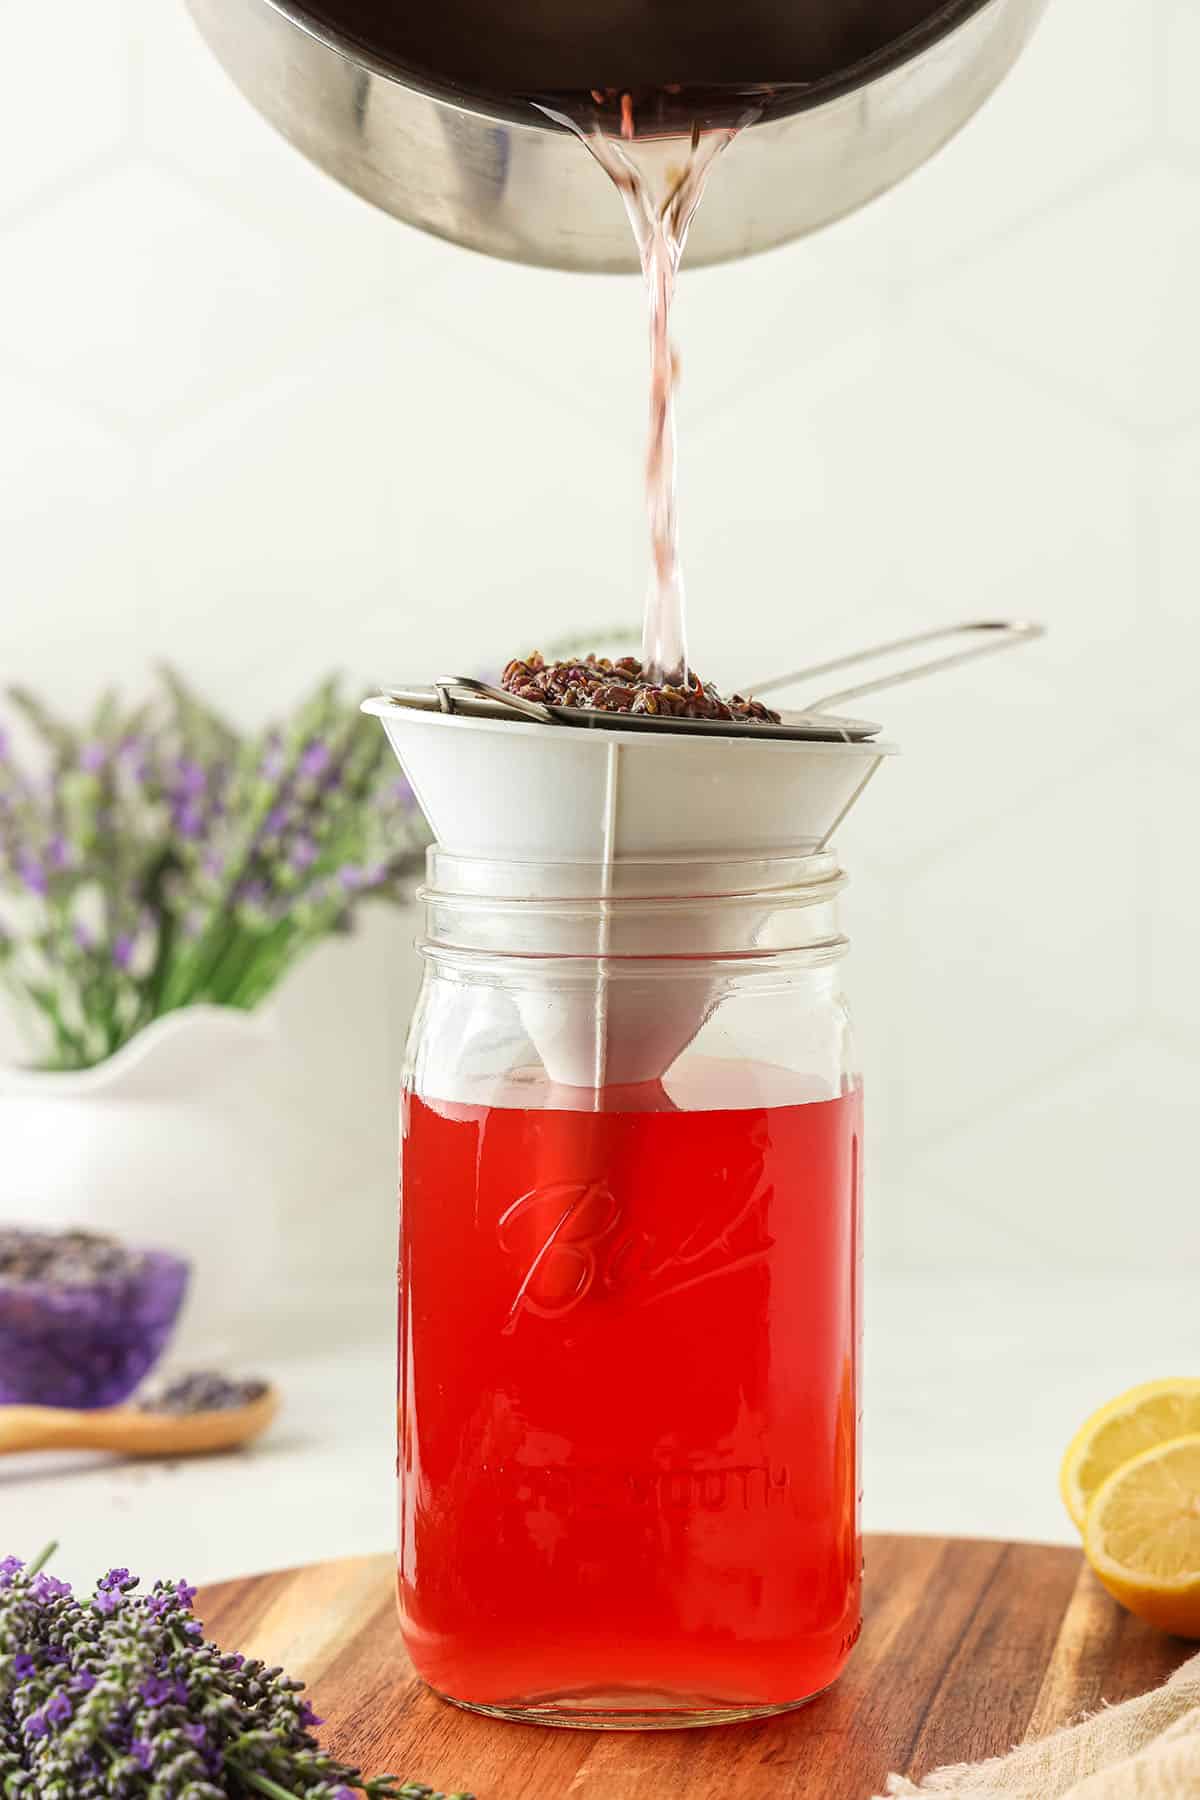
Turn off the heat and allow the lavender syrup cool completely down to room temperature. Then strain the lavender flowers out with a fine mesh sieve.
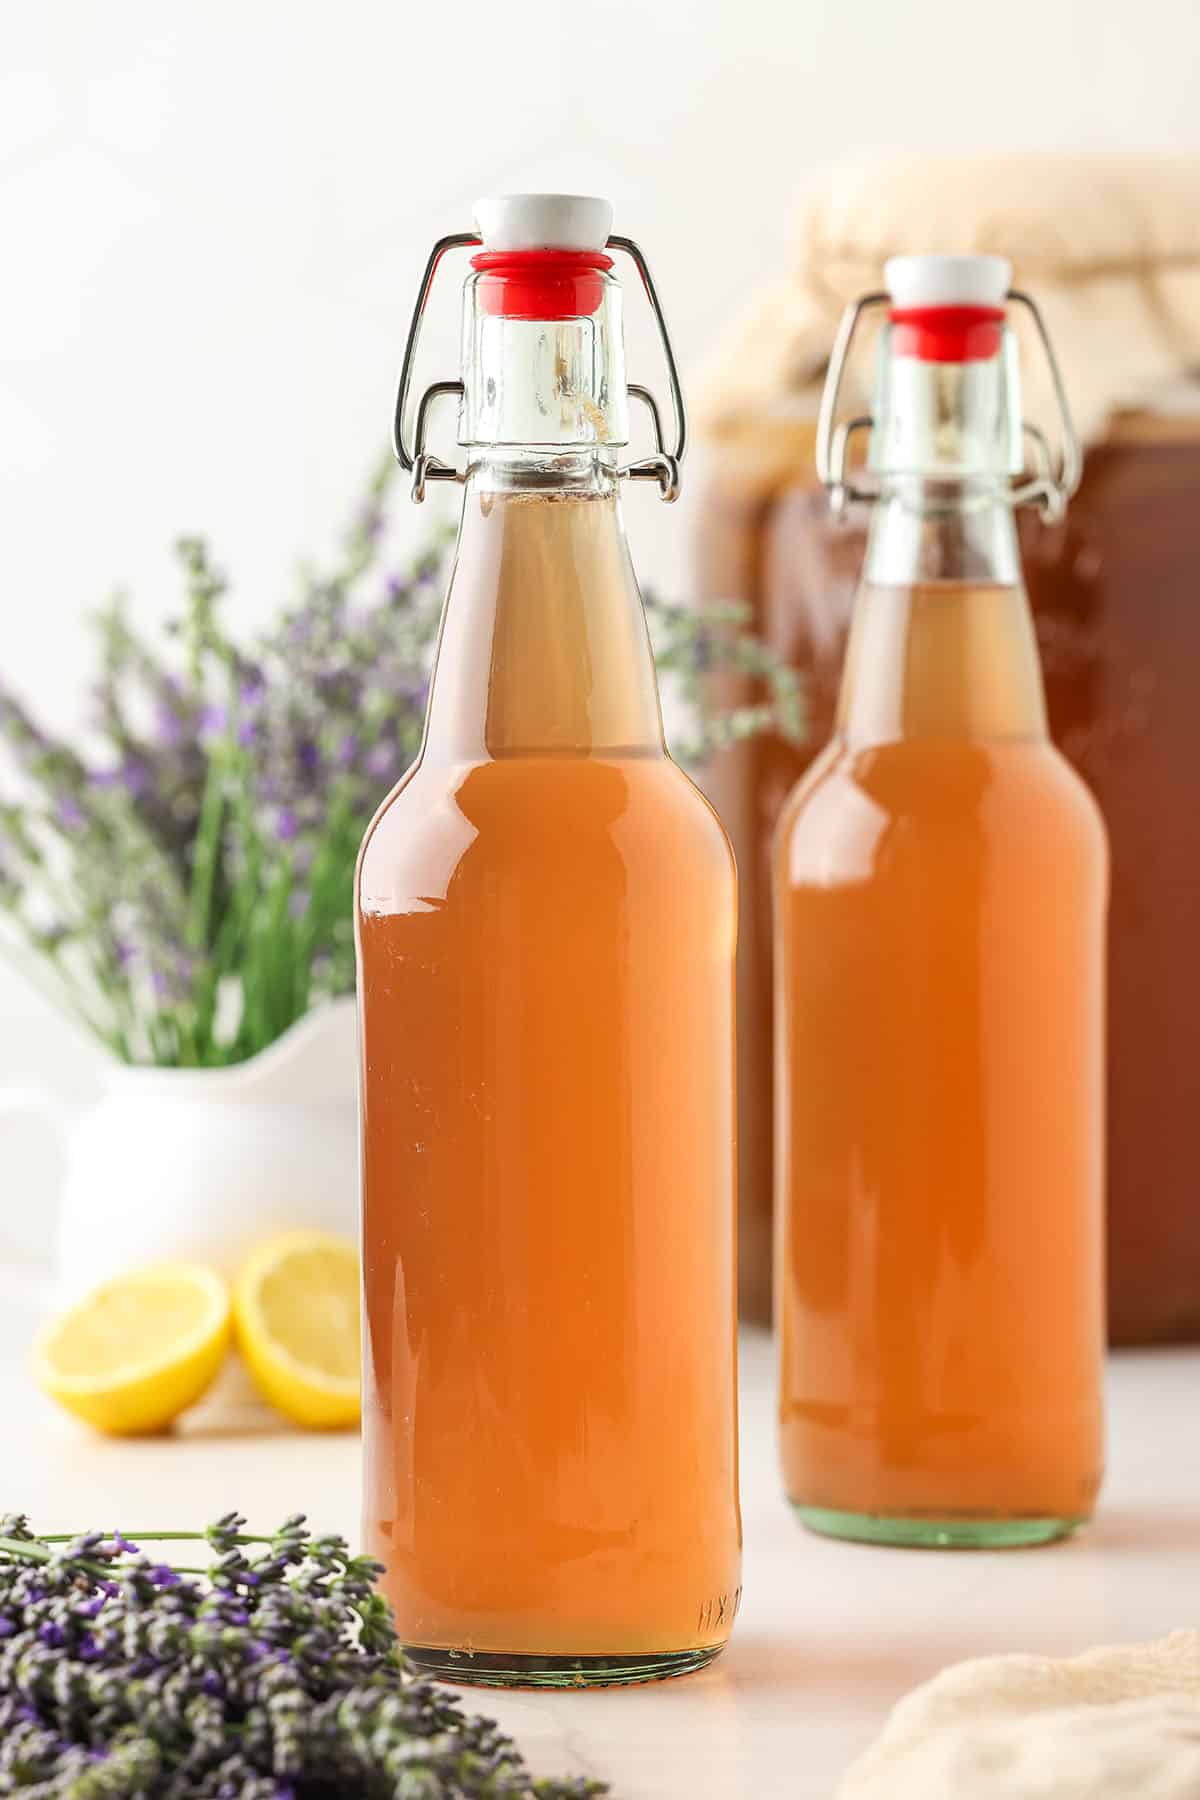
Kombucha Second Fermentation
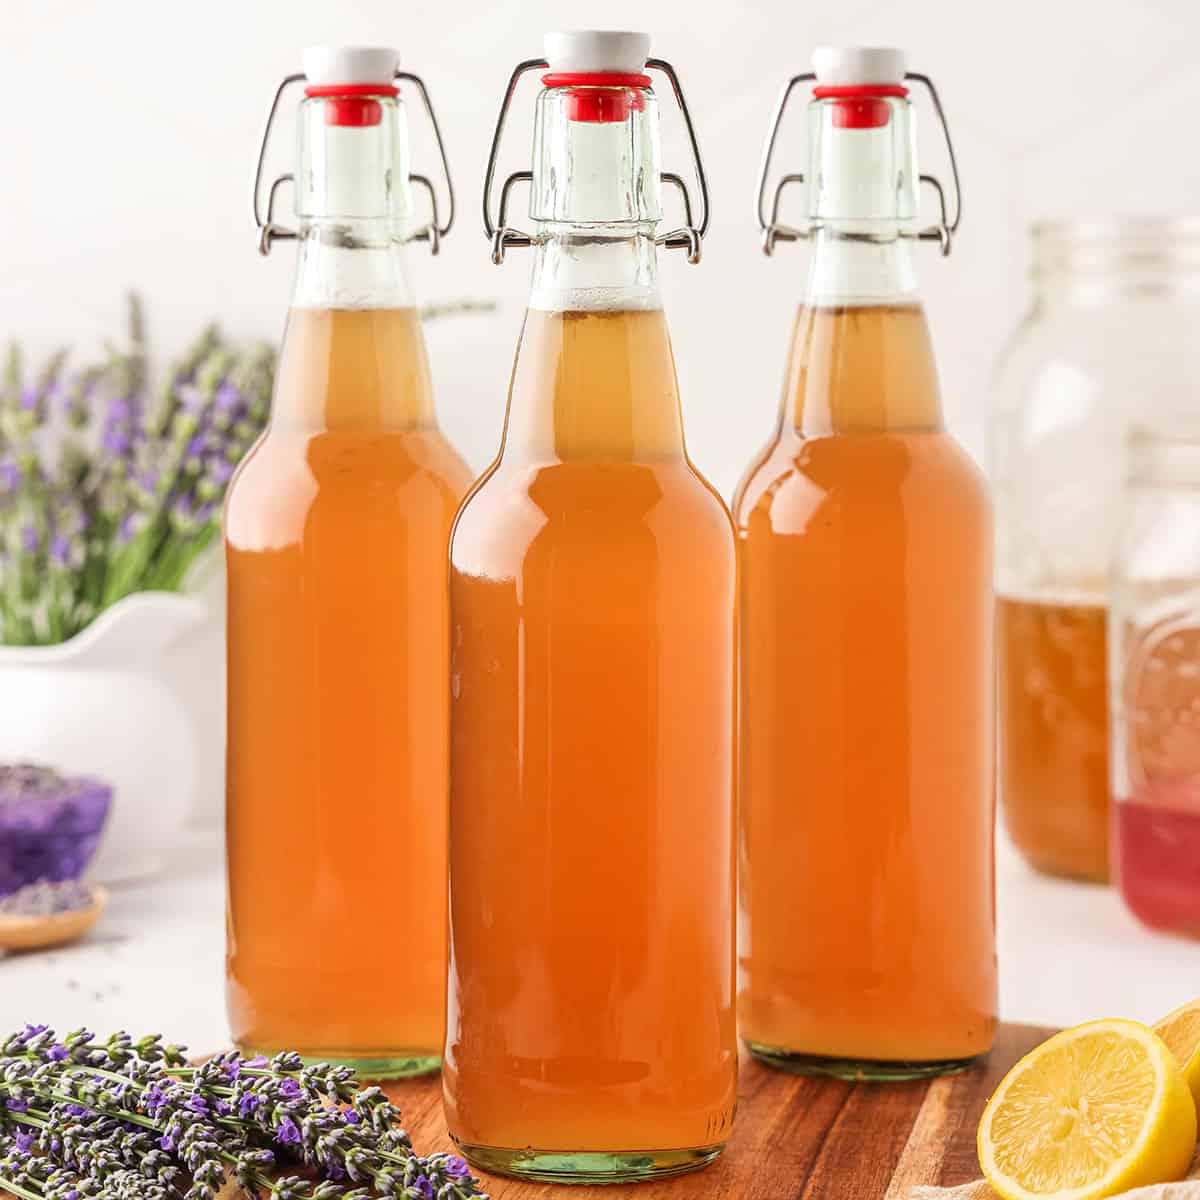
Gently swirl the fermented kombucha from the first fermentation process to evenly distribute the yeast before you pour it into the bottles.
Then use a funnel to pour one cup of brewed green tea kombucha into each bottle.
Next, pour about one cup of lavender syrup into each bottle, making sure to leave about 1-2 inches in the neck of the bottles for headspace.
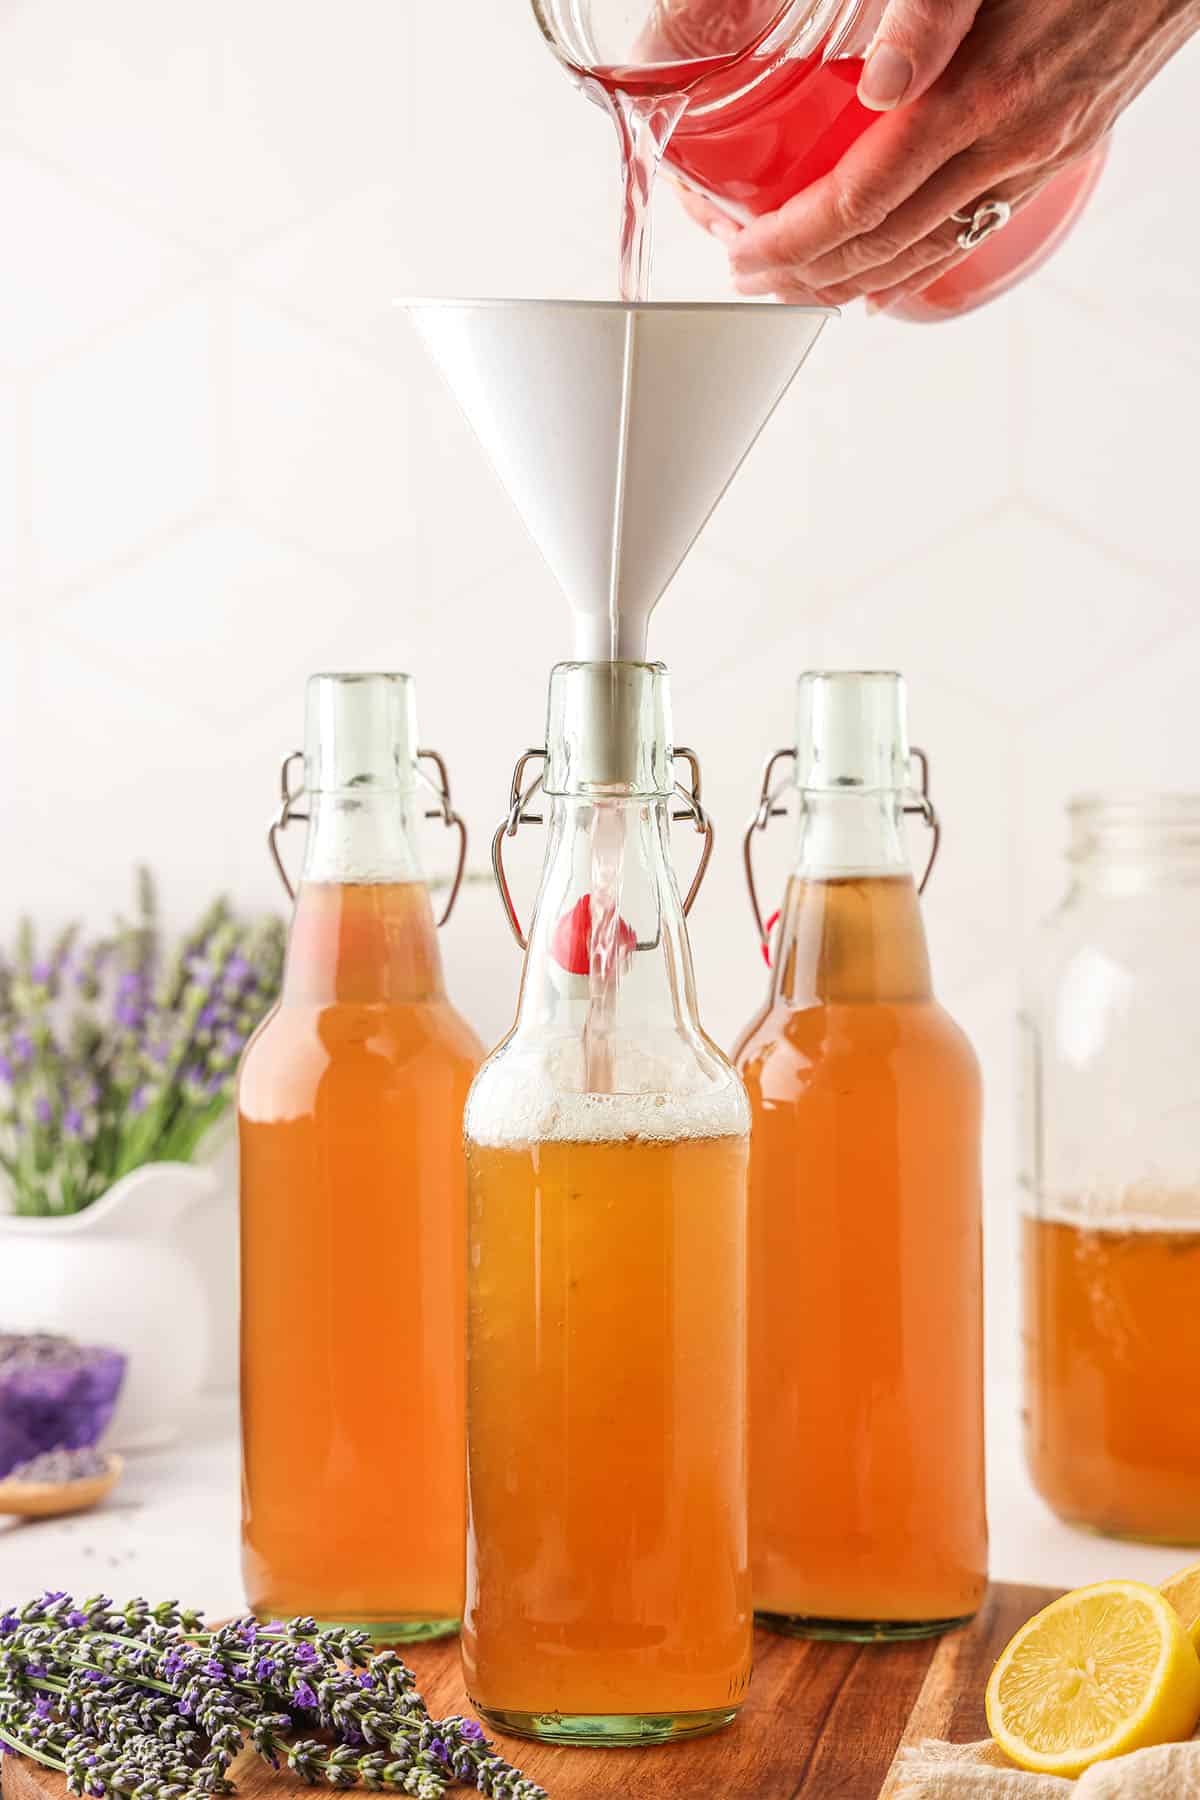
Note: I like the balance of using half kombucha and half lavender syrup per bottle, but this can be adjusted to your liking.
Now seal the bottles and shake them gently to mix the syrup with the kombucha so the bacteria and yeast are distributed around.
Then place the bottles in a room that is out of direct sunlight, and where you will remember to check on them daily. I’m a fan of setting a daily alarm, because out-of-sight-out-of-mind is a true phenomenon!
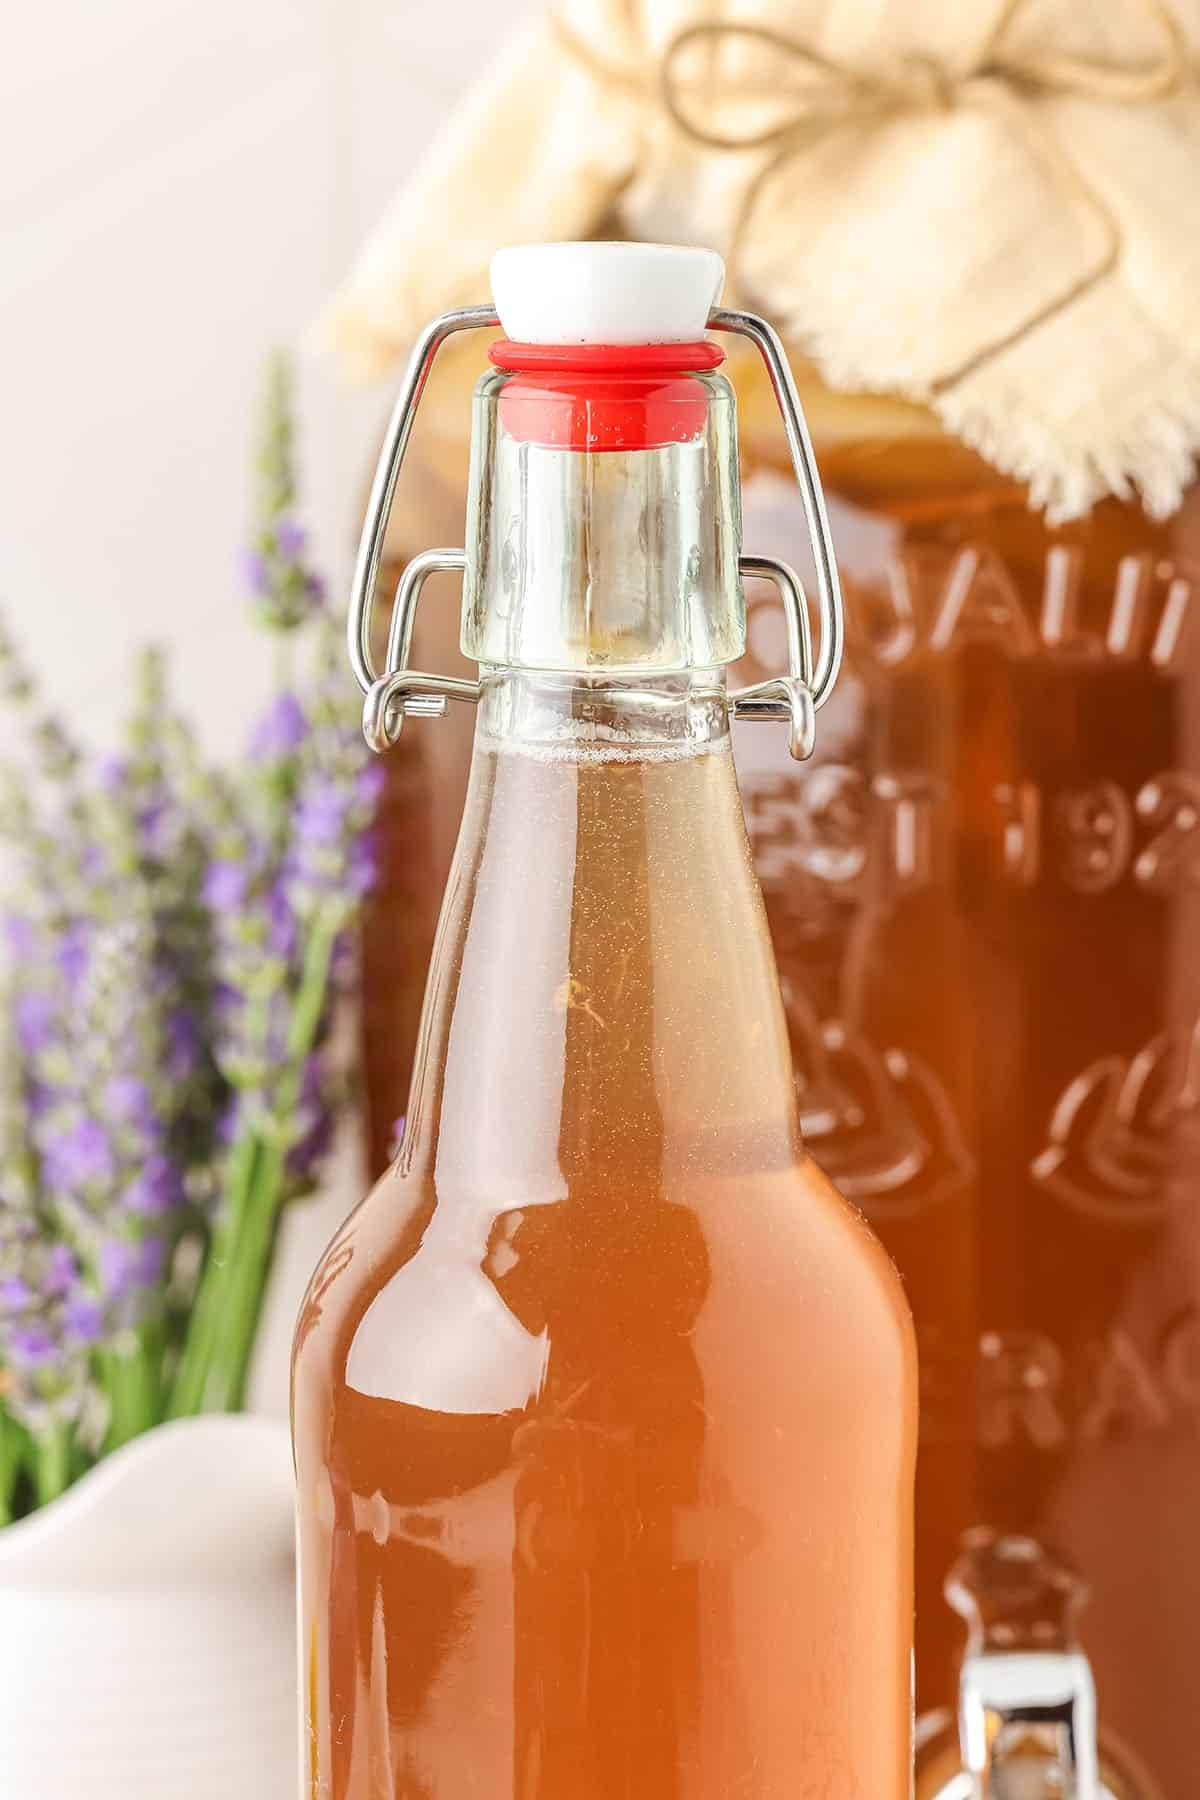
As the fermentation process occurs, you will notice little bubbles forming at the top and the yeasts will float. Check the bottles daily and “burp” them at least once daily to release pressure.
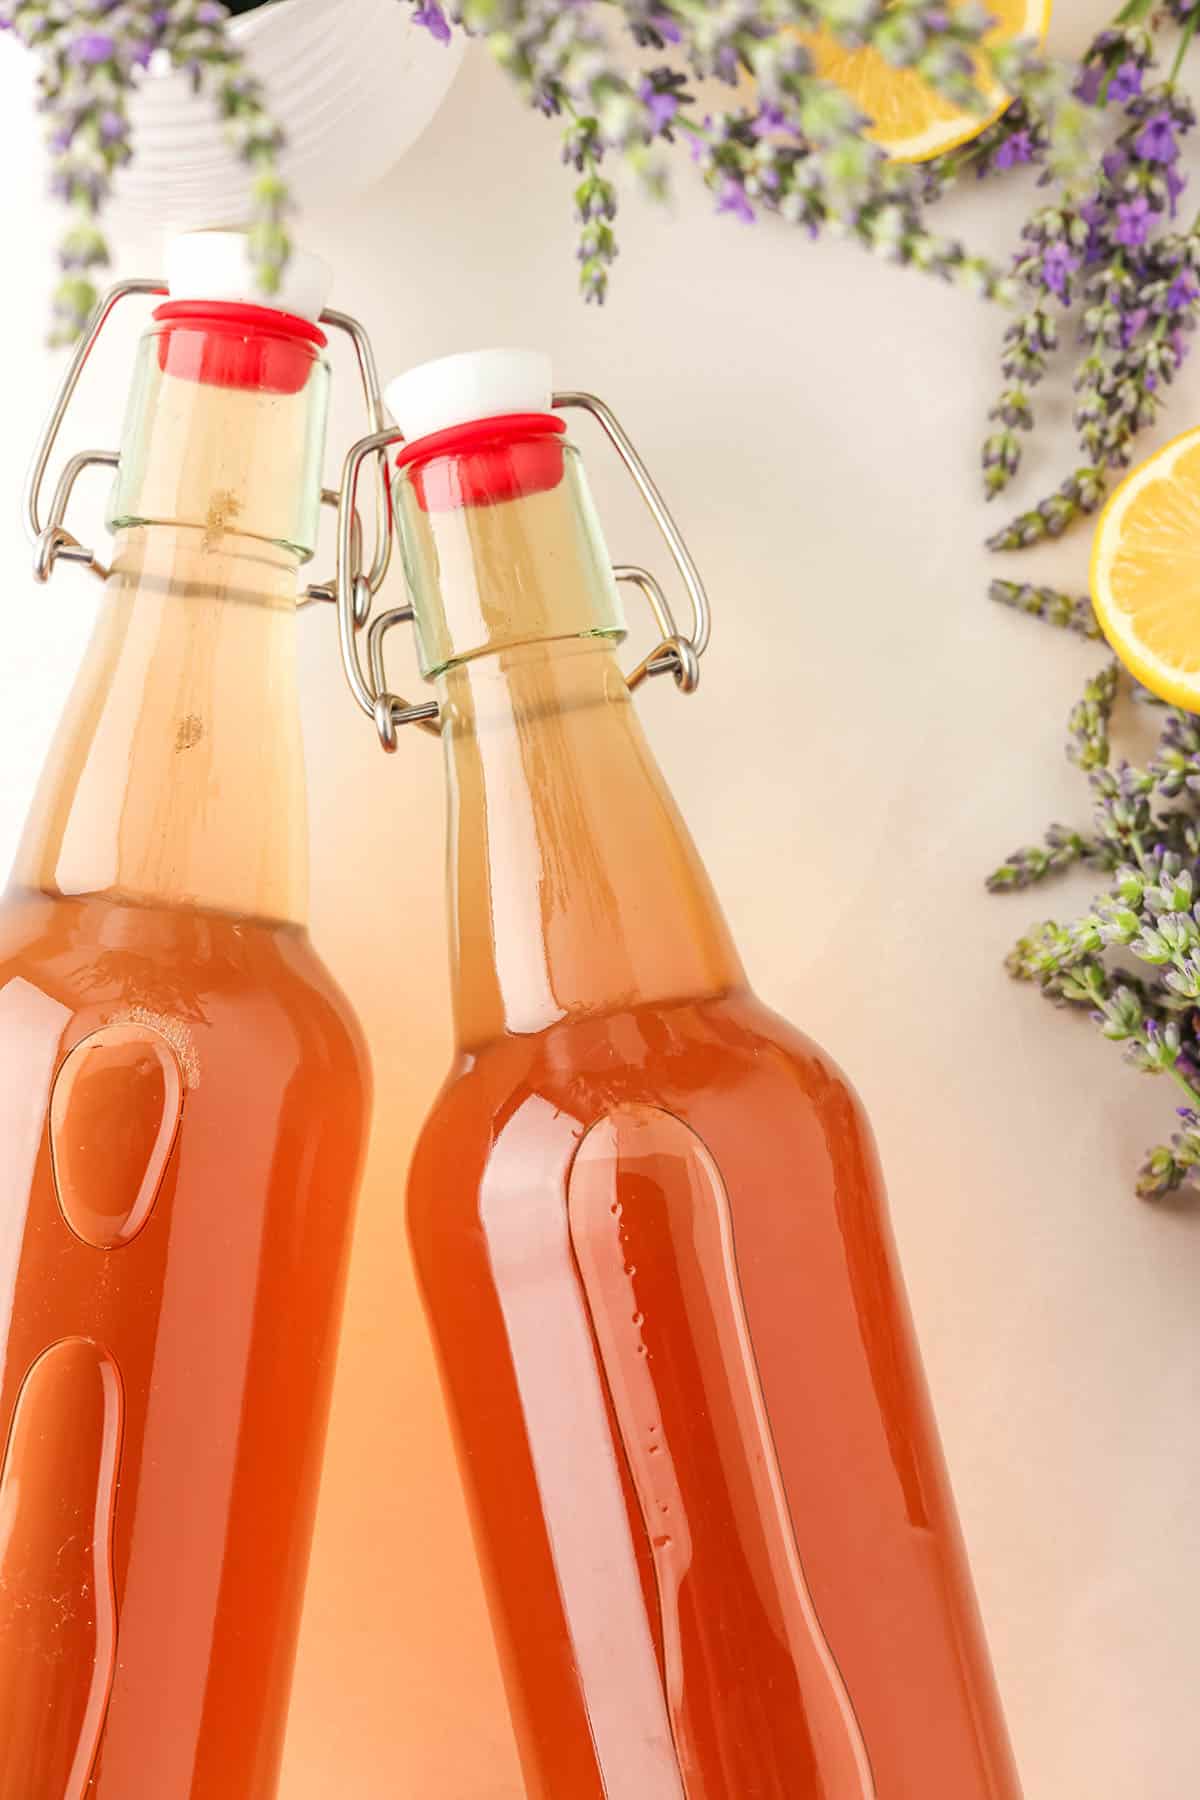
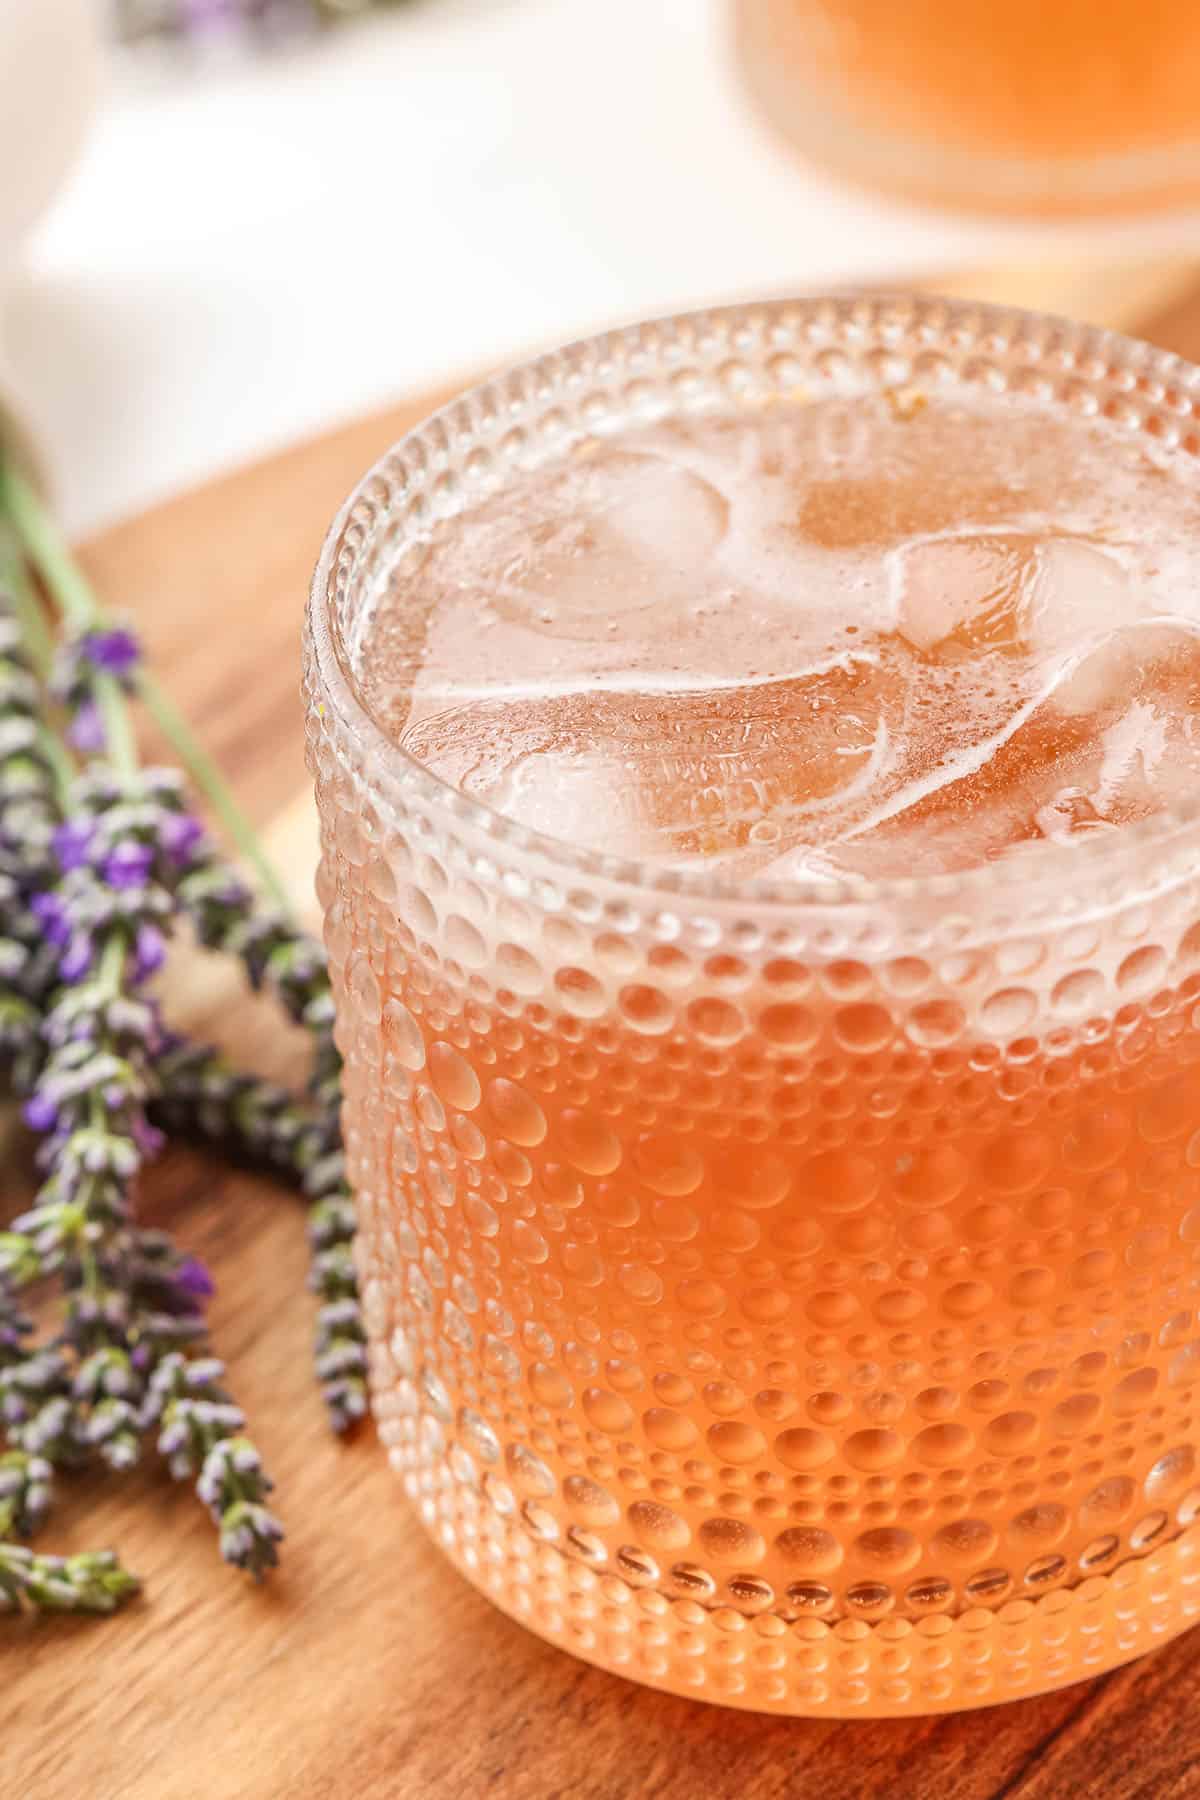
If there is built up pressure and bubbles race to the top, that means the fermentation is done and you can move that bottle to the refrigerator. Now it’s ready to drink!
Note: Keep in mind as you check the bottles that lavender kombucha may not get as fizzy as fruit kombuchas.
Depending on the ambient air temperature, a kombucha second fermentation can take anywhere from 2 to 5 days or so.
A Cold Drink For Chilling Out
Lavender kombucha is best served chilled on a warm summer day, let the herbs calm your soul and give a relaxing vibe to your afternoon.
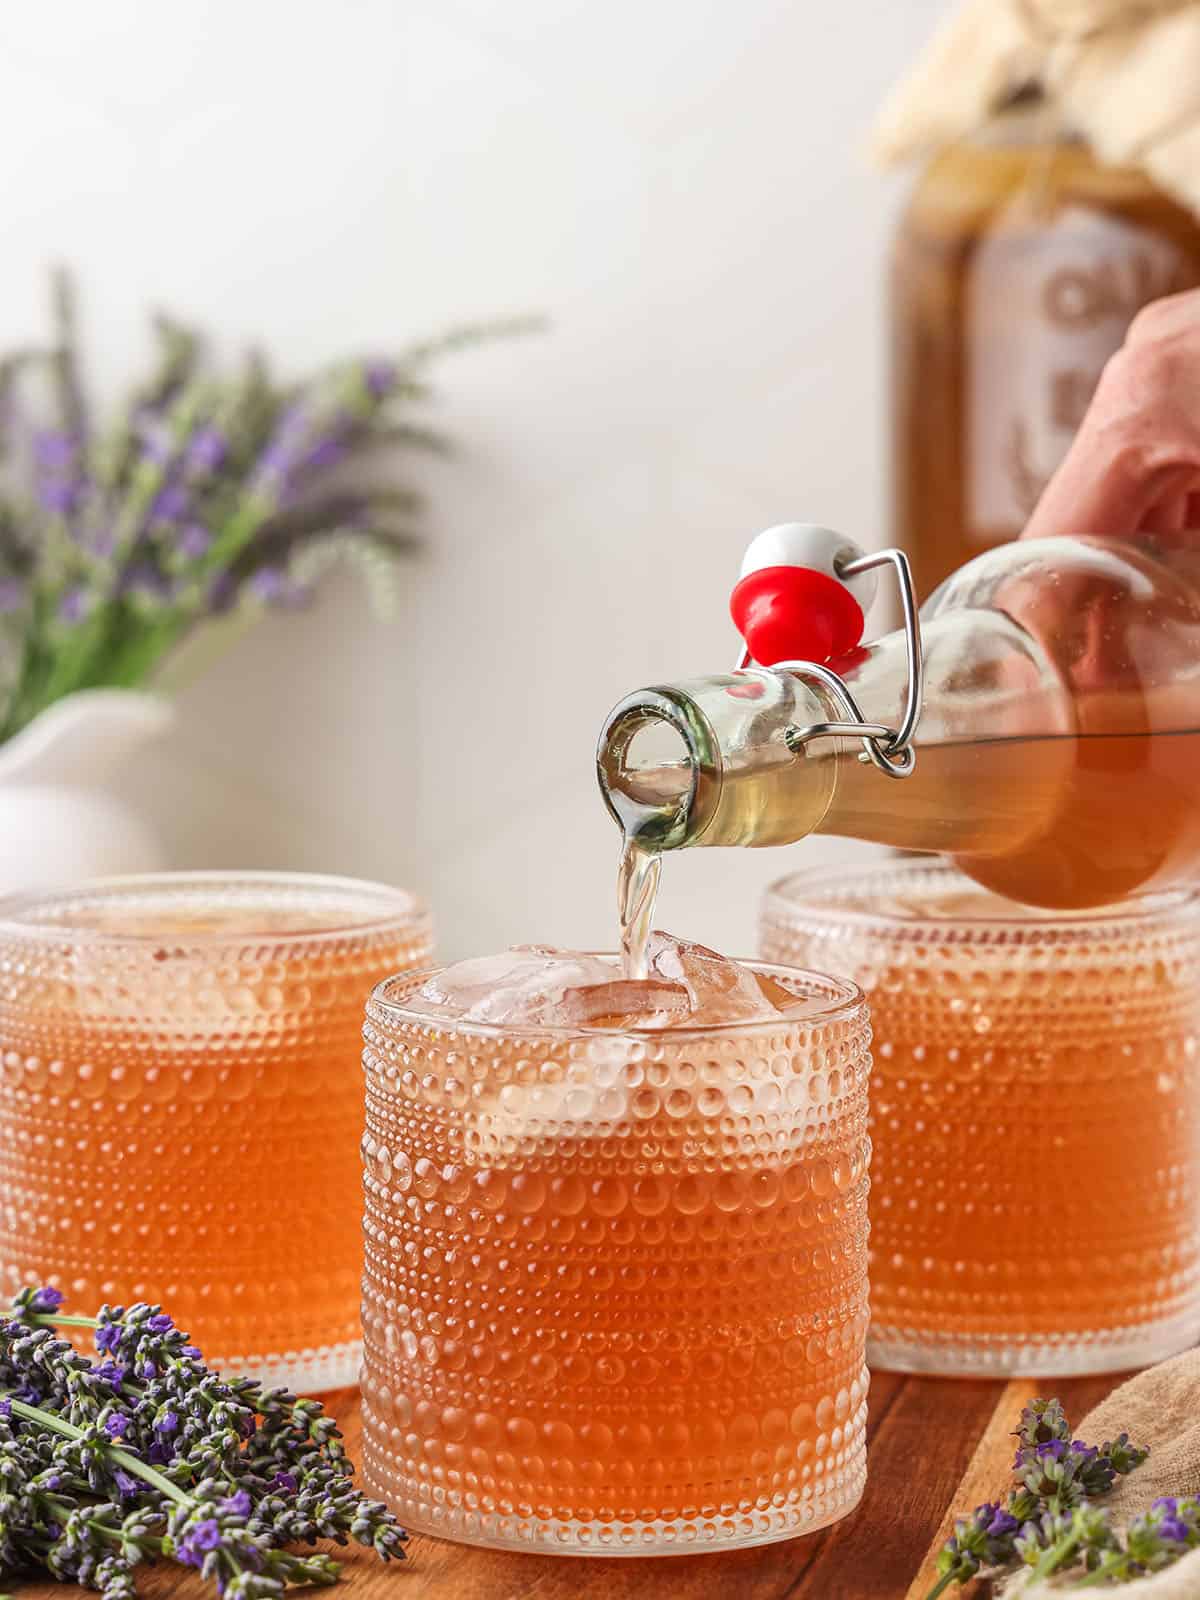
I love to accompany this tasty probiotic rich drink with some lavender lemon shortbread cookies, it’s perfect for a summertime snack!
Lavender is the best way to relax, give yourself time to digest, and take care of any worries you might have. Cheers!
More Fermented Drinks
- Strawberry Water Kefir Soda
- Pine Needle Soda
- Naturally Fermented Turmeric Soda
- Fermented Root Beer
- Yarrow, Rose, and Strawberry Soda
- Strawberry Rhubarb Soda
Best Kombucha Flavors
- Blueberry Kombucha
- Dandelion Kombucha
- Ginger Kombucha
- Hibiscus Kombucha
- Rose Kombucha
- Strawberry Kombucha
- Watermelon Kombucha
- Blackberry Kombucha
- Elderberry Kombucha
- Apple Ginger Kombucha
- Cranberry Kombucha

Lavender Kombucha
Ingredients
- 1/4 cup dried lavender flowers
- 4 cups water
- 2 lemons juiced
- 1 cup sugar
- 4 cups fermented kombucha green tea kombucha is recommended
Instructions
Lavender Syrup
- Put the lavender flowers, water, and lemon juice into a pot and bring to a gentle boil over medium heat.
- Once it is boiling add the sugar and stir to dissolve. Turn off the heat and allow the lavender syrup to cool completely to room temperature, then strain out the lavender flowers with a fine mesh sieve.
Kombucha Second Fermentation
- Gently swirl the fermented kombucha (from the first fermentation process) before you pour it into the bottles to evenly distribute the yeast, then pour one cup of brewed kombucha into each bottle.
- Then pour about one cup of lavender syrup into each bottle, leaving about 1-2 inches in the neck of the bottles for headspace.
- Seal the bottles and shake them gently to mix.
- Place the bottles in a room that is out of direct sunlight, and where you will remember to check on them daily.
- As the fermentation process occurs, you will notice little bubbles forming at the top and the yeasts will float. Check the bottles daily and “burp” them at least once daily to release pressure. If there is built up pressure and bubbles race to the top, then move the bottles to the refrigerator. Depending on the ambient air temperature, this can take anywhere from 2 to 5 days or so.
- Best served chilled on a warm summer day.
Notes
- I recommend using kombucha that has been through the first fermentation process using green tea for this kombucha flavor. Green tea kombucha has a lighter flavor and will not overpower the lavender taste.
- Fresh lavender flowers can be used instead of dried.
- Honey can be used instead of sugar.
- I like the balance of using half kombucha and half lavender syrup per bottle, but this can be adjusted to your liking.
- Lavender kombucha may not get as fizzy as fruit kombuchas.
- This kombucha can be chilled and enjoyed right away if you prefer to skip the 2nd fermentation process.
- When you burp the bottles to release the pressure, check to see how quickly the bubbles race to the top. If you only see a few bubbles and they are slow to make their way to the top, you can replace the lid and check the next day. If the pressure release is loud and bubbles race to the top, then you know it is time to move that bottle to refrigeration!
- In cooler weather, kombucha takes longer to ferment. In warmer weather, the process goes much faster. I recommend checking your bottles daily until you get familiar with the process and about how long it takes in your situation. Refrigeration slows the process, which will keep the kombucha from exploding under pressure.

Leave a Reply