

These pine needle cookies are shaped like trees and made with real pine needles for a fresh winter flavor. Perfect for holiday or winter celebrations, these sugar cookies are a wonderful way to use foraged pine needles and share your love of nature!
Want to save this post for later?
Edible Pine Needles for Winter
Pine needles are edible and have medicinal qualities too, they are perfect for winter foraging and baking. Nothing says winter quite like foraged pine needle cookies!
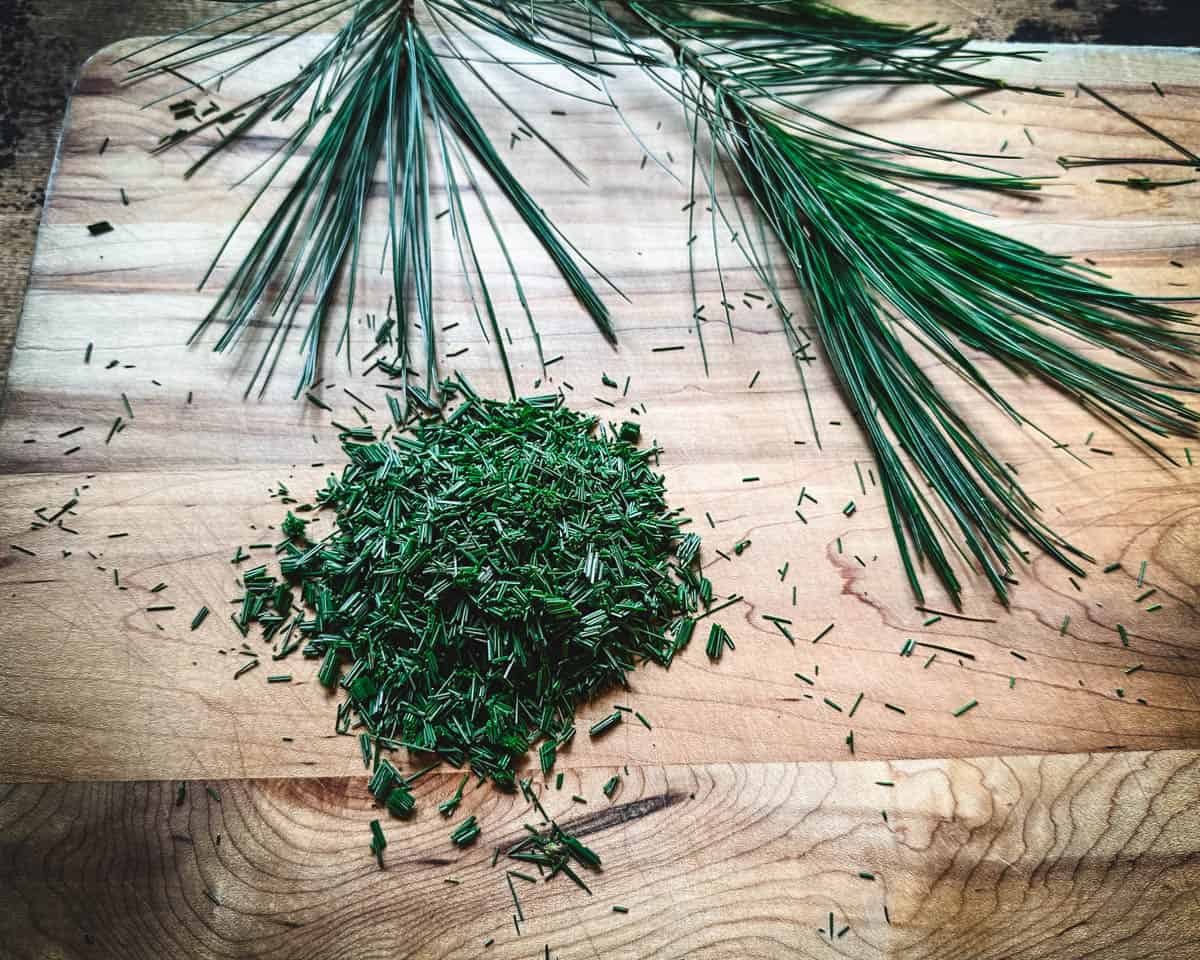
Pine and other conifer needles are easy to forage for in most regions during winter when most other plants are asleep for the season. Most of them are edible and medicinal, not to mention smell amazing!
Pine or other edible conifer needles are good to use in these nature inspired sugar cookies. It’s important to properly identify conifer needles you are foraging, to stay away from varieties that are toxic, particularly the yew family.
Pine needles have a delicious taste that is piney, fresh, citrusy, with a slight mint undertone. They’re delicious in cookies!
Related: 30+ Pine Needle Recipes
Get more of my favorite food, drink, medicine, and body care recipes that use pine, fir, spruce, and other conifer needles in my ebook Foraged Conifer Recipes for Body, Mind, and Health!
Pine Needle Sugar Cookies Recipe
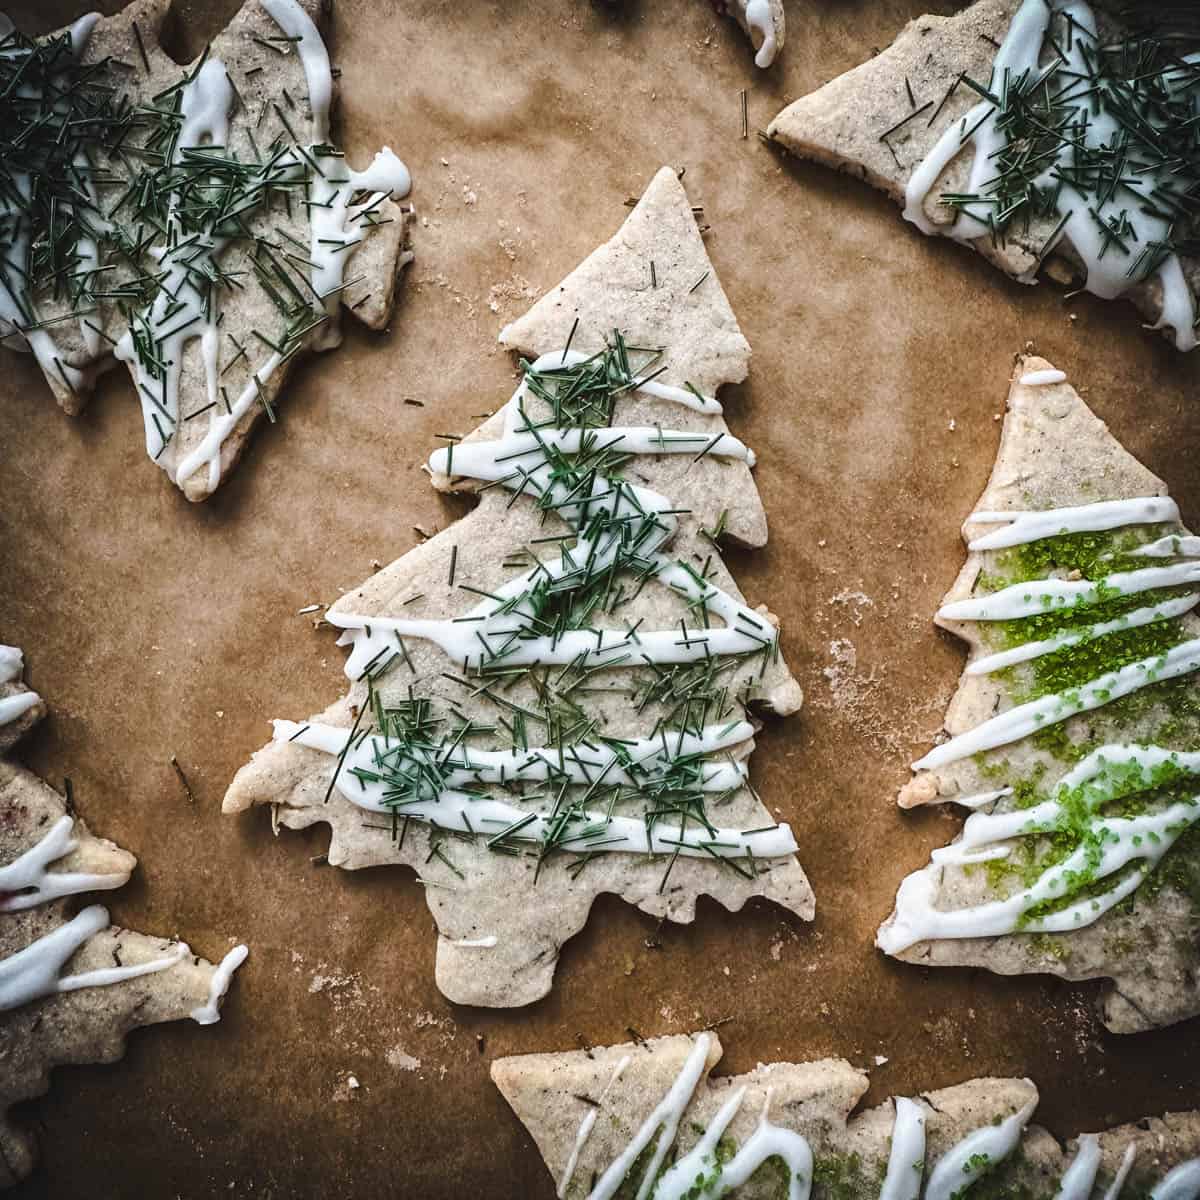
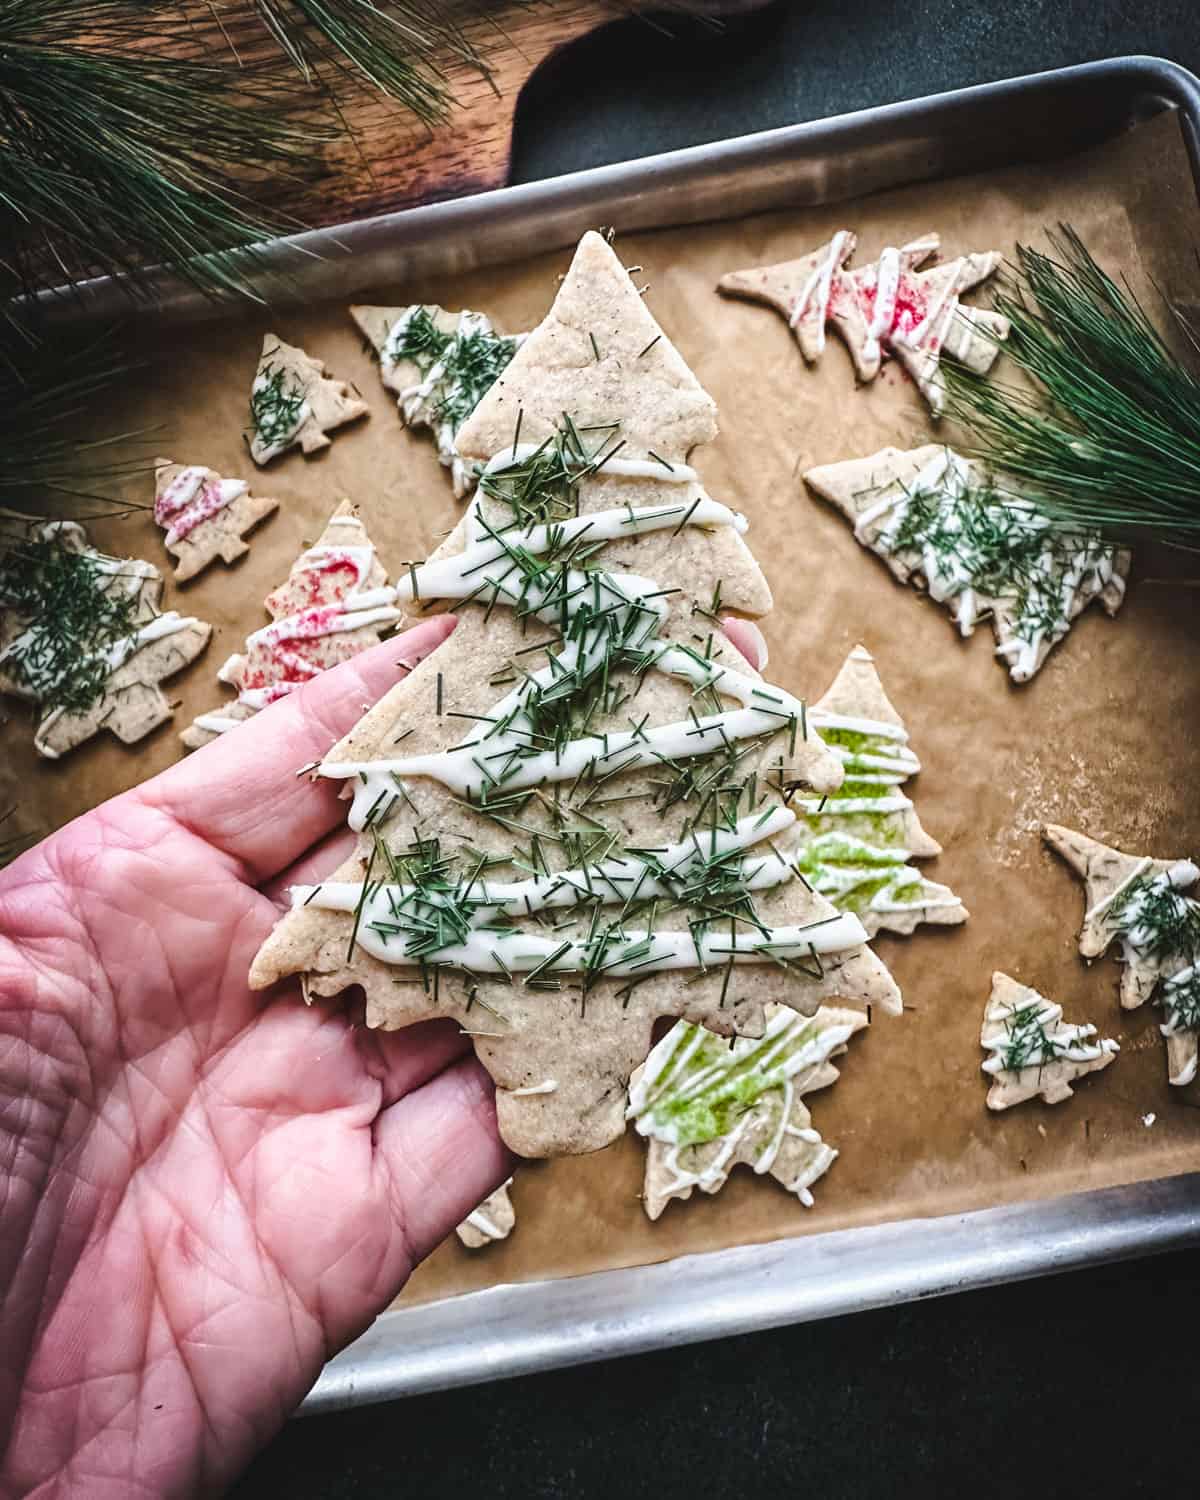
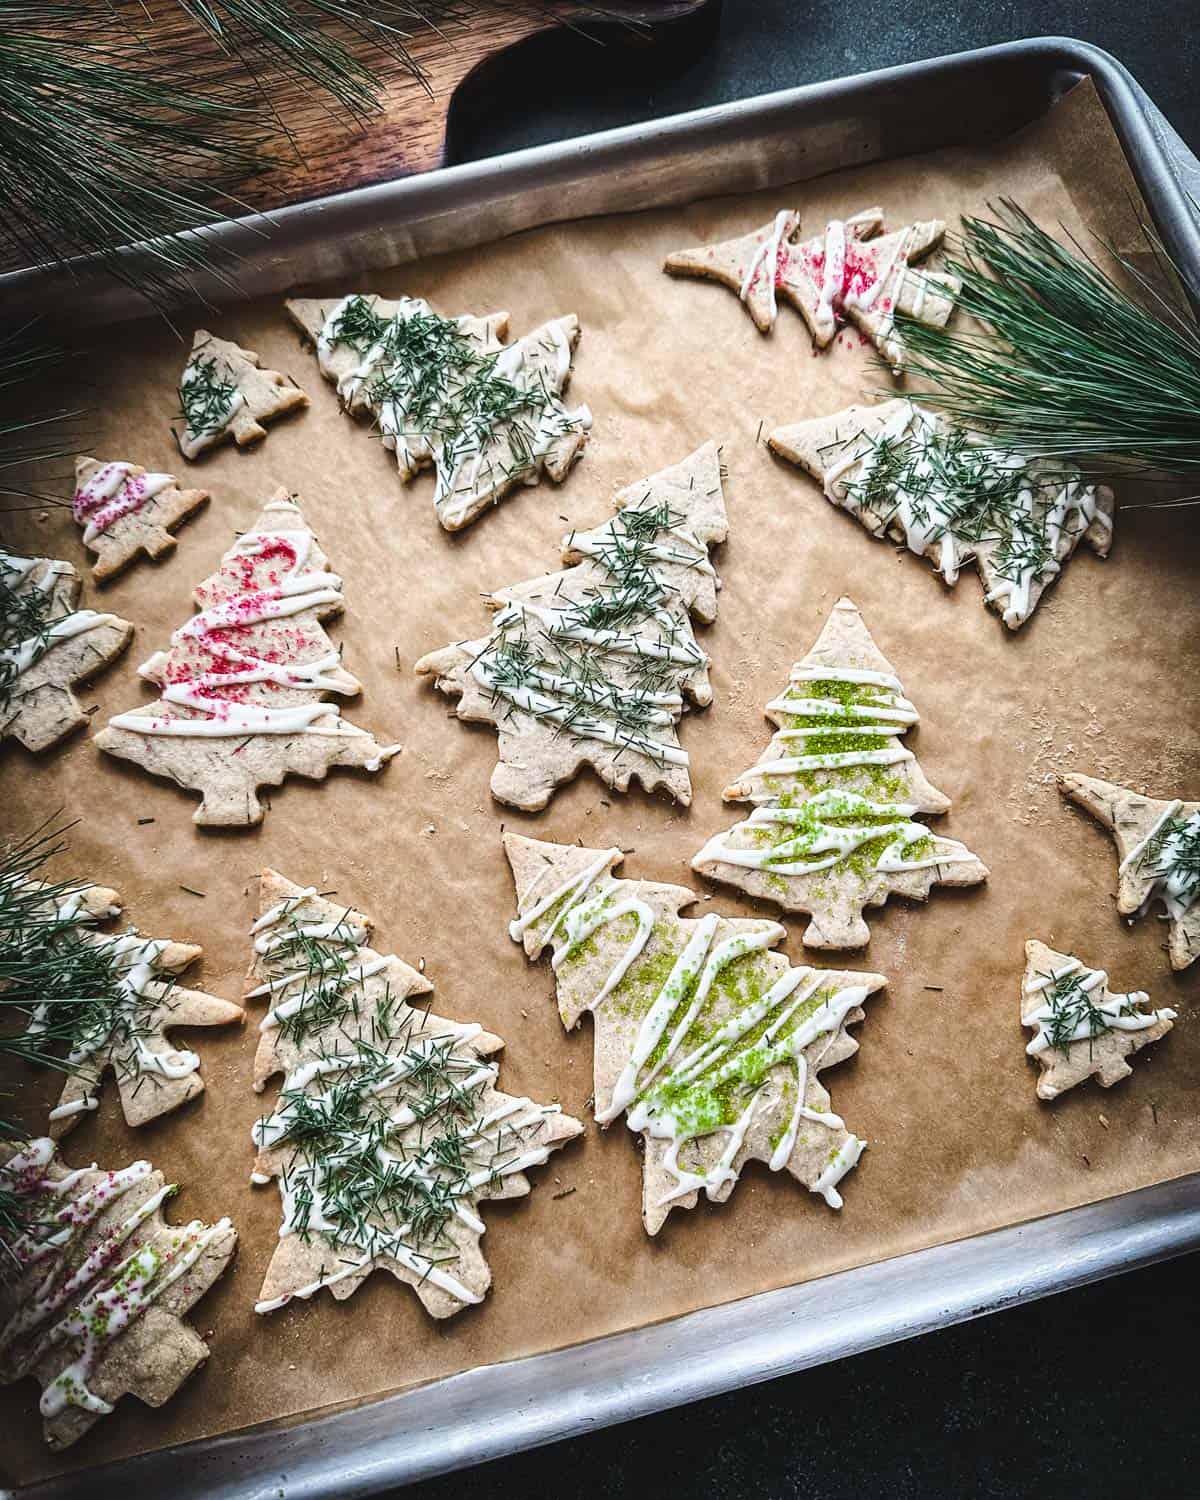
These cookies are delicious without any icing, but they are also fun to ice and decorate!
Let them cool completely before icing. I used the white icing mix from King Arthur Flour which is quick and easy to use!
The maple icing in my my maple cookies recipe would also work great, or feel free to use your own favorite icing recipe.
Ingredients
Pine needles: Any edible conifer needles such as pine, fir, or spruce can be used in these cookies.
Note: Some pine needles like Eastern white pine (which is what I used) are very fine and easy to cut with a knife, but others can be tougher and may benefit from a few pulses in a food processor before using.
All-purpose flour: I like this all purpose flour, but use what you have on hand.
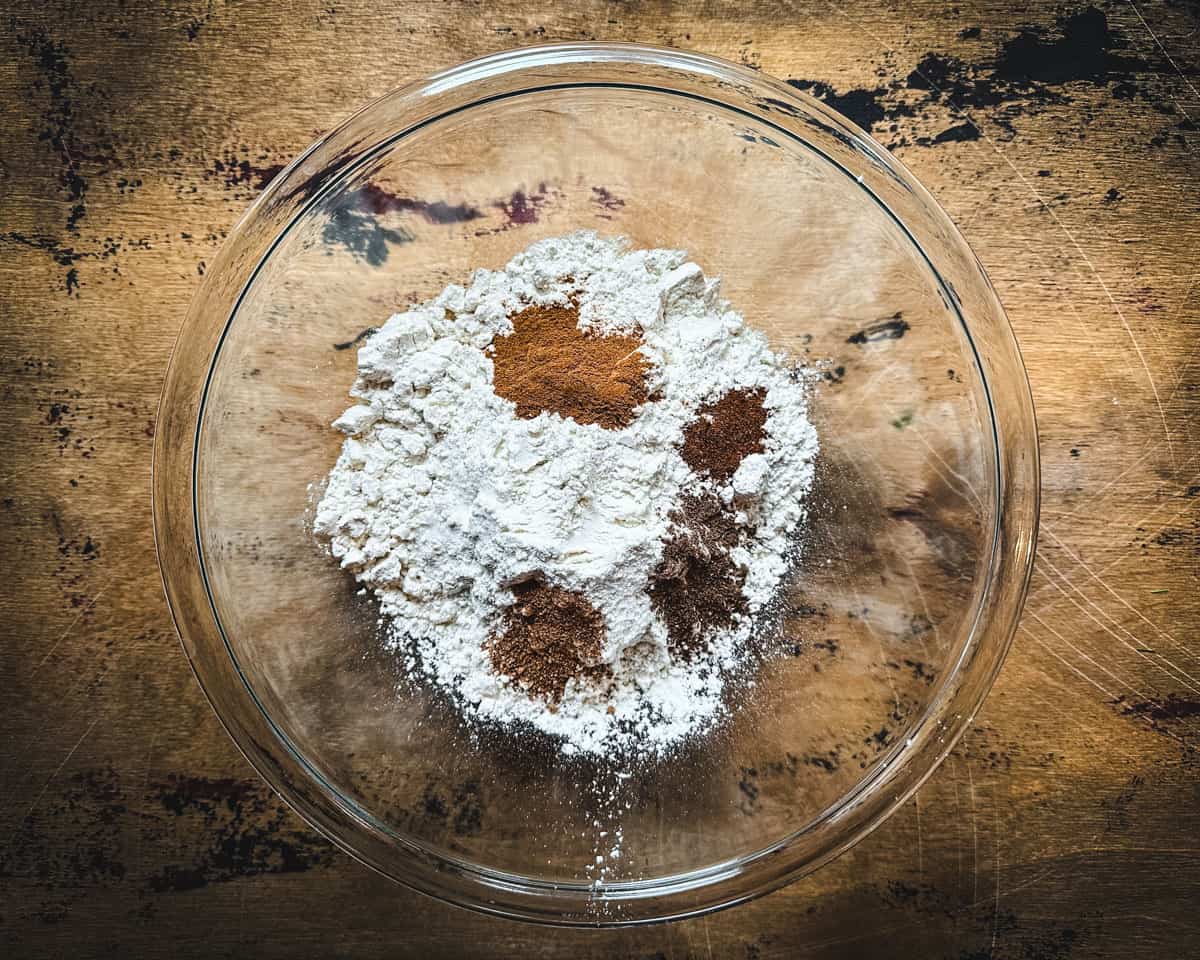
Ground spices: Cinnamon, cloves, allspice, and nutmeg.
Butter: It needs to be at room temperature for these pine sugar cookies, so remember to leave some out!
Sugar: I use organic sugar, but again use what you have on hand.
Egg
Vanilla extract: I use this vanilla extract, but you can also make your own on a budget with this vanilla extract recipe.
How to Make Pine Needle Cookies
To prepare the pine needles, finely chop them with a knife or pulse them in a food processor.
Note: For a natural tree look, reserve one tablespoon of the chopped pine needles to use for decorating, or use any other cookie decorations that you prefer. I also used green and red decorating sugar.
Next, in a medium bowl, combine the flour, baking powder, cinnamon, cloves, nutmeg, and salt.
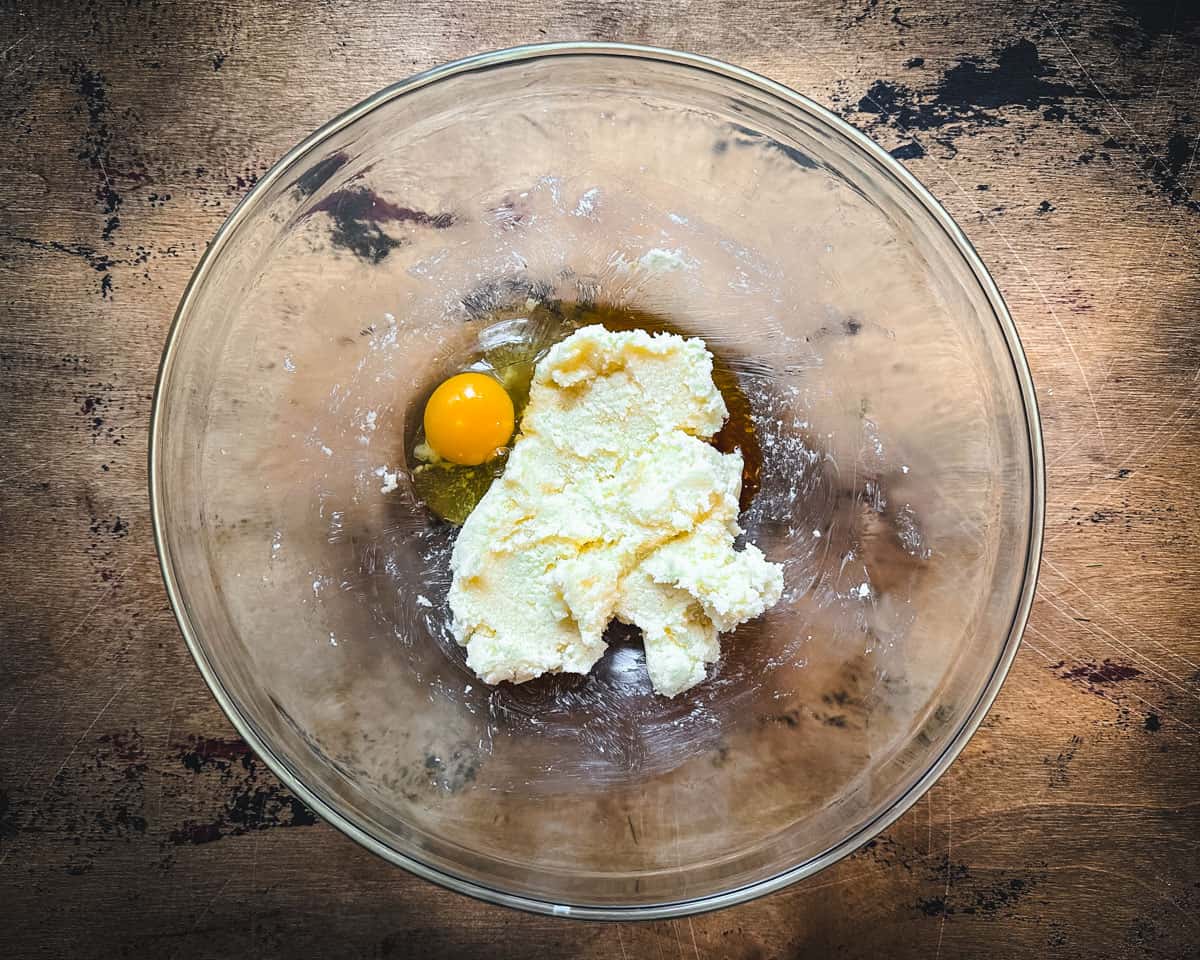
Then use a large bowl to combine the butter and sugar until it is creamy.

Stir the egg and vanilla into the creamed butter and sugar.
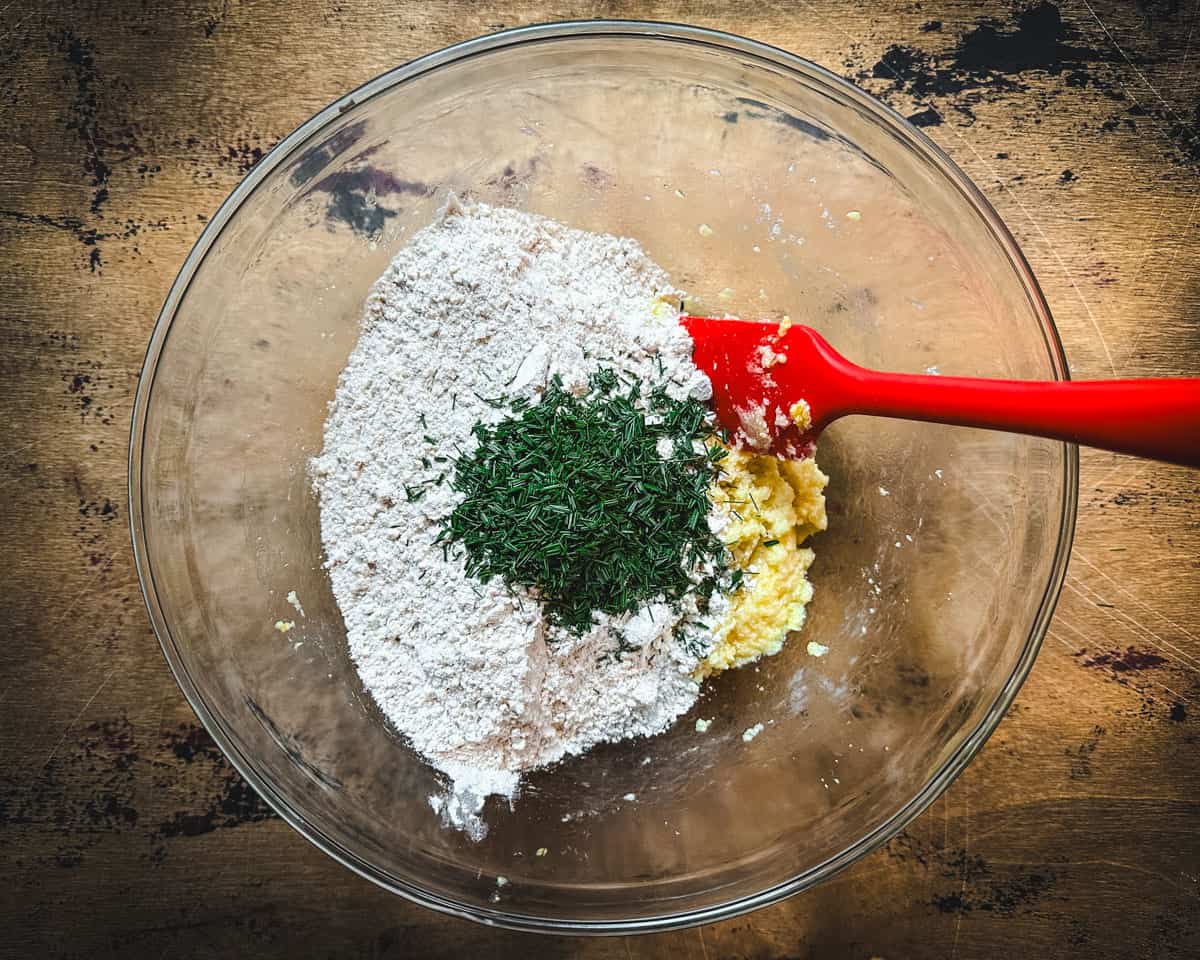
Now, add the dry ingredients along with 3 tablespoons of the chopped pine needles into the wet ingredients. Stir it until comes together into a dough.
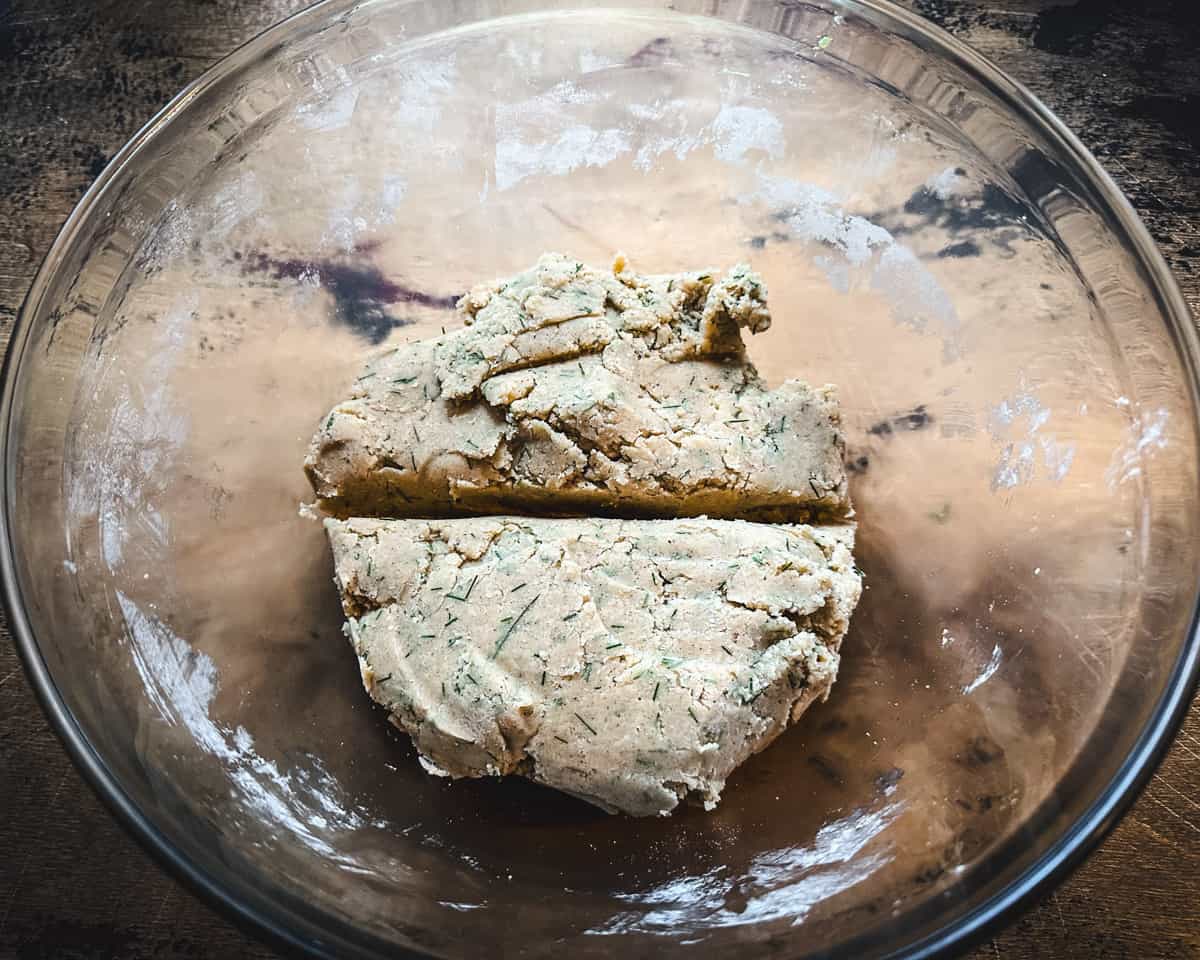
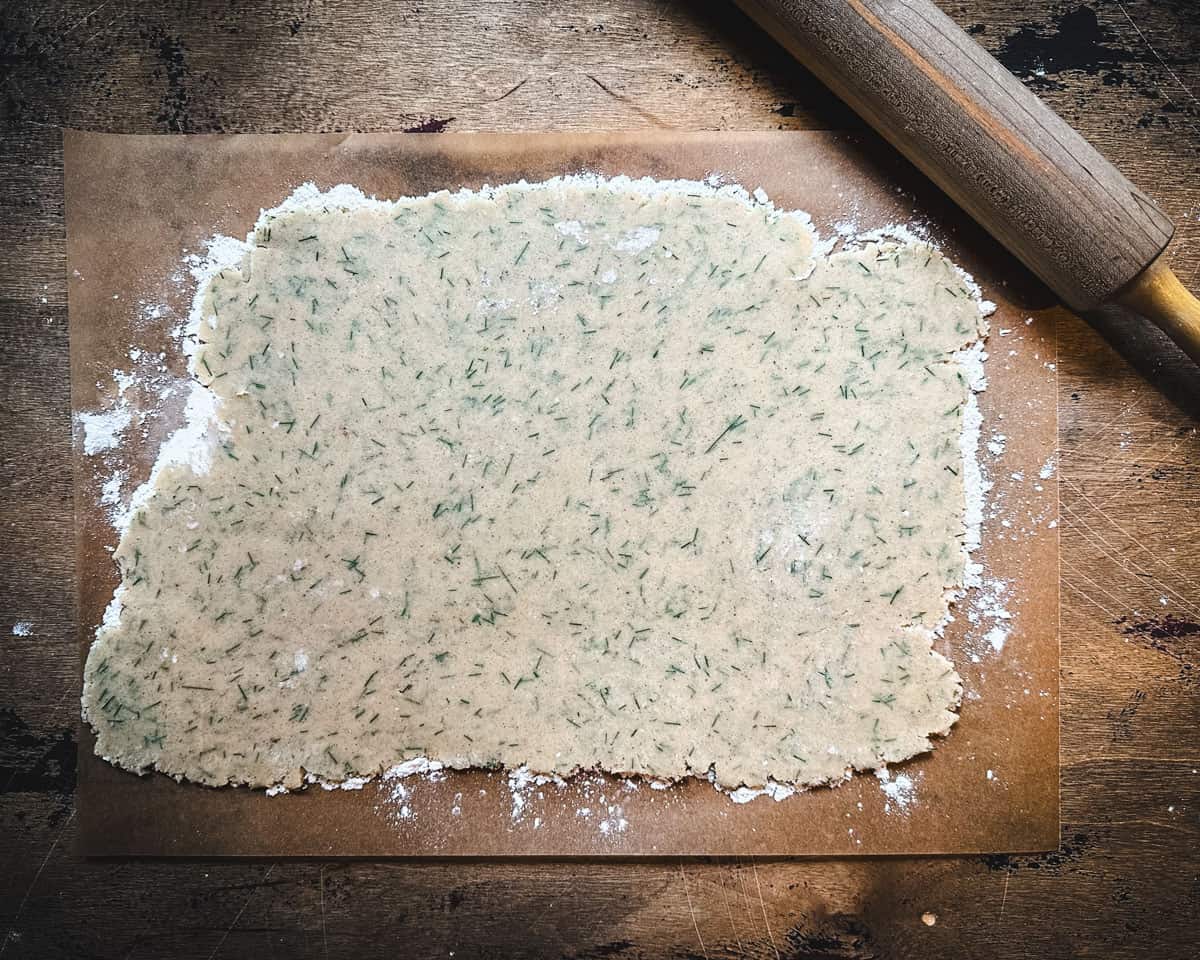
If the dough is too sticky, add a little flour at a time until it reaches a dough consistency. Then divide the dough into two halves.
Roll each dough half out onto a lightly floured piece of parchment paper until it’s about 1/4 inch thick.
Place one rolled-out dough on parchment on a sheet pan, and layer the second rolled-out dough on parchment on top of the first. Then cover the top dough with plastic wrap or beeswax wrap.
Keep the rolled-out doughs in the refrigerator to chill for at least 1-2 hours, or overnight.
Once the pine needle cookie dough is chilled, preheat the oven to 350°F (175°C). Line a sheet pan with parchment paper or a silicone baking mat. Pull one rolled-out dough out of the refrigerator.
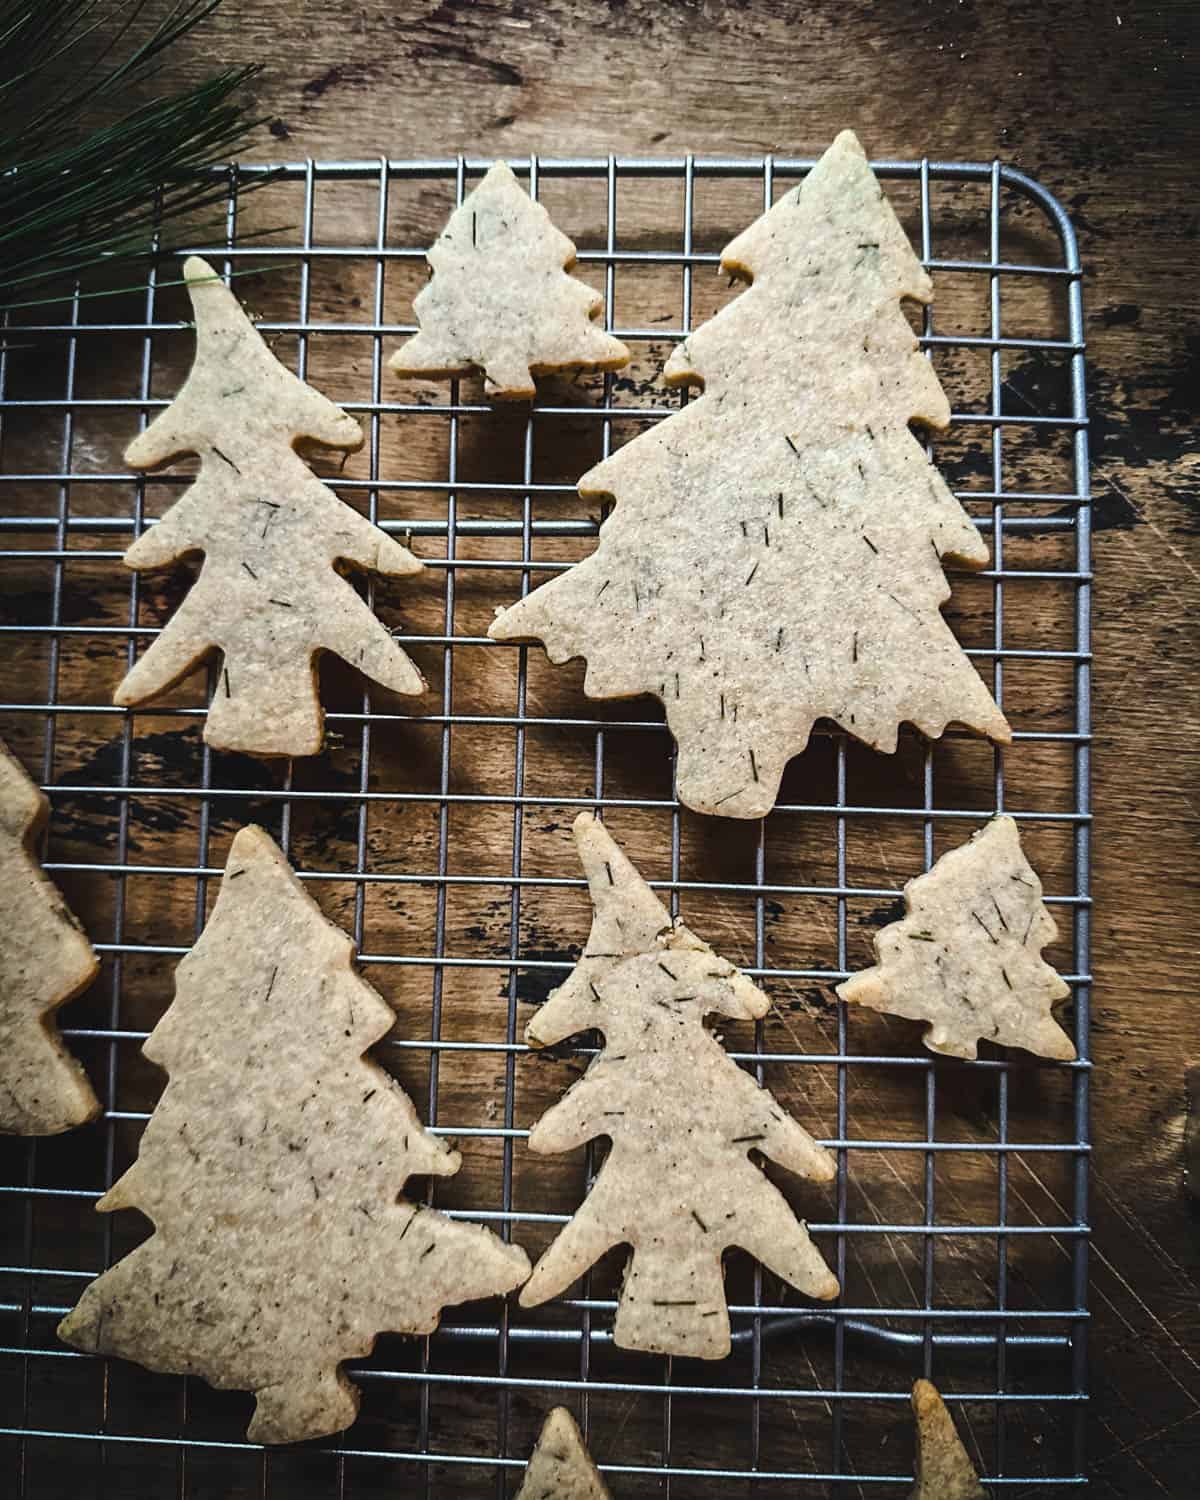
Tree Cookie Cutters
Use tree shaped cookie cutters to cut the dough into shapes (or any cookie shapes you like). For the same pine needle cookies shapes in the photos, use these cookie cutters:
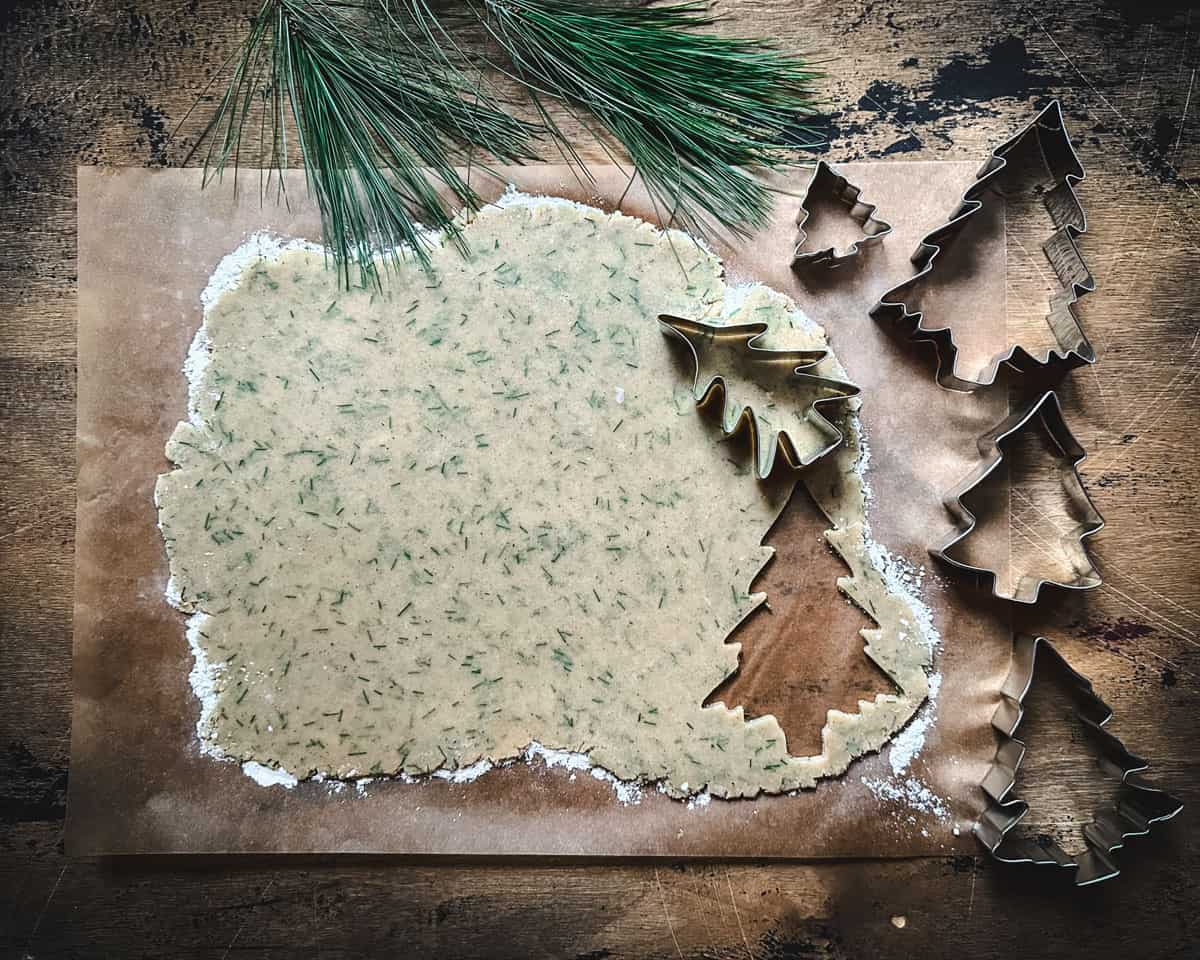
When all the dough is cut, you can re-roll the scraps to cut more shapes.
Put the cut out cookies onto the baking sheet with an inch or so in between them.
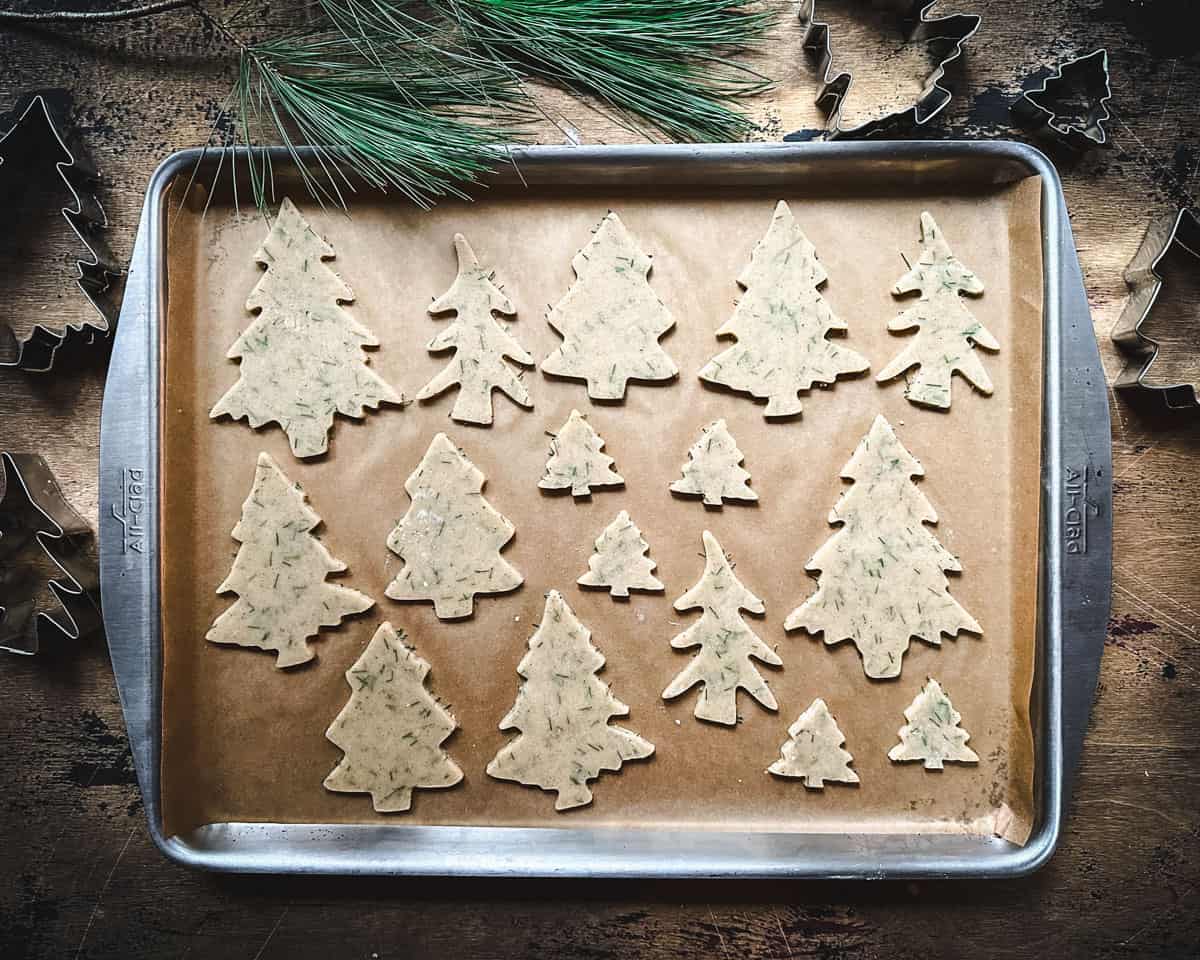
Bake for 11-12 minutes or until the edges are just starting to turn brown.
Then let the cookies cool on the sheet pan for several minutes first before moving them over to a cooling rack.
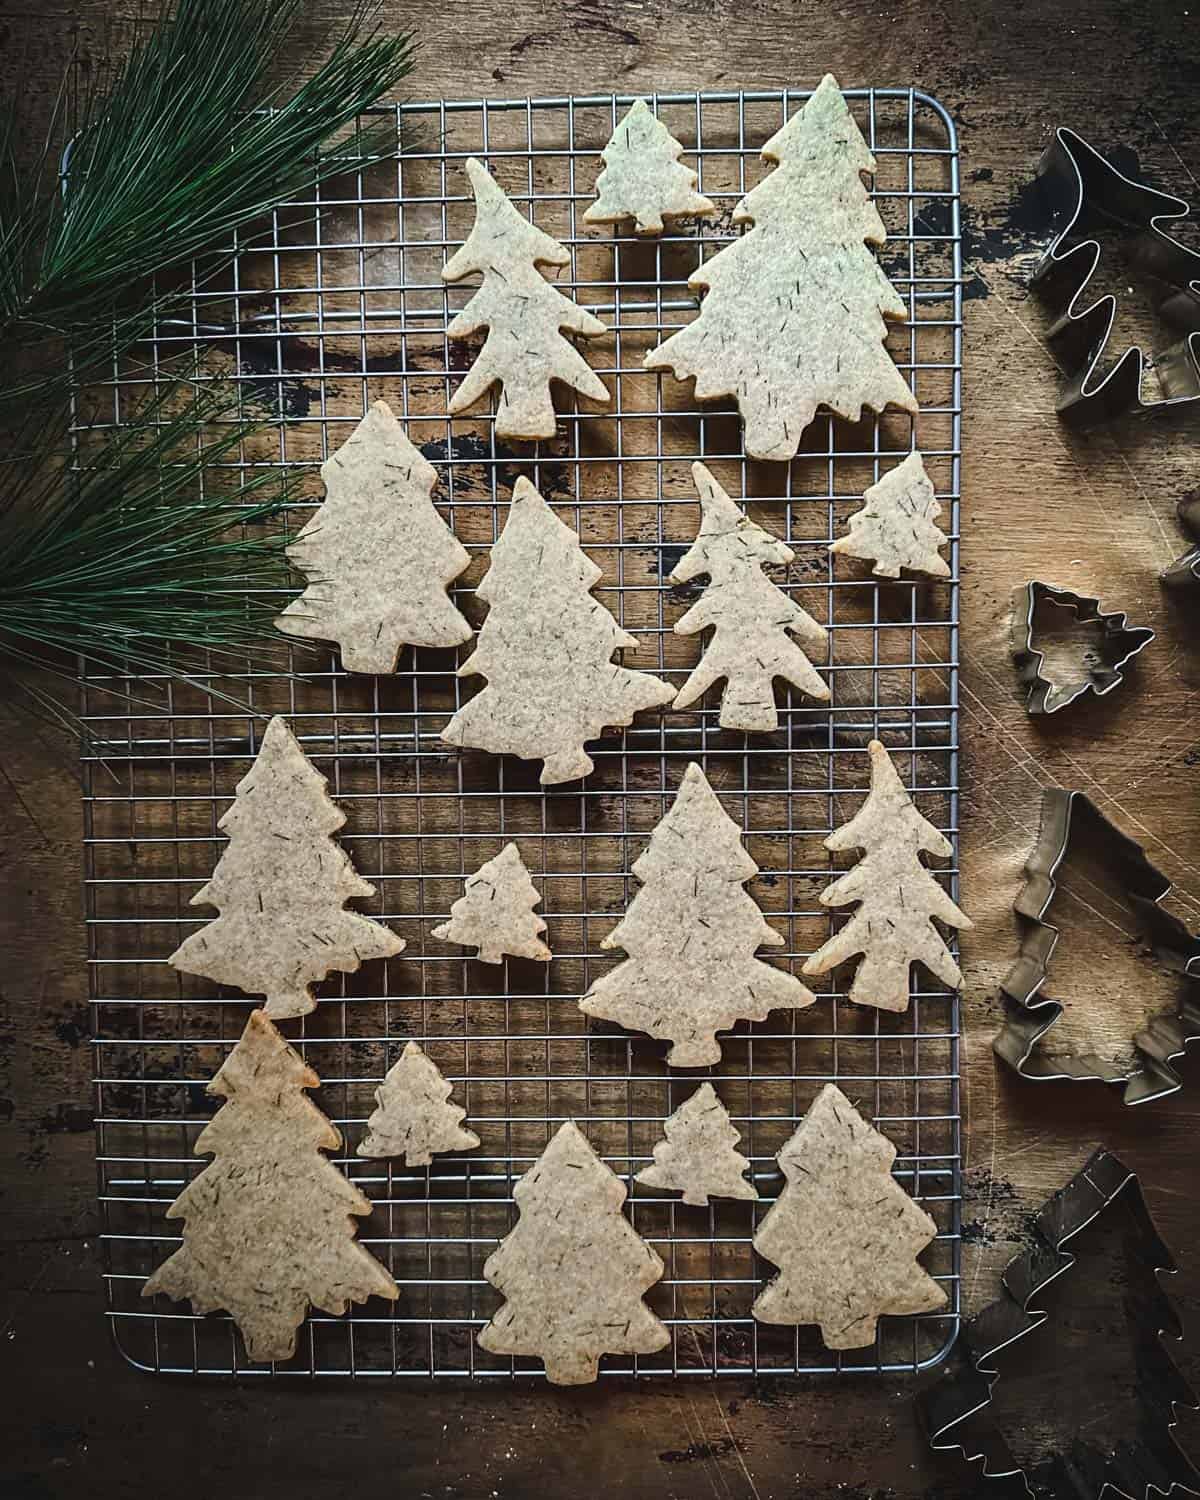
Repeat with the remaining dough until all the pine needle cookies are baked.
Optional: Once the cookies are completely cool, use icing and sprinkle them with the remaining cut pine needles or other cookie decorations.
Eat and Store Tree Sugar Cookies
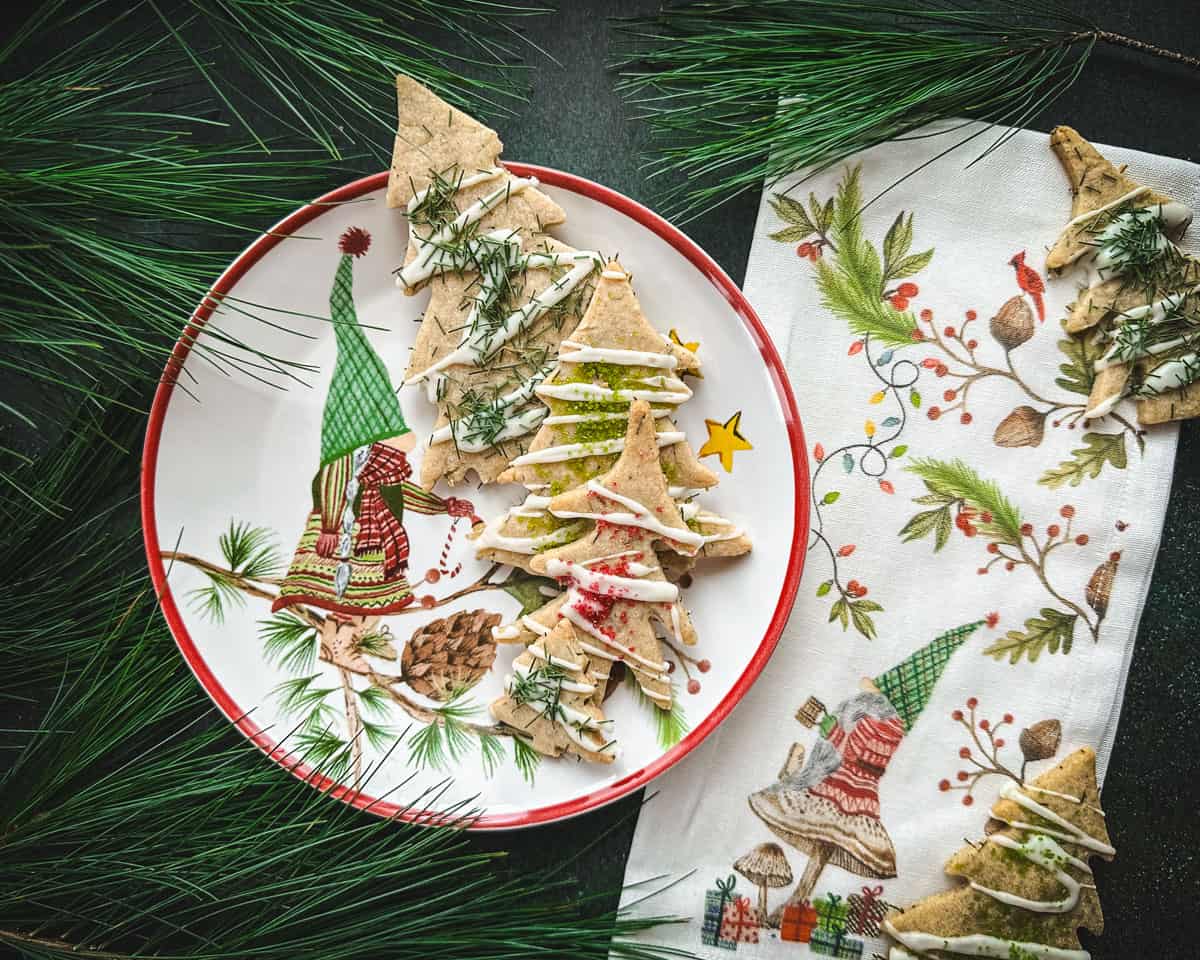
These make perfect Christmas tree cookies to set out during a celebration, or to add to a holiday or winter cookie plate.
They’d be a great addition to bring a nature inspired foraged cookie to a cookie party too!
Since these pine needle cookies have a sugar cookie base, store them in an air tight container at room temperature. Just like other sugar cookies, they don’t store well in the refrigerator.
These Christmas tree cookies should also freeze well. Just take them out and thaw at room temperature when you’re ready to eat them. They’re just as delicious after the holidays!
More Pine Needle Recipes
- Pine Needle Infused Honey
- Rosemary Pine Beard Balm
- Pine Needle Cough Syrup
- Winter Spice Pine Soap
- Pine Lotion Bars for Winter
- Pine Needle Tea
- Conifer Infused Body Oil
- Pine Needle Soda
- Pine Needle Lotion Bars
- Pine Salve
- Conifer Tip Syrup
Pine Needle Cookies
Equipment
- Food Processor optional
- Beeswax Wrap or plastic wrap
Ingredients
- 4 tablespoons pine needles finely chopped, divided
- 2 1/4 cup all-purpose flour
- 1/2 teaspoon baking powder
- 1 teaspoon cinnamon
- 1/4 teaspoon cloves
- 1/4 teaspoon allspice
- 1/4 teaspoon nutmeg
- 1/4 teaspoon salt
- 3/4 cup butter at room temperature
- 3/4 cup sugar
- 1 egg
- 1 teaspoon vanilla extract
Instructions
- Finely chop the pine needles (or other edible conifer needles) with a knife or pulse them in a food processor.
- Combine the flour, baking powder, cinnamon, cloves, nutmeg, and salt in a medium bowl.
- In a large bowl combine the butter and sugar until it is creamy. Stir in the egg and vanilla.
- Add the dry ingredients and 3 tablespoons of the chopped pine needles to the wet ingredients and stir until it comes together into a dough. If the dough is sticky you can add a little more flour as needed.
- Divide the dough into two halves and roll each one out onto a lightly floured piece of parchment paper until it’s about 1/4 inch thick.
- Place one rolled-out dough on parchment on a sheet pan, then put the second rolled-out dough on parchment on top of the first. Then cover the top dough with plastic wrap or beeswax wrap.
- Refrigerate the rolled-out doughs for at least 1-2 hours or overnight.
- Once the dough has been chilled, preheat the oven to 350°F (175°C). Line a sheet pan with parchment paper or a silicone baking mat. Pull one rolled-out dough out of the refrigerator.
- Use tree shaped cookie cutters to cut the dough into tree shapes (or whatever shapes you like). When you’ve used all the dough you can re-roll the scraps to cut more cookies.
- Put the cut out cookies onto the baking sheet with an inch or so in between them. Bake for 11-12 minutes or until the edges are just starting to turn brown.
- Let the cookies cool on the sheet pan for several minutes before moving them to a cooling rack.
- Repeat with the remaining dough until all the cookies are baked.
- Optional: Once the cookies have completely cooled ice them and sprinkle them with the remaining cut pine needles or other cookie decorations if desired.
Notes
- Any edible conifer needles such as pine, fir, or spruce can be used in these cookies. Be sure to properly identify the tree before using. Yew trees are highly toxic and should not be used.
- Some pine needles like Eastern white pine (which is what I used) are very fine and easy to cut with a knife, but others can be tougher and may benefit from a few pulses in a food processor before using.
- These cookies are delicious without any icing, but they are also fun to ice and decorate! Let them cool completely before icing. They’d be great with the maple icing I used in my maple cookies or any other icing recipe that you prefer.
- I used the white icing mix from King Arthur Flour which is quick and easy to use!
- Reserve one tablespoon of the chopped pine needles to use for decorating if you’d like or use any other cookie decorations that you prefer.
- I also used green and red decorating sugar.

Leave a Reply