

Sourdough bagels made at home are super comforting and are a fun project. They are a perfect way to use sourdough discard or an active sourdough starter. There’s nothing quite like a sourdough bagel with cream cheese for breakfast or loaded with your favorite sandwich ingredients for lunch!

Want to save this post for later?
Homemade Sourdough Bagels
Comfort is a bagel with cream cheese and lox or topped with hummus, pickled jalapeños, and seasonal veggies. I think next, I’ll try my homemade bagels with this caramelized onion jam!
There have been times in my life when my favorite dinner was an everything bagel with butter and scrambled eggs. There’s just nothing better than a bagel!
As you probably know, I love sourdough baking. I decided to combine these two loves and venture into sourdough bagels! They are a delicious labor of love, and I’m so glad I made them.
This recipe for sourdough bagels is slightly different from making sourdough bread or pancakes. They take a little time to rise which isn’t unusual, but, to make a bagel be a bagel, the dough has to be boiled.

Once the dough is shaped with its signature hole, each bagel will be boiled for about a minute on each side. This might feel daunting or labor-intensive, but trust me, it’s easy and so worth it!
Without boiling the dough, a bagel wouldn’t have the delicious crust and soft inside texture that we know of bagels. It would basically just be a sourdough roll. Which is good, but it isn’t a bagel!
So trust me on this: don’t skip the boiling.
Sourdough Bagels Recipe
These sourdough bagels can be sprinkled with everything bagel seasoning, cheese, or any other toppings you love. Make it your own! It is comfort food to comfort you, after all.
Ingredients
For the Bagel Dough
All-purpose flour: Any all-purpose flour you have should work great, although I prefer to use organic.
Sourdough starter: This recipe is great if you have sourdough discard to use. If not, an active room-temperature sourdough starter is perfect!
Sugar: Use granulated sugar for the dough of sourdough bagels. I like to use this organic sugar.
For the Boiling Mixture
Honey: I always use raw honey. If you prefer to substitute the honey with sugar, that works okay, too.
Bagel Topping Options
Seeds: Sesame, poppy, and sunflower seeds all work well!
Cheese: Asiago, parmesan, cheddar, or romano are great cheeses that turn out with a crispy texture atop a sourdough bagel.

How to Make Sourdough Bagels
First, start by placing all of the bagel ingredients into a stand mixer bowl fitted with a dough hook.
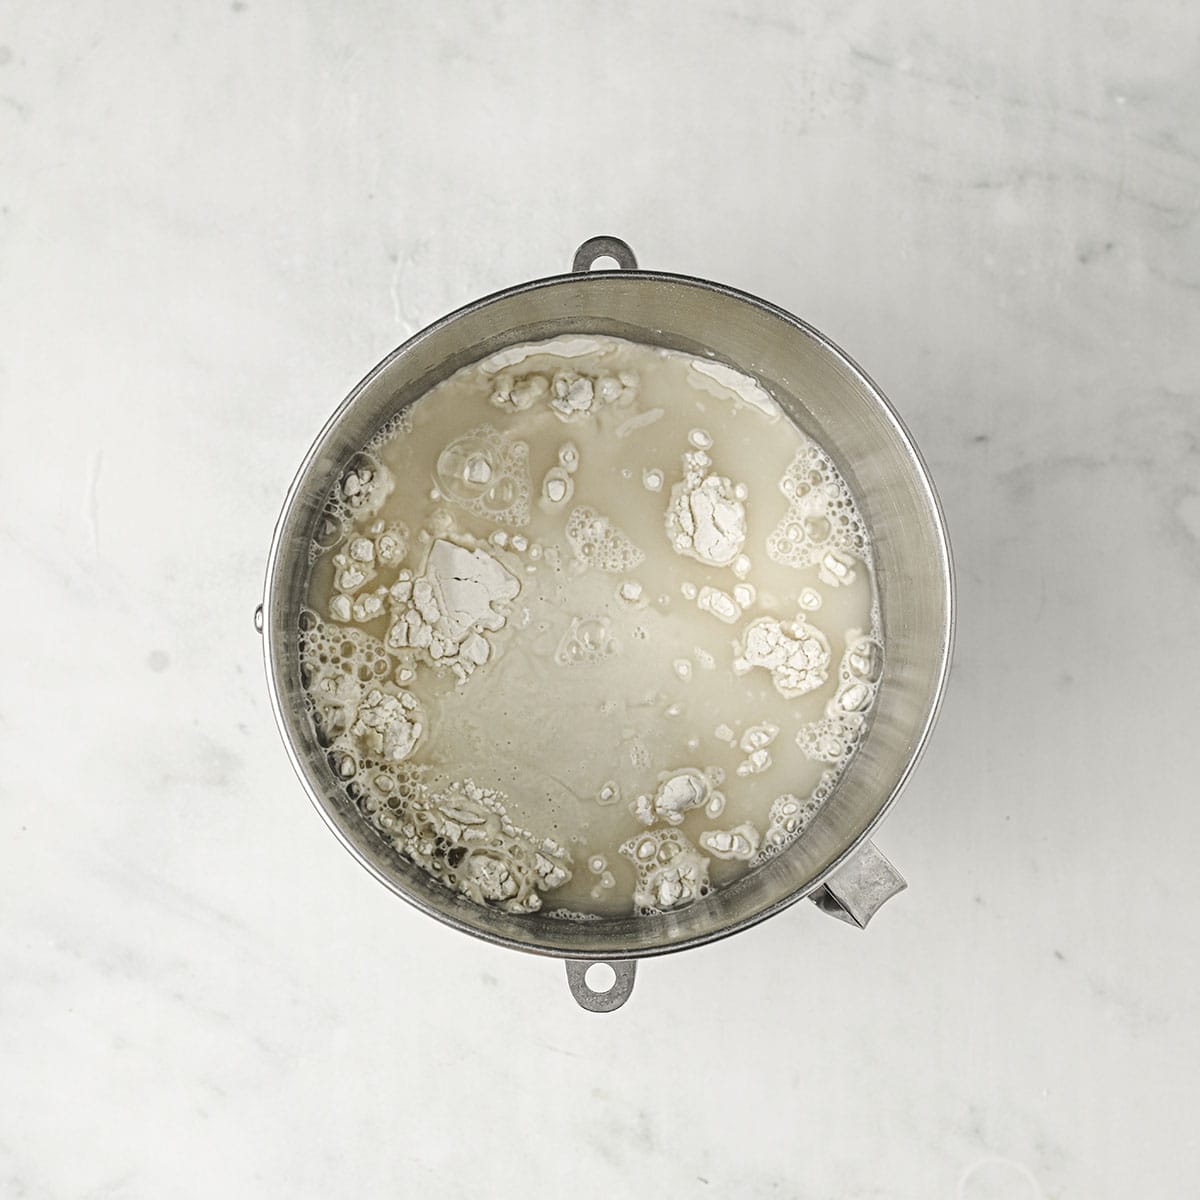
Knead with the dough hook on medium speed, and it will bring the mixture together into a rough dough.
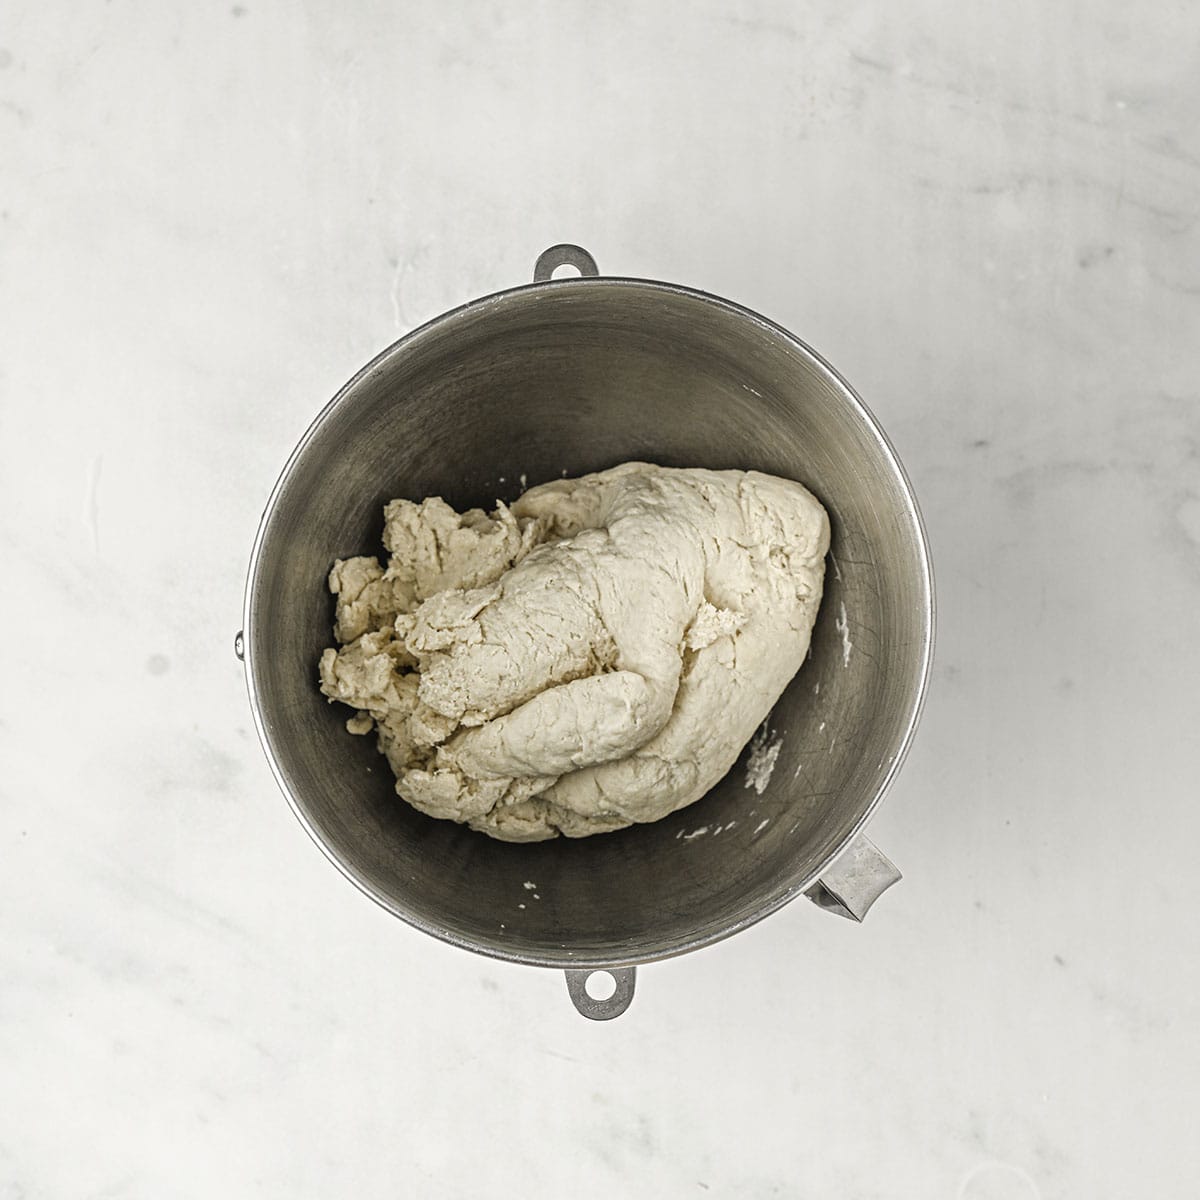
Now, turn the dough out onto a clean surface and knead it by hand for about ten minutes. The dough will be thick and heavy as you begin kneading.
Expect it to be hard to knead, but the more you knead, the smoother the dough will become. This is a great way to bring proprioceptive focus to your day and build some muscle like our grandmothers did!
Once you’re done kneading the dough, place it into a well-greased bowl. Use baking spray to coat the top of the dough, then cover the bowl with a damp tea towel to help it stay damp as it rises.
Rise the Dough
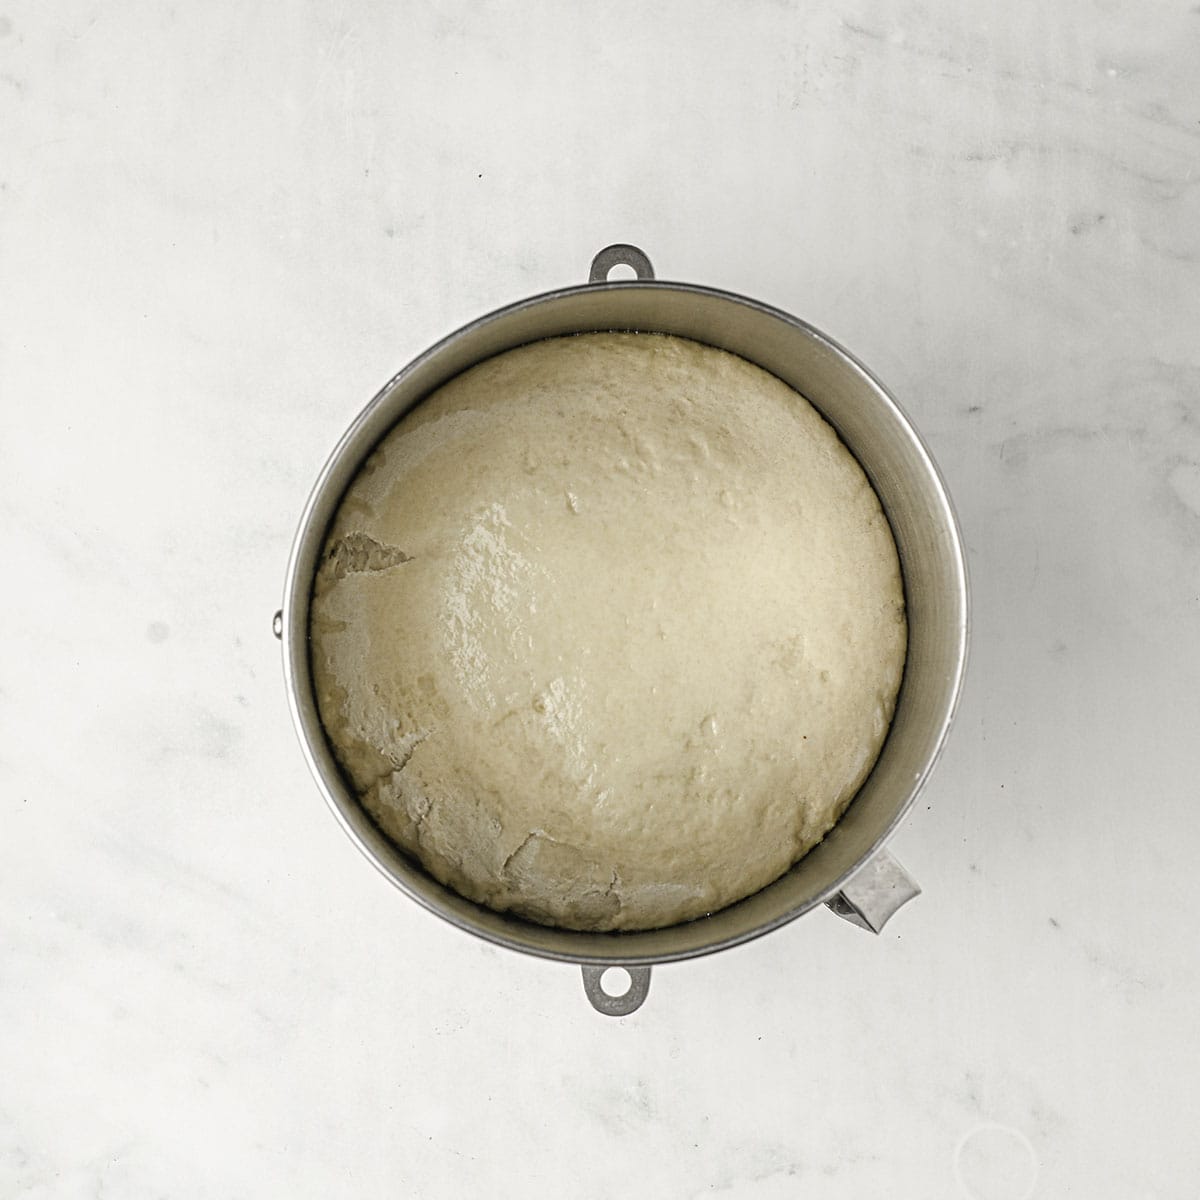
Now, set the bowl in a warm place and let the sourdough rise for about two or three hours or until it doubles in size.
Note: After kneading, the dough can rise overnight in the fridge, and it will be ready to be formed in the morning for baking.
The rise time will vary depending on the activeness of your sourdough starter. The dough will not always rise like typical bread dough.
After the first rise, remove the tea towel and punch the dough down. This is always my favorite part! It’s a wonderful way to process any frustration.

Then let the dough rise for another 20 minutes.
Now, turn the dough out onto a clean surface and cut it into eight equal pieces. Then, roll each piece into a taught ball.
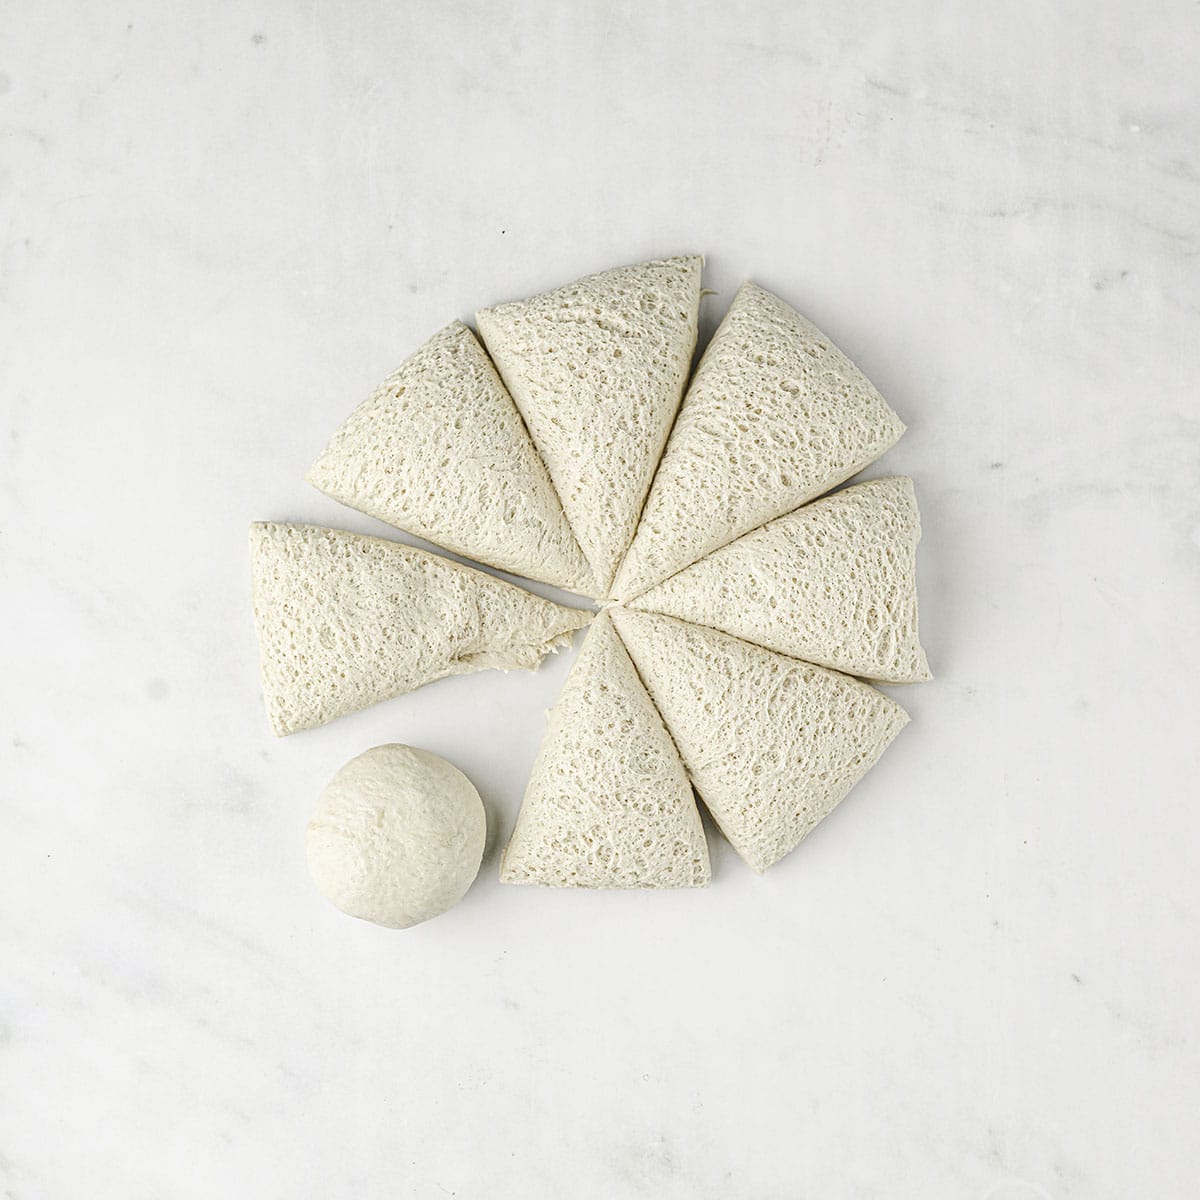
Once the balls are formed, press a clean finger into the center of each dough ball and gently stretch into a center hole to make a bagel shape.
Place each formed bagel onto a parchment-lined baking sheet.
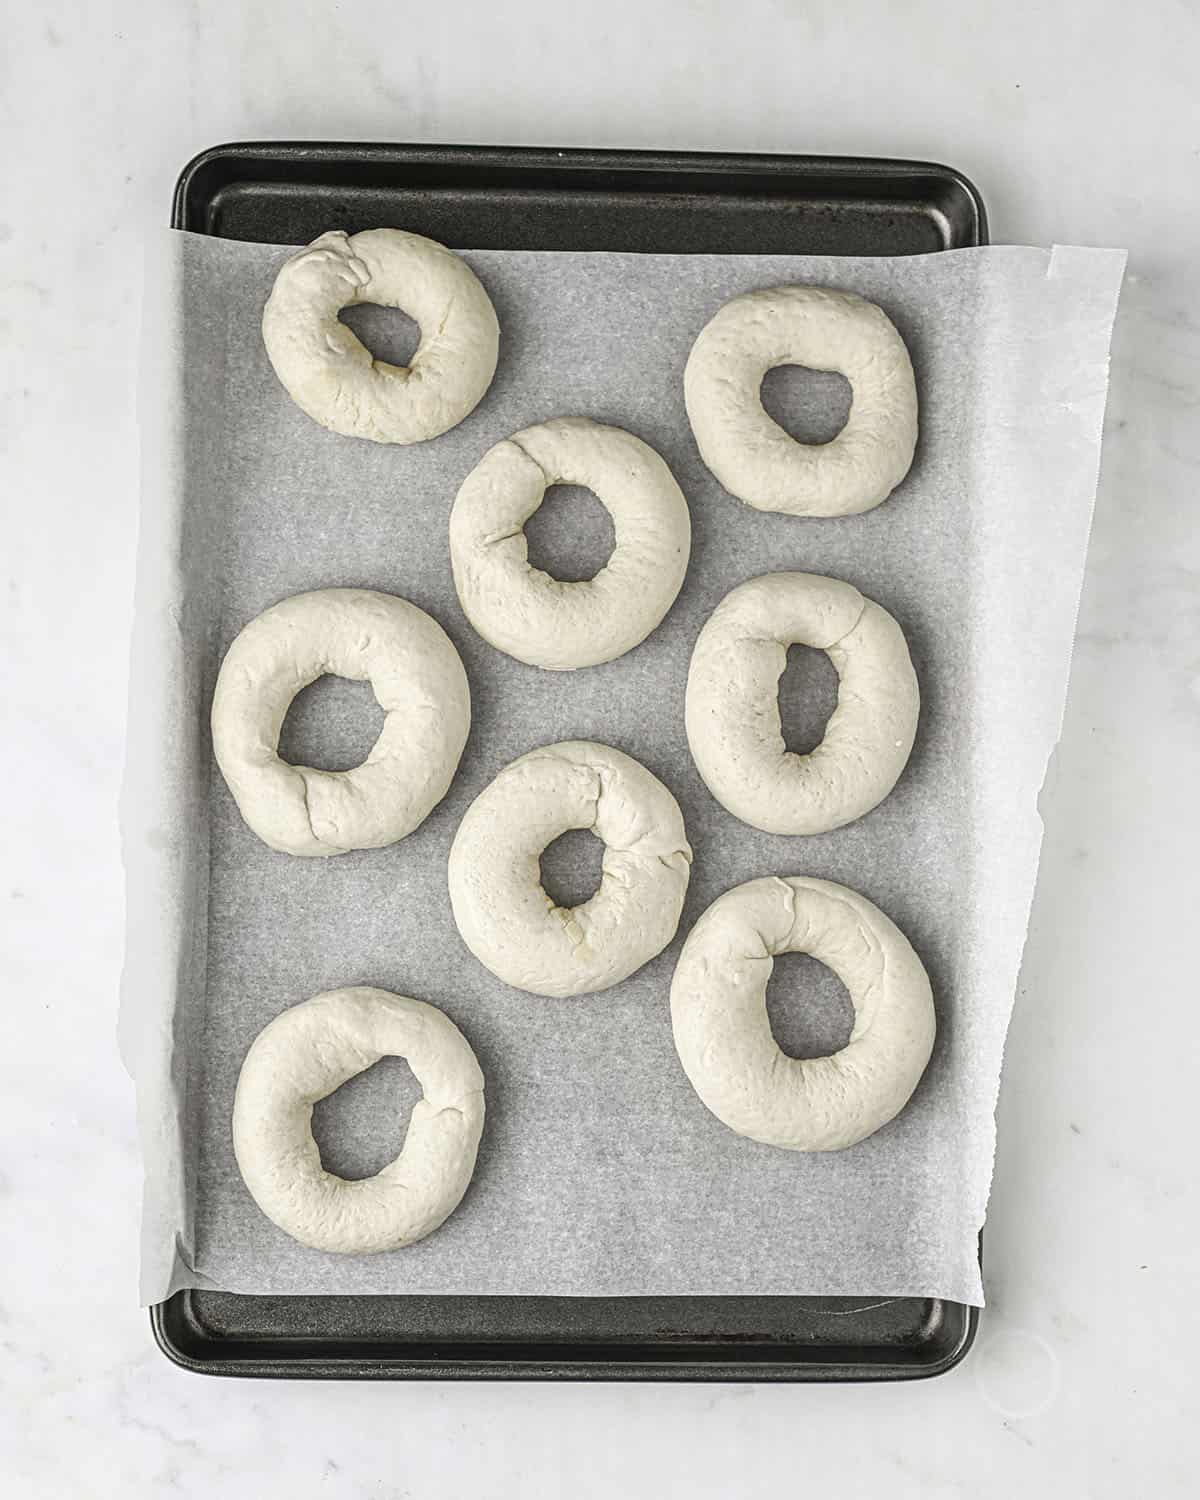
Cover the sourdough bagel dough with a damp tea towel and set it in a warm place to rise for another hour or until it’s almost double in size.
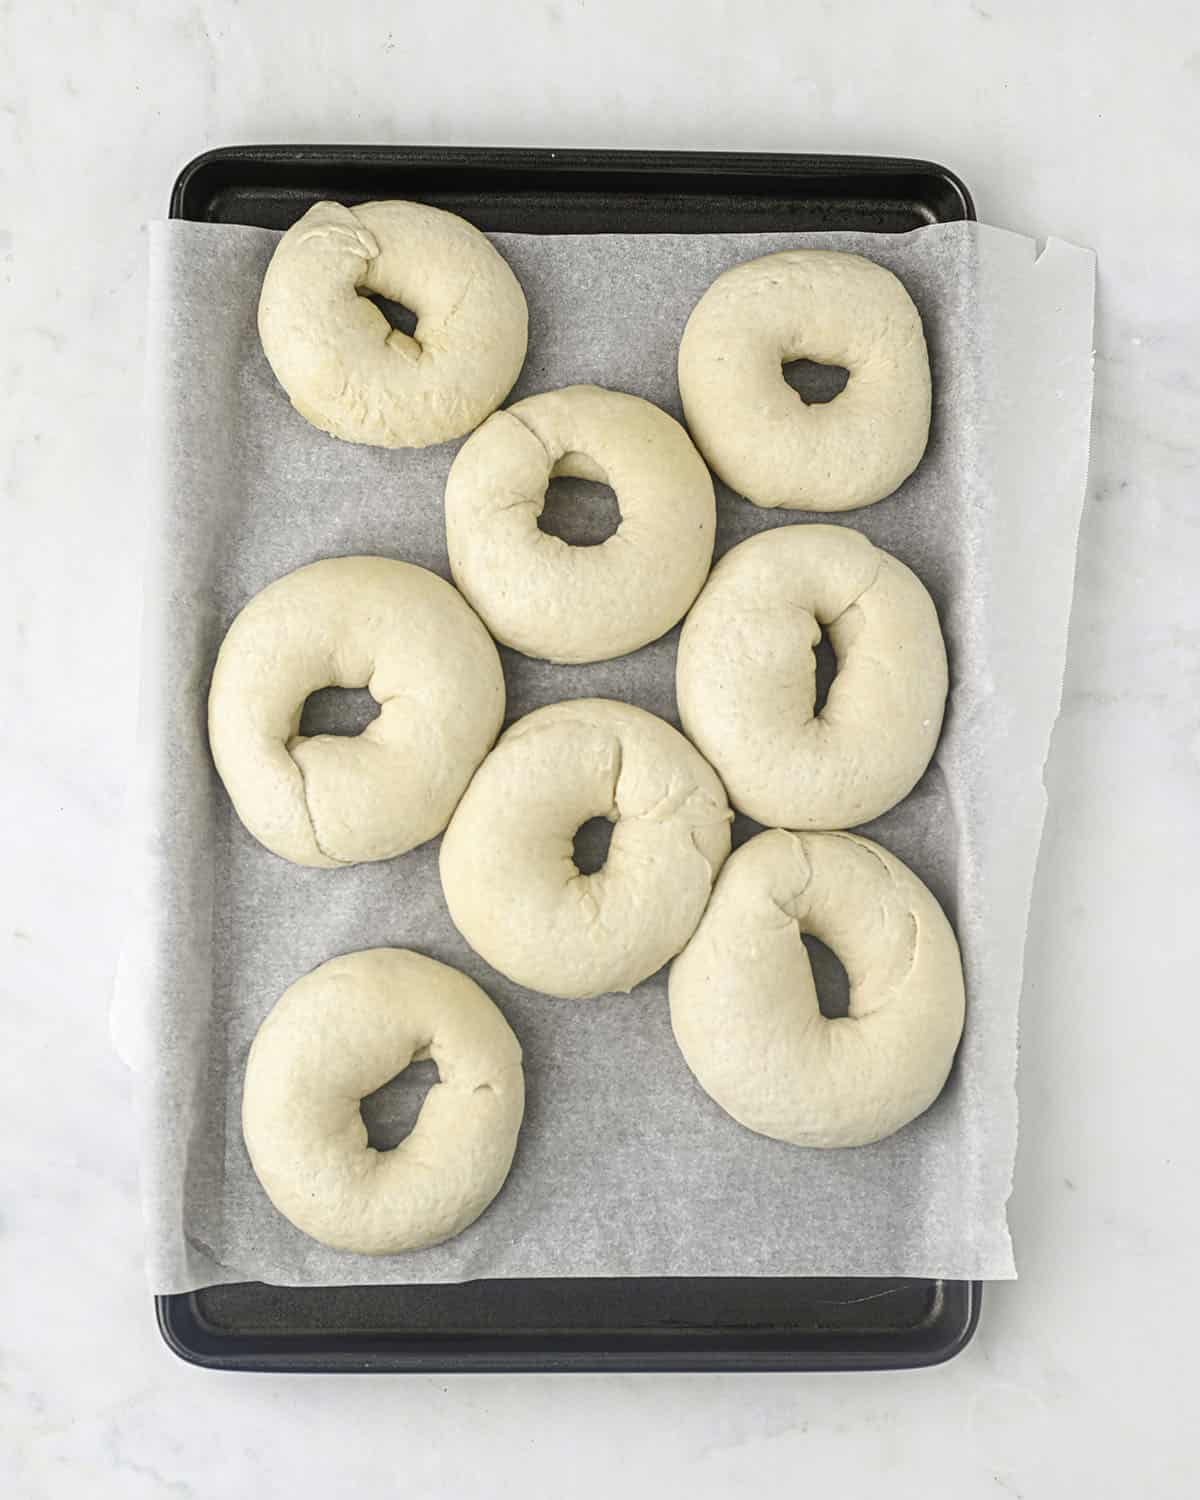
Once they are done rising, preheat the oven to 400°F (200°C).
Boil the Bagels
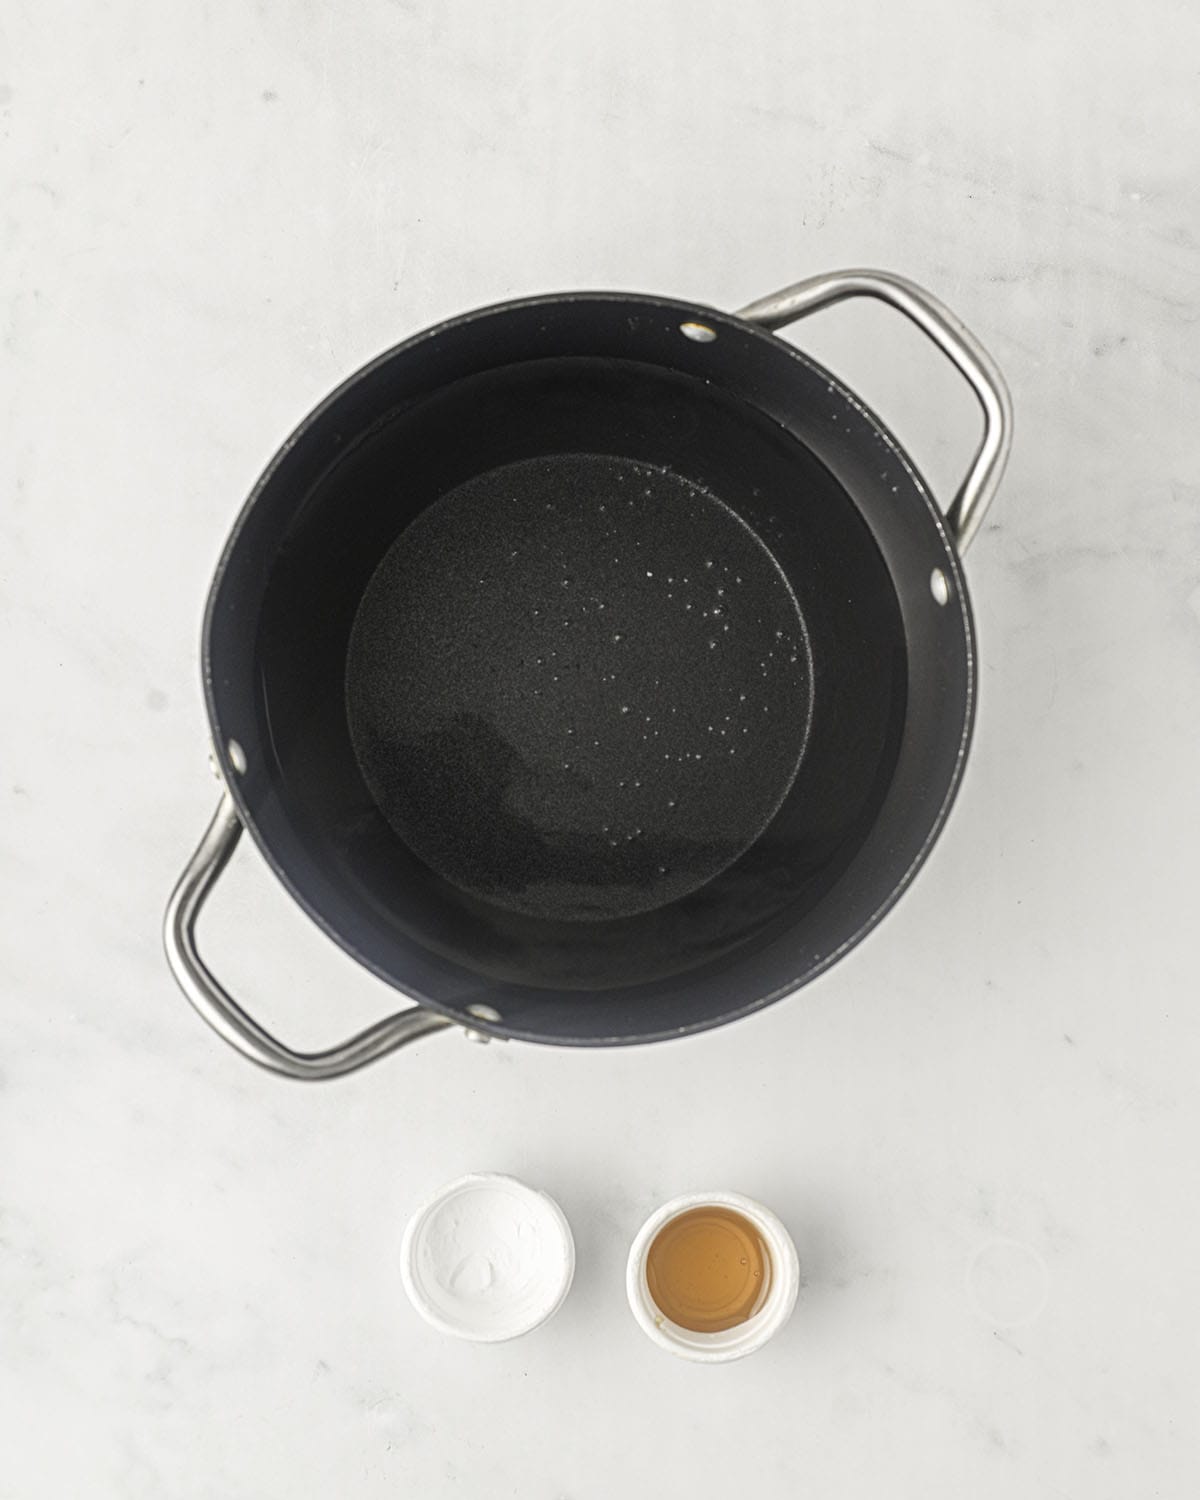
First, fill a large pot with the water, and boil it over high heat. Mix the honey and baking soda into the water as it heats up.
Once the water is boiling, add one or two sourdough bagel doughs to the water and boil them for one minute per side.
Using tongs, remove them from the water and put them back onto the baking sheet, leaving about ½” of space at least between each one.
Bake the Bagels
Once all of the bagels have boiled, sprinkle any toppings on the bagels (seeds, spices, or cheese).
Now, place the pan into the preheated oven and bake for 20 minutes or until the sourdough bagels are browning on all sides.

You’re done, now it’s time to enjoy homemade bagels!
A Sourdough Bagel A Day
Sourdough bagels are like a blank canvas, ready to comfort you no matter what you top it with! Bagels are great for breakfast, perfect for lunch, and also make a tasty dinner side.
These homemade bagels are chewy and crispy, with a perfect crust. They have a soft, bready interior and an amazing, sour flavor that is typical of sourdough.

Sourdough bagels take longer to make than regular bagels, but they are so worth the wait!
Happiness comes from eating a sourdough bagel every day. But why limit yourself? Invest in a bagel guillotine and do these bagels up any way you like them! Here’s some ideas:
- cream cheese and a beefsteak tomato slice
- cream cheese and lox
- hummus and sprouts
- tuna and melted Monterey jack cheese
- herbed butter and scrambled eggs
- chèvre and strawberry jam
- fried egg and blue cheese crumbles
- turkey slices and pepper jack cheese
The delicious ways to enjoy a sourdough bagel could really go on and on! Make it your own, and you’ll find the comfort you need.

To store, keep homemade sourdough bagels in a sealed container at room temperature for up to 3 days. However, they are best to eat on the same day of making them.
More Sourdough Recipes
- How to Make a Sourdough Starter
- Homemade Sourdough Tortillas
- Sourdough Blueberry Pancakes
- Sourdough Naan Bread
- Whole Wheat Sourdough Flatbread
- No Knead Sourdough Bread
- No Knead Sourdough Rye Bread
- Mini Sourdough Appetizer Pizzas

Homemade Sourdough Bagels
Ingredients
Bagel Dough
- 4 ½ cups all-purpose flour
- 1 cup sourdough starter
- 1 cup warm water
- 2 teaspoons sugar
- 2 teaspoons salt
Boiling Mixture
- 3 cups water
- 3 tablespoons honey
- 2 teaspoons baking soda
Toppings
Instructions
- Put all of the bagel ingredients into a stand mixer bowl fitted with a dough hook. Knead on medium speed to bring the mixture together into a rough dough.
- Turn the dough out onto a clean surface and knead by hand for 10 minutes. The dough will be thick, heavy, and hard to knead, but the more you knead, the smoother it will become.
- Once kneaded, place into a well-greased bowl. Spray the top of the dough with baking spray, then cover the bowl with a damp tea towel. Set the bowl in a warm place to rise for about 2-3 hours or until doubled in size.
- Once doubled, remove the tea towel and punch down. Let rise for 20 minutes.
- Turn the dough out onto a clean surface and cut into 8 equal pieces. Roll each piece into a taught ball. Press a clean finger into the center of each ball and gently stretch into a center hole.
- Place each formed bagel onto a parchment-lined baking sheet. Cover with a damp tea towel and set in a warm place to rise for another hour or until almost doubled in size.
- Once the bagels have risen, preheat the oven to 400° F (200℃). Place a large pot with the water over high heat to boil. Mix in the honey and baking soda.
- Once the water is boiling, add one or two risen bagels in and boil for 1 minute per side. Once boiled, remove from the water and place back onto the baking sheet, leaving about ½” of space at least between each one.
- If desired, sprinkle toppings on at this point. Once all the bagels have boiled, place the pan into the preheated oven to bake for 20 minutes or until browned on all sides.
Notes
- Sugar may be used in place of the honey in the boiling mixture.
- The rise time will vary depending on the activeness of your sourdough starter. The dough will not always rise like typical bread dough.
- The dough, once kneaded, can rise overnight in the fridge and be ready to be formed in the morning for baking.

These turned out amazing!! My starter had just come out of the fridge 2 days prior to making so it took awhile for them to rise, making it a two day process but that was fine with me! This is my new go to bagel recipe 😋
I’m so glad to hear that, Jackie! Enjoy!!
I made the dough yesterday and put it in the refrigerator overnight. It’s now been resting in a warm place for about two hours, but it hasn’t risen at all. Is it trash at this point?
I would let it warm up unrefrigerated for an hour and see how it looks before trashing it.
Swapped out one cup of all purpose flour for bread flour. These are easy to make and were absolutely delicious!
Is it with going through the next steps if my dough does not rise?
I’d still continue the recipe since sometimes they can rise during the boiling step.
Most sourdough recipes use grams for measurements. Curious why you don’t and if you can add that for conversion. I understand the starter may be different depending on its density but at least the Flour should be in grams since it allows for more consistent and accurate recipes. Thank you for the nice recipe. Trying it now.
There is a toggle for metric measurements under “Ingredients” in the recipe card.
I’ve made this recipe many times and it very well written and the bagels are fantastic!
I’m so glad you continue to like this recipe!
My dough never really changed. I kept it covered but it still felt pretty dry before boiling. What would stop them from rising at all?
It could of been the strength of your starter. Are you using a sourdough starter that has been doubling in size consistently? Or maybe the room temperature was too cool?
If I let the dough rise in the fridge should I let it come to room temperature before I punch it down and let it re-rise again for the hour? Or should I let it re-rise for longer than an hour before boiling/baking? Can I let it sit in the fridge for closer to 18-20 hours?
Yes, let it come to room temperature and then punch it down and resume the instructions in the recipe. Yes, you can leave it in the fridge longer, if you wish!
Can you freeze these before you boil and bake them?
Yes, I think that should be fine!
Do you think these would be fine to freeze? I don’t think I could eat them all within 3 days.
Yes, that is totally fine!
These did not work out for me at all! Everything looked fairly promising until I boiled them and then they were flat. When I cut them open after baking they looked dense and wet. Open to suggestions!
It sounds like they were over proofed before they were boiled. It’s hard to say without knowing your exact process.
I’ve made these bagels over 10 times and they always come out delicious. I haven’t purchased store bought since
I’m so glad you liked this recipe, Cathy!
What are my options if I don’t have a stand mixer?
You could knead the dough by hand.
I’ve made these alot and they are delicious. I’ve also added blueberries and they turned out great. And they also freeze well.
I’ve done the dough and allowed it to rise 3 hours in the oven it did rise and did its part. My thing is a migraine is starting to show up, I will not be able to make them tonight nor in the morning. I get off work at 4p I can start the process at 5-6p tomorrow night, my question is will the dough be ok to form tomorrow at that time? Or will it ruin it all?
You would need to shape and refrigerate until ready to bake.