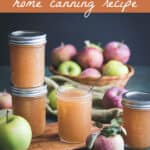

Fall is the time for apples, and if you have an apple tree then that means a lot of apples! Even with just one tree in our backyard, we have so many apples that I have to preserve them in one way or another. This no sugar apple jelly is a great way to save that apple flavor through the rest of fall and winter!

Want to save this post for later?
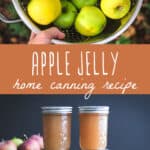
How to Make No Sugar Apple Jelly
This no sugar apple jelly recipe is made using the pectin calculator on the Ball® Fresh Preserving website. This is a handy tool for knowing how much pectin to use for low or no sugar preserves.
It also calculates the ingredient amounts for different size batches of preserves. This is helpful if you want to make a smaller or larger amount of jam or jelly. It does the work for you!
Here is the pectin calculator apple jelly recipe I followed, using the amounts for four half pint jars.

Get more recipes for canning, fermenting, quick pickling, dehydrating, and freezing so that you can enjoy your summer produce year-round in my ebook Preserving the Garden Harvest!
Low Sugar or No Sugar Option
It’s up to you to decide if you want to add some kind of sweetener to this apple jelly or none at all. I made it without any added sugar. I think it’s delicious, but it is a bit on the tart side, as some of the apples I used were green and tart.
This recipe can be made with low sugar if you prefer, using up to one cup of sugar to make four half pints of jelly. If you don’t want to use traditional cane sugar, you could also use honey, coconut sugar, or another sugar substitute.
Adding some sugar also helps the jelly to set up, so without it the jelly may have a slightly softer consistency, which is fine by me.
Either way, you will need to use Ball® Low or No-Sugar Needed Pectin.

Make the Apple Juice
The first step in making this apple jelly is to make apple juice. If you have an apple press, that is helpful, but it’s not necessary.
Alternatively, you can use prepared apple juice from a local farm, orchard, farmer’s market, or grocery store. If you go that route, I recommend using the highest quality juice that you can find, ideally without any other ingredients besides freshly pressed apple juice.
To make your own apple juice, you will need about 14-15 apples, or 2 1/3 pounds. Wash them well and remove the stem and blossom ends. Don’t worry about peeling or coring them, just cut them into chunks.
Combine the apple chunks and 3 cups of water in a saucepan. Cover and simmer for 10 minutes, stirring occasionally. Crush the chunks and simmer for another 5 minutes.
Strain the mixture through a dampened jelly bag or several layers of cheesecloth to extract the juice. An easy way to do this is to tie the jelly bag or cheesecloth to a wooden spoon, then place the wooden spoon over a large pot, allowing the juice to drip into the pot for 2-4 hours.
To make four half pints of jelly, you will need four cups of juice. Note that squeezing the jelly bag may cause the jelly to be cloudy. I had to do this in order to get enough juice, and while my jelly is a bit cloudy, it doesn’t bother me.
You will also need an additional 2/3 cup of unsweetened fruit juice. I used more apple juice, but feel free to use any juice that you prefer. Water works as well.

Make the Apple Jelly
To make the apple jelly, first prepare your water bath canner.
Put the canning rack on the bottom of a large pot, then heat four half pint jars in simmering water until ready to use. Wash the lids in warm soapy water and set aside with the bands until you are ready to use them.

Combine the prepared juice in a saucepan and gradually stir in the no sugar pectin. Bring the mixture to a full roiling boil that can not be stirred down, over high heat, stirring occasionally.
If you are using sugar, honey, or another sugar substitute, add that now and return the mixture to a full roiling boil.
Boil hard for one minute, stirring constantly. Remove from heat and skim any foam if necessary.
Using a jar lifter, lift one jar and place it on a towel or wooden cutting board. Ladle the hot jelly into a hot jar using a canning funnel.
Leave 1/4 inch of headspace at the top (the headspace measuring tool helps). Remove any air bubbles and wipe the jar rim.

Center a lid on the jar and apply the band, adjusting to fingertip tight. Place the jar into the boiling water canner, then repeat the process until all of the jars are filled.

Process the jars for 10 minutes, adjusting for altitude. Turn off the heat, remove the lid, and let the jars sit in the canner for 5 minutes.
Remove the jars with the jar lifter and let them cool for 24 hours. Check the lids for a seal, they should not flex when the center is pressed.
It may take up to 48 hours or longer for the apple jelly to set. It will set even more once it is placed in the refrigerator.

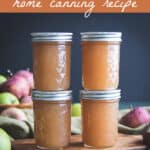
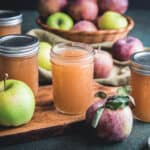
This apple jelly is so delicious! It is definitely the flavor of fall, which just happens to be my favorite season.
The best part is that it has no sugar (or low sugar)! That’s always a win in my book.

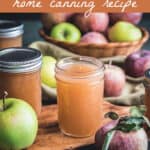
This no sugar apple jelly is perfect on a slice of buttered sourdough bread, spread on a homemade muffin, or even on top of a bowl of yogurt!
It’s a little bit tart, a little bit sweet, and full of wonderful apple flavor!

After freezing apple pie filling or canning it for later, this is definitely one of my new favorite ways to preserve apples in the fall.
If you’ve already made enough apple butter or cinnamon apple cake this season, give this apple jelly a try. You won’t be disappointed!

Here are some more easy and delicious canning and preserving recipes that I’ve done in collaboration with Ball® Fresh Preserving:
More Low Sugar Jam & Jelly Recipes
- No Sugar Peach Jam
- Low Sugar Raspberry Jam
- Low Sugar Wild Violet Jelly
- Low Sugar Strawberry Jam
- Low Sugar Dandelion Jelly
- No Sugar Blueberry Jam
- Low Sugar Lilac Jelly
- Low Sugar Blackberry Jam
Apple Jelly (No Sugar or Low Sugar)
Equipment
Ingredients
Apple Juice
- 2 1/3 pounds apples (about 14-15)
- 3 cups water
Apple Jelly
- 4 cups fresh strained apple juice or prepared pure unsweetened apple juice
- 2/3 cup unsweetened fruit juice or more apple juice or water
- 4 Tbsp Ball® Low or No-Sugar Needed Pectin
- sugar, honey, or other sweetener up to one cup (optional)
Instructions
Apple Juice
- Wash the apples well and remove the stem and blossom ends. Don't worry about peeling or coring them, just cut them into chunks.
- Combine the apple chunks and 3 cups of water in a saucepan. Cover and simmer for 10 minutes, stirring occasionally.
- Crush the apple chunks with a potato masher and simmer for another 5 minutes.
- Strain the mixture through a dampened jelly bag or several layers of cheesecloth to extract the juice. An easy way to do this is to tie the jelly bag or cheesecloth to a wooden spoon, then place the wooden spoon over a large pot, allowing the juice to drip into the pot for 2-4 hours.
Apple Jelly
- Prepare the boiling water canner. Put the canning rack on the bottom of a large pot, then heat four half pint jars in simmering water until ready to use. Wash the lids in warm soapy water and set aside with the bands until you are ready to use them.
- Combine the prepared juice in a saucepan and gradually stir in the no sugar pectin. Bring the mixture to a full roiling boil that can not be stirred down, over high heat, stirring occasionally.
- If you are using sugar, honey, or another sugar substitute, add that now and return the mixture to a full roiling boil.
- Boil hard for one minute, stirring constantly. Remove from heat and skim any foam if necessary.
- Using a jar lifter, lift one jar and place it on a towel or wooden cutting board. Ladle the hot jelly into a hot jar using a canning funnel. Leave 1/4 inch of headspace at the top (the headspace measuring tool helps). Remove any air bubbles and wipe the jar rim.
- Center a lid on the jar and apply the band, adjusting to fingertip tight. Place the jar into the boiling water canner, then repeat the process until all of the jars are filled.
- Process the jars for 10 minutes, adjusting for altitude. Turn off the heat, remove the lid, and let the jars sit in the canner for 5 minutes.
- Remove the jars with the jar lifter and let them cool for 24 hours. Check the lids for a seal, they should not flex when the center is pressed.
- It may take up to 48 hours or longer for the apple jelly to set. It will set even more once it is placed in the refrigerator.
Notes
- Squeezing the jelly bag may cause the jelly to be cloudy.
- Adding some sugar helps the jelly to set up, so without it the jelly may have a slightly softer consistency.
- The pectin calculator on the Ball® Fresh Preserving website is a handy tool for knowing how much pectin to use for low or no sugar preserves. It also calculates the ingredient amounts for different size batches of preserves.
- Here is the pectin calculator apple jelly recipe I followed, using the amounts for four half pint jars.

Hi there, I pressed fresh cider, can I use that to make the jelly with your recipe using the low sugar pectin or will there be too much natural pectin from the pressed cider? I’ve only ever made apple jelly with a steamer to extract the juice. Thank you!
Sure, you can use fresh cider!
If you double,tripe the recipe do you do the same for the water portion??
Yes.
I did apple and grape omg! Delicious!
I said it held up after being refrigerated. I canned mine do I still put it in the refrigerator or is it ok to put on the shelf?
As long as the jars are sealed, they are safe to sit on your pantry shelf.
So not removing the seeds is ok since they will be strained out in the process correct? Look forward to making this!
Yup, that’s totally fine!
When do you add the 2/3 cup unsweetened juice? I was unable to find that in your recipe descriptions. I am going to use unsweetened blueberry juice and wanted to make sure I add it at the correct time.
Under step 2 of the apple jelly section of the recipe, “Combine the prepared juice in a saucepan and gradually stir in the no sugar pectin.” I should have made it clear that you should combine both of the juices.
Do you have to make the apple juice with the strainer etc. or can you just prepare natural apple juice using a juicer? If so, what is the difference between the two juices? Thanks!
The difference is that you’ll need to use twice as many apples to get enough juice for this recipe since I extract the juice from the apples in 3 cups of water.
Great recipes
What is the shelf life of canned no sugar apple jelly
12-18th months.
Have you made this with no added sweetener? Just the apple juice and pectin? Is it sweet enough? Thanks!
Yes, This recipe has no added sugar. Just juice from the apples and pectin.