These dandelion lotion bars are a wonderful and compact way to moisturize and nourish your skin naturally. Dandelions are an easy to forage wild-growing perennial herb that works wonderfully to soothe the skin. Moisturize and soothe a wide variety of dry skin issues with these non-greasy DIY dandelion lotion bars!
Want to save this post for later?

Have you ever wondered if the weeds in your backyard are useful?
Foraging & Using Backyard Weeds, my ebook, teaches beginning foragers how to identify common edible and medicinal plants that are probably growing in your backyard.
You’ll learn straightforward techniques and recipes to forage and use wild edible weeds with confidence!
Healing Dandelion Lotion Bars
When dandelions pop their sunny heads up, I am always so excited about all of the soothing energy they bring to my life!
A great way to utilize their benefits is to make these skin-soothing dandelion lotion bars.
Get recipes for food, drinks, infusions, and self-care using dandelion flowers, leaves, and roots in my ebook, Dandelion Recipes From Flower To Root!
Dandelion Benefits for the Skin
All parts of dandelions are edible and have herbal uses. Most importantly for this recipe, they are very soothing for the skin.
Dandelions have powerful herbal benefits. These lotion bars are a wonderful way to access the topical use of the studied and proven potential of dandelion’s abundant anti-inflammatory properties.
Studies have shown that using dandelion flower and leaves topically has protective benefits for the skin.
These lotion bars work amazingly well to soothe and moisturize dry, itchy, cracked, or inflamed skin.
Related: Rose Lotion Bars, Calendula Lotion Bars, Pine Lotion Bars

Forage and Wilt Dandelion Flowers
The first step to making any herbal lotion bar is to make a fresh foraged infused oil as a base.
To make dandelion infused oil, forage fresh dandelions from your yard, garden, or an unsprayed place away from pet waste or heavy foot traffic.
To make an infused oil with fresh dandelions, they first need to be wilted overnight to release some of their moisture. They shouldn’t be totally dried as they will likely puff into seed heads!
Once the dandelions are gathered, wilt them on a drying screen or towel for about 24 hours. They will turn from vibrant yellow flowers to wilted petals.
Related: Should You Save Dandelions for the Bees? 6 Things to Consider.
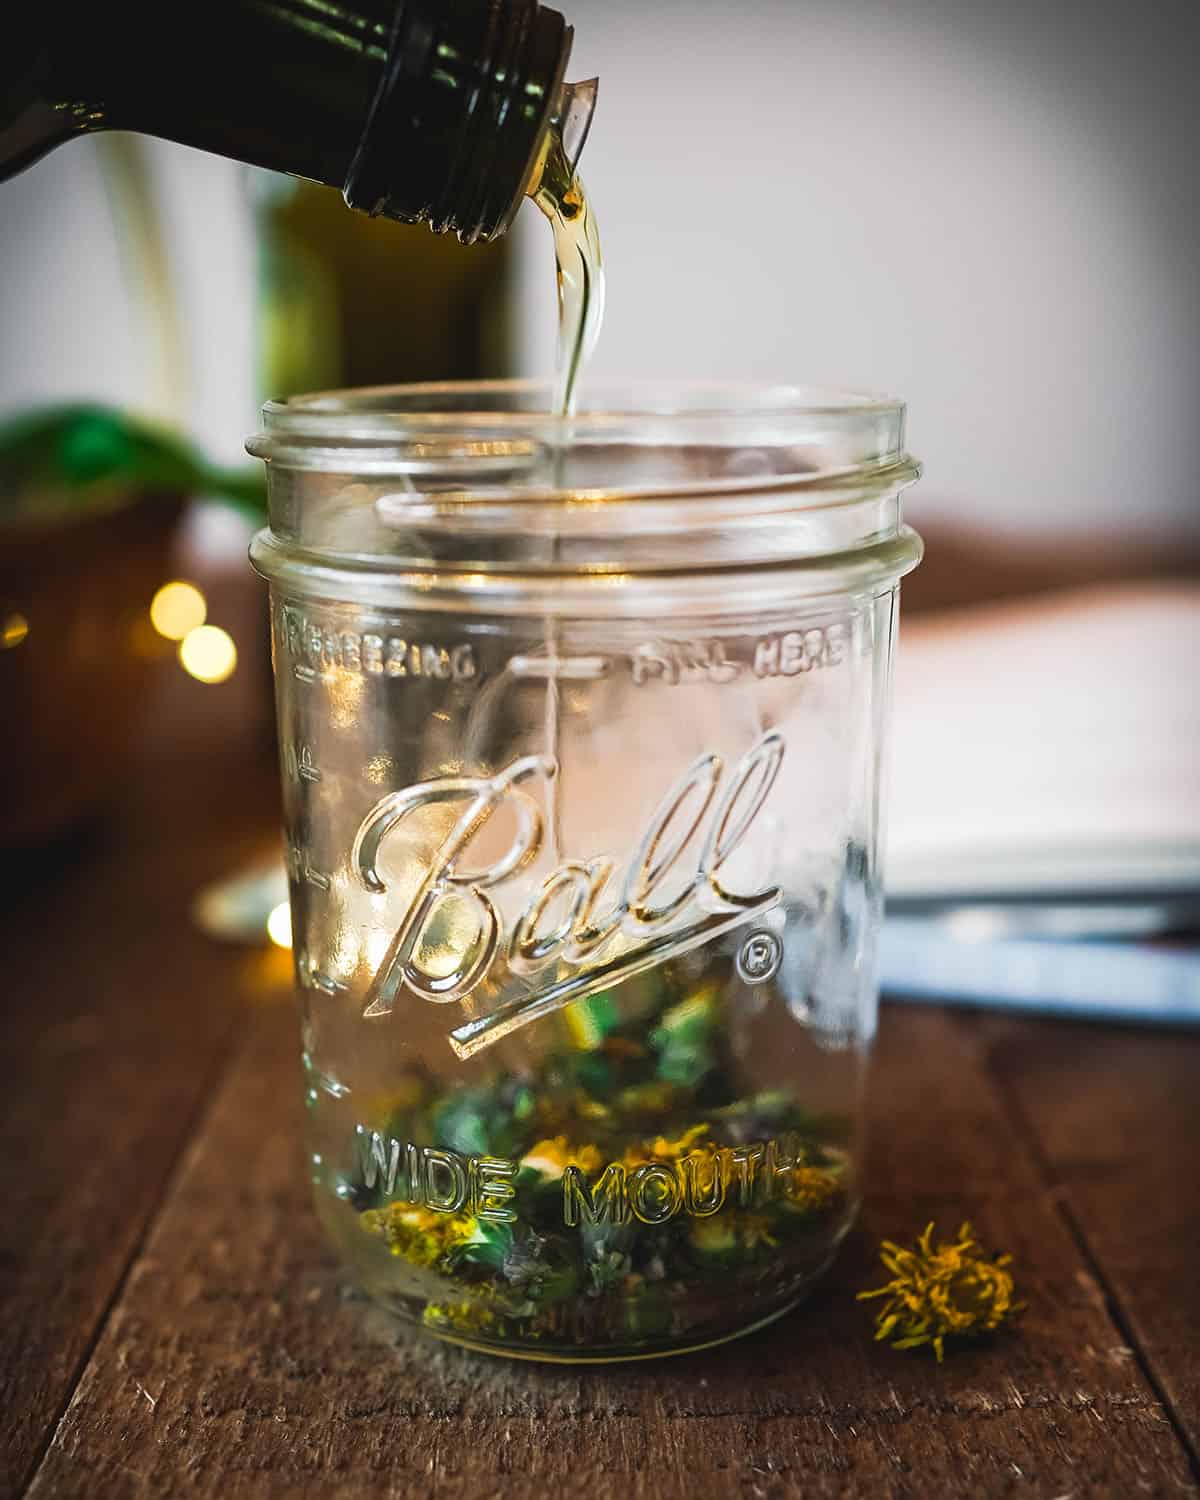
Make the Dandelion Infused Oil
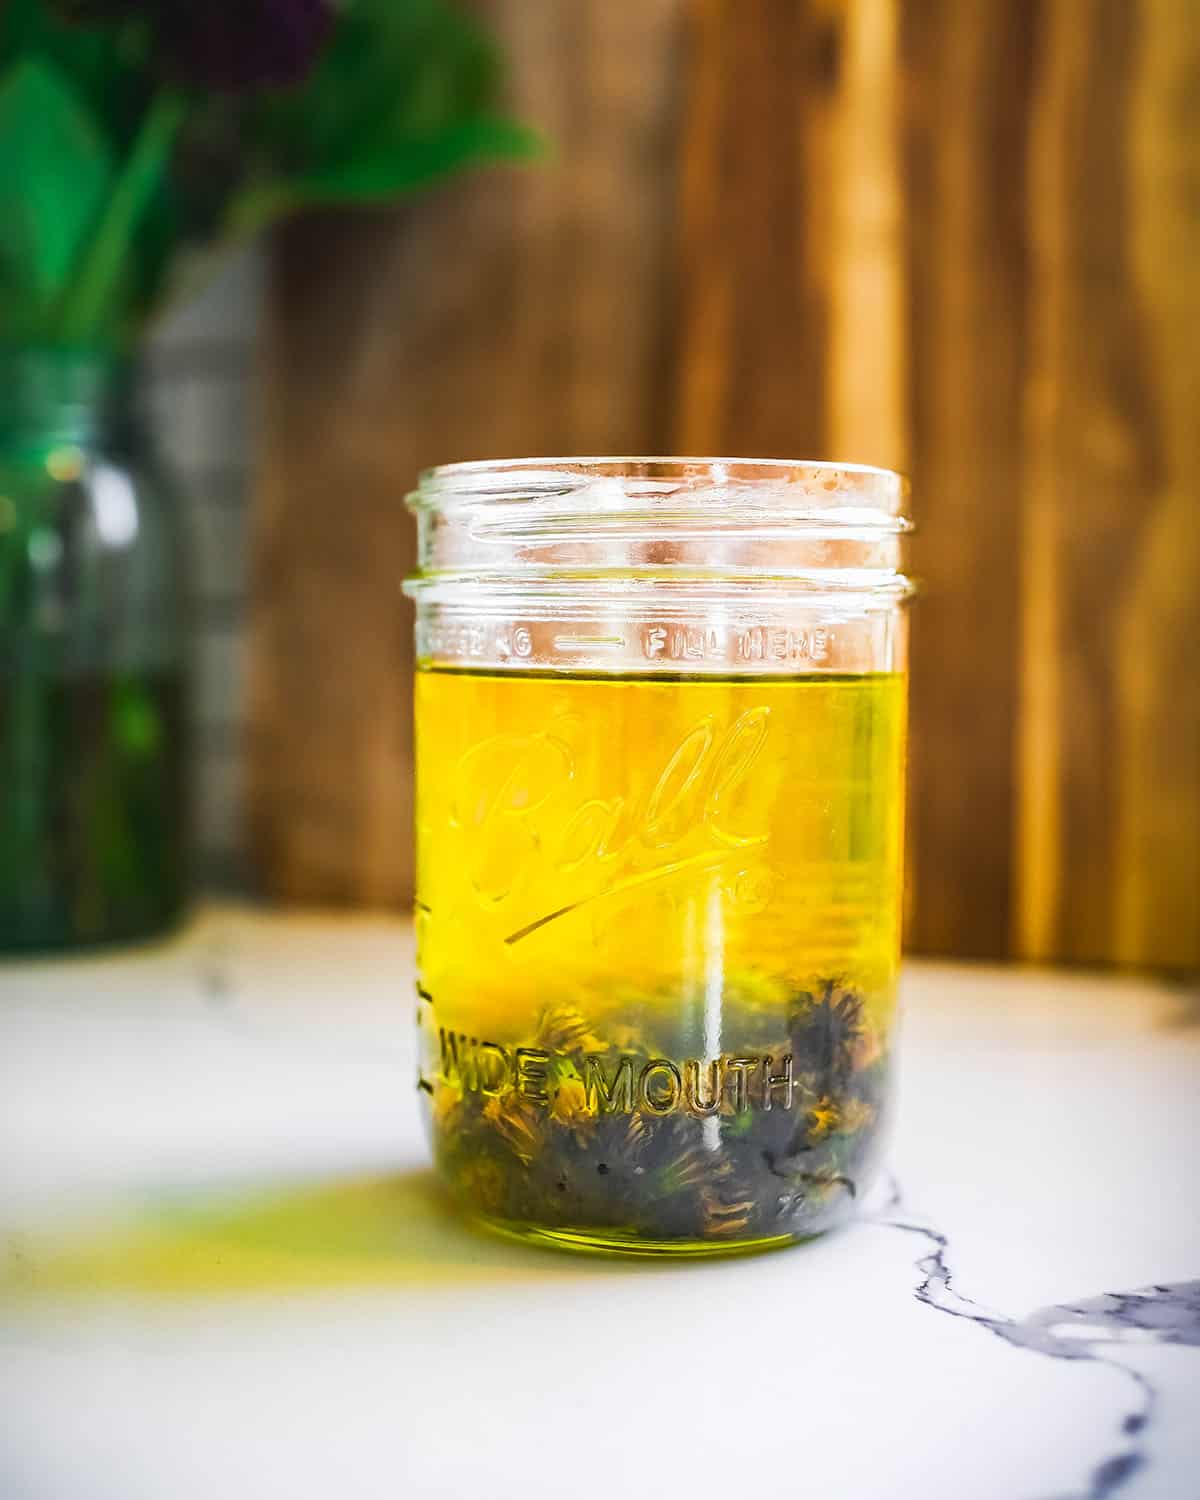
Fill the jar half full with the dried dandelions and pour in the carrier oil of your choice so they are submerged and the jar is filled.
I like to use a blend of olive, sweet almond, and coconut oil for my dandelion oil infusion. It is helpful to melt the coconut oil first before blending.
All of these oils have skin-nourishing qualities that benefit this lotion bar recipe, so use whatever combination works for you.
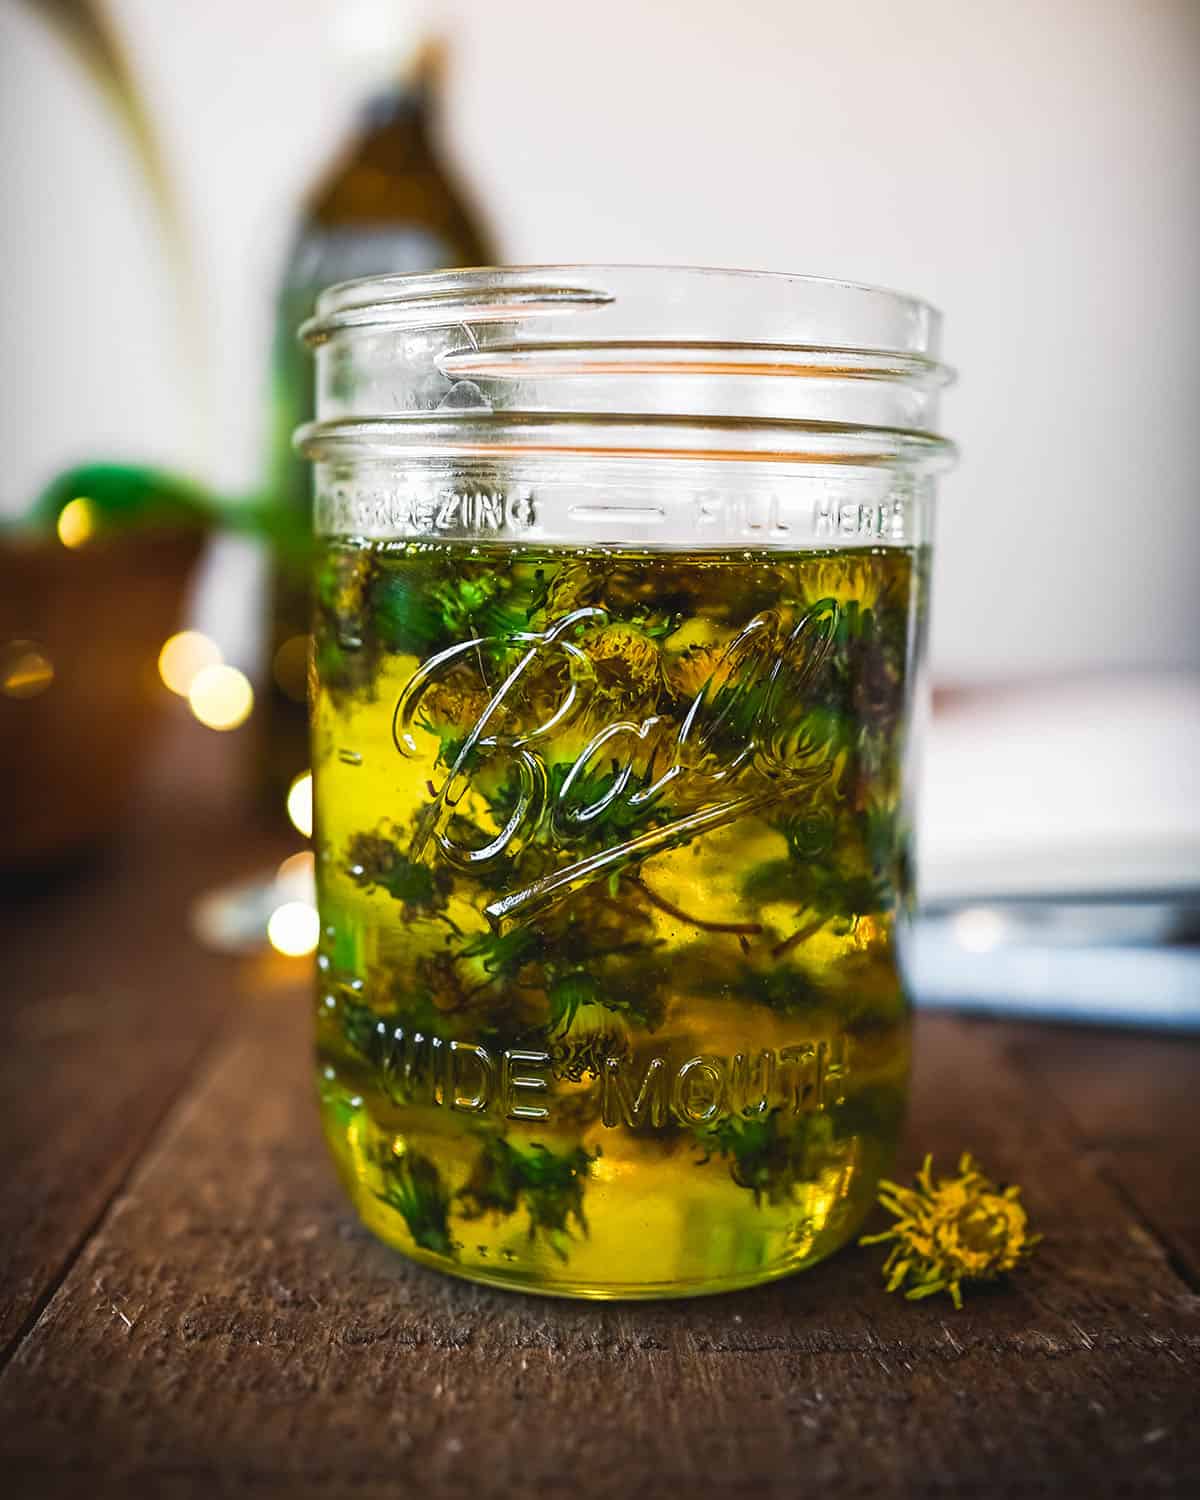
Cover the jar with a lid and let the infused oil sit for a week or so in a dark place out of direct sunlight. Since the dandelions are not completely dry do not let the oil sit for more than about 10 days to avoid mold from forming.
It’s also possible to quickly infuse the oil with a low heat method.
I personally prefer using a dehydrator for fresh herb infusions (such as when making dandelion salve or chickweed salve). They can be set to a low enough temperature and be left to do their thing without ongoing management or spoiling.
To infuse with a dehydrator, I recommend using an Excalibur dehydrator (or a similar box dehydrator with temperature control). Set the temperature to 100 degrees F, and place the wilted dandelions in oil in the dehydrator for 24-48 hours.
Alternatively, you can also do a quick heat infused oil method on the stove, but be sure to not let the oil get too hot.
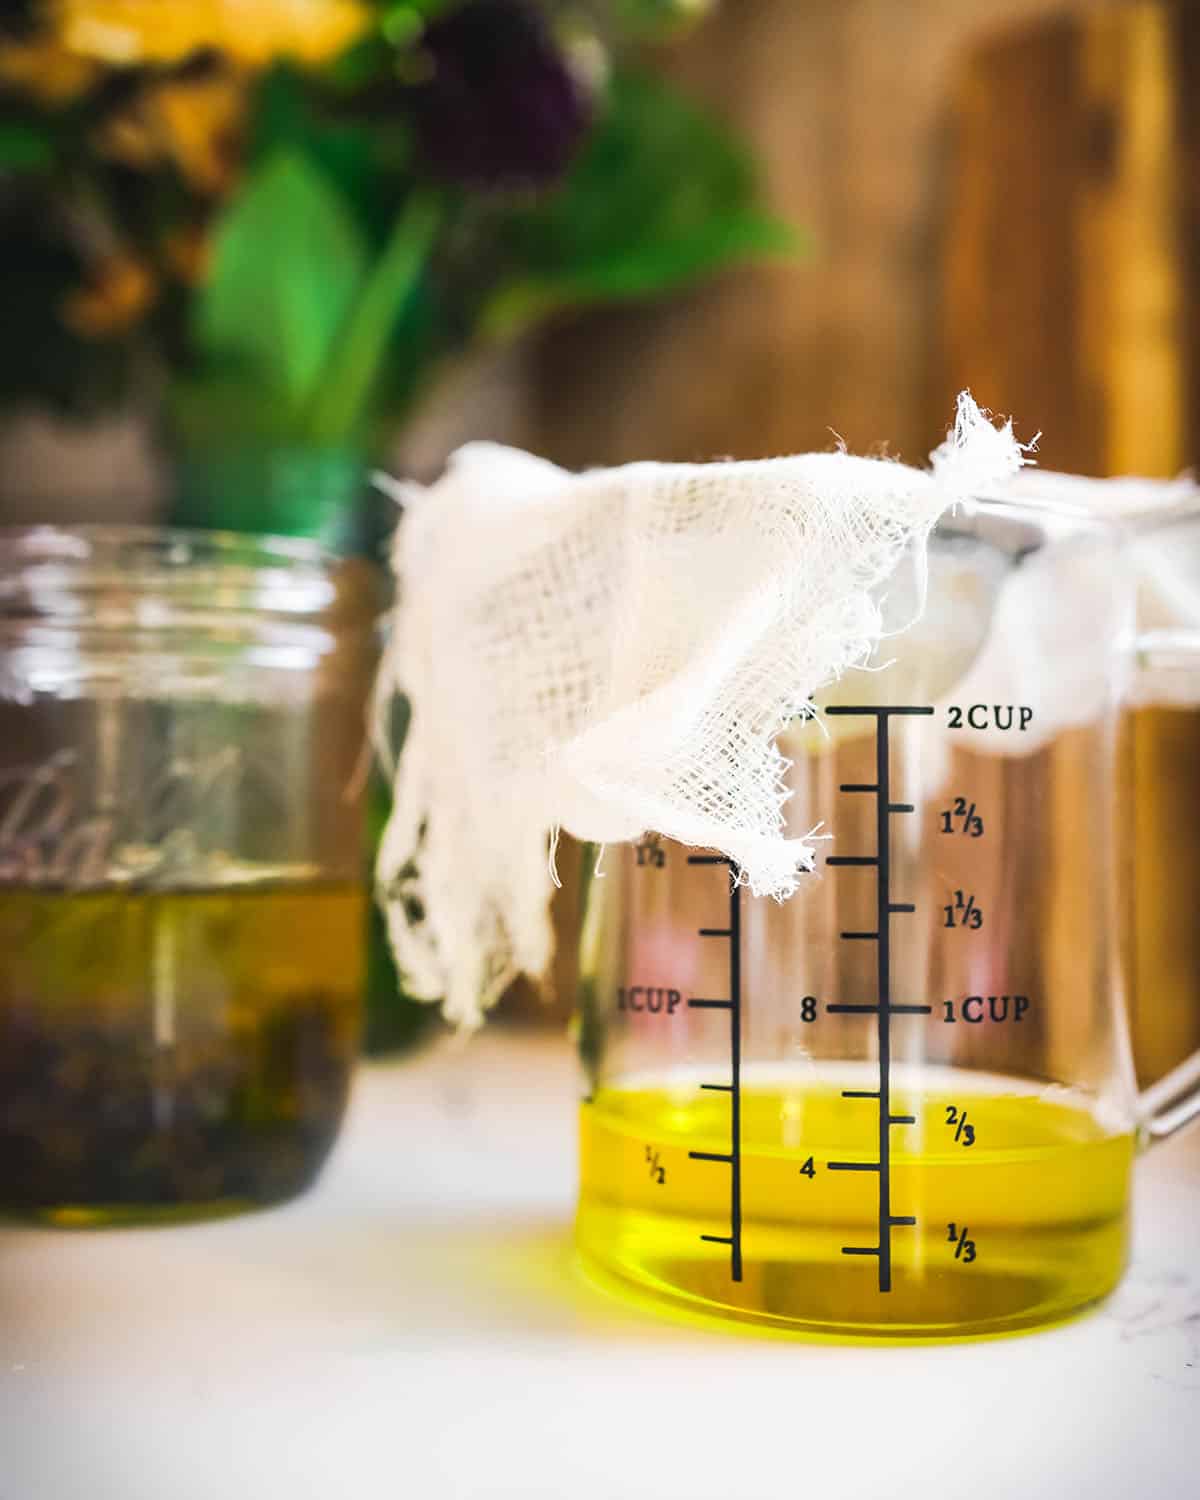
Once infused, strain the dandelions out of the oil with a fine-mesh strainer and cheesecloth, squeezing all of the dandelion goodness out with the cloth. This will leave a beautiful golden-colored nourishing oil!
How to Make Dandelion Lotion Bars
To make healing dandelion lotion bars, melt 1/2 cup of the infused dandelion oil together with 3 ounces of beeswax in a double boiler.
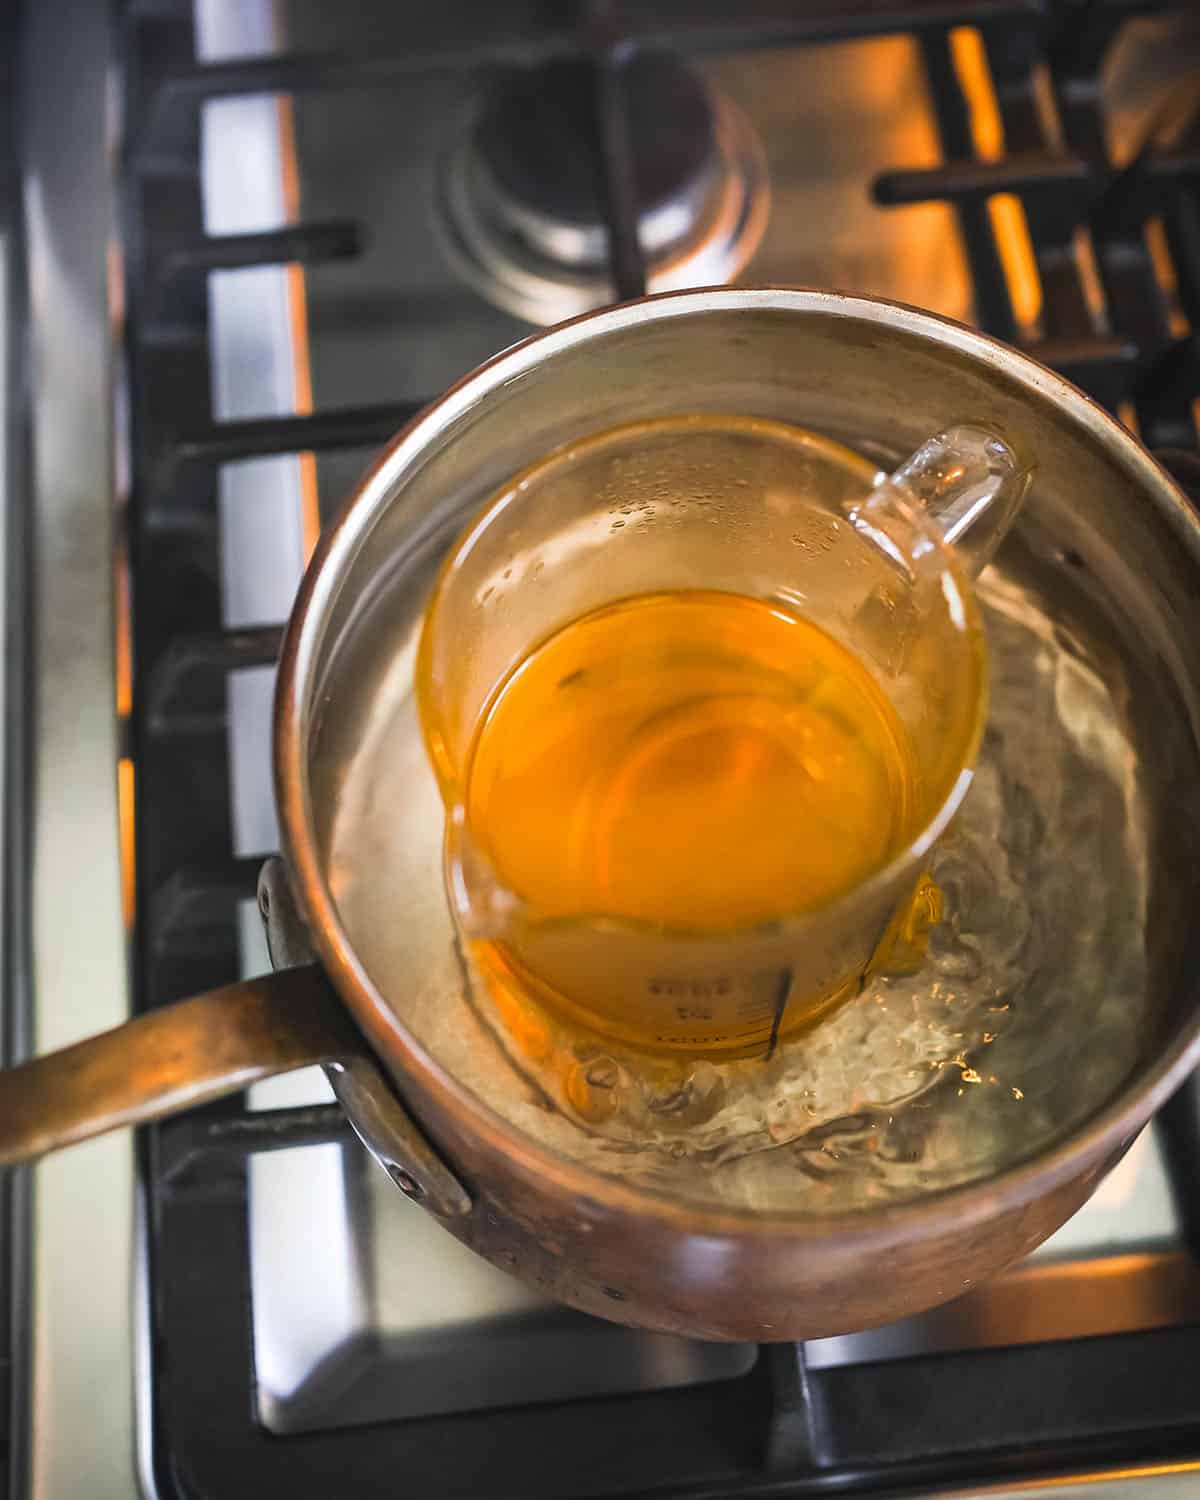
If you don’t own a double boiler, it’s easy to create a makeshift one by putting a small bowl or glass Pyrex measuring cup over a pot with about an inch of simmering water.
Heat on medium-low heat until all of the oil and beeswax are melted together and completely liquefied, which takes about 10 minutes. Then add 4 ounces of shea butter and stir until it has dissolved.

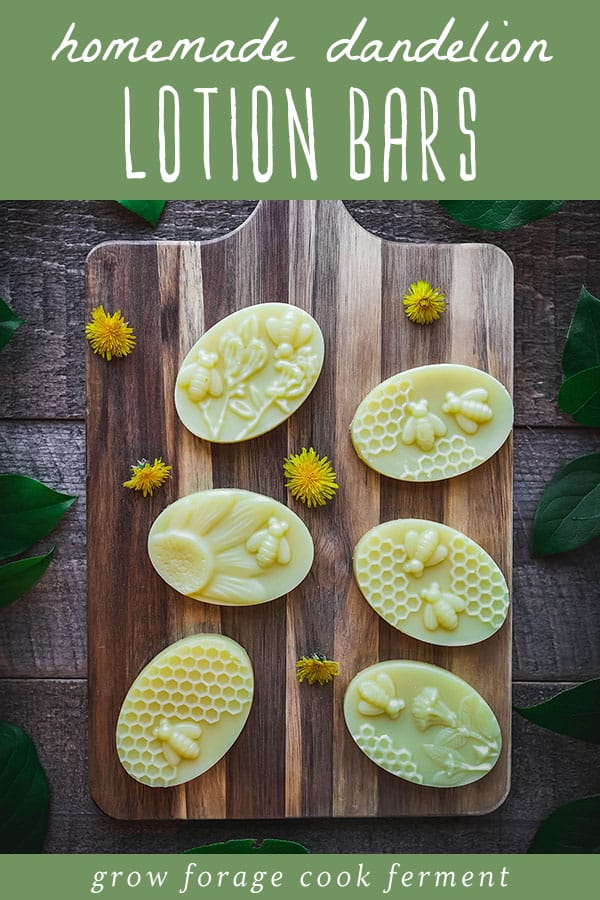
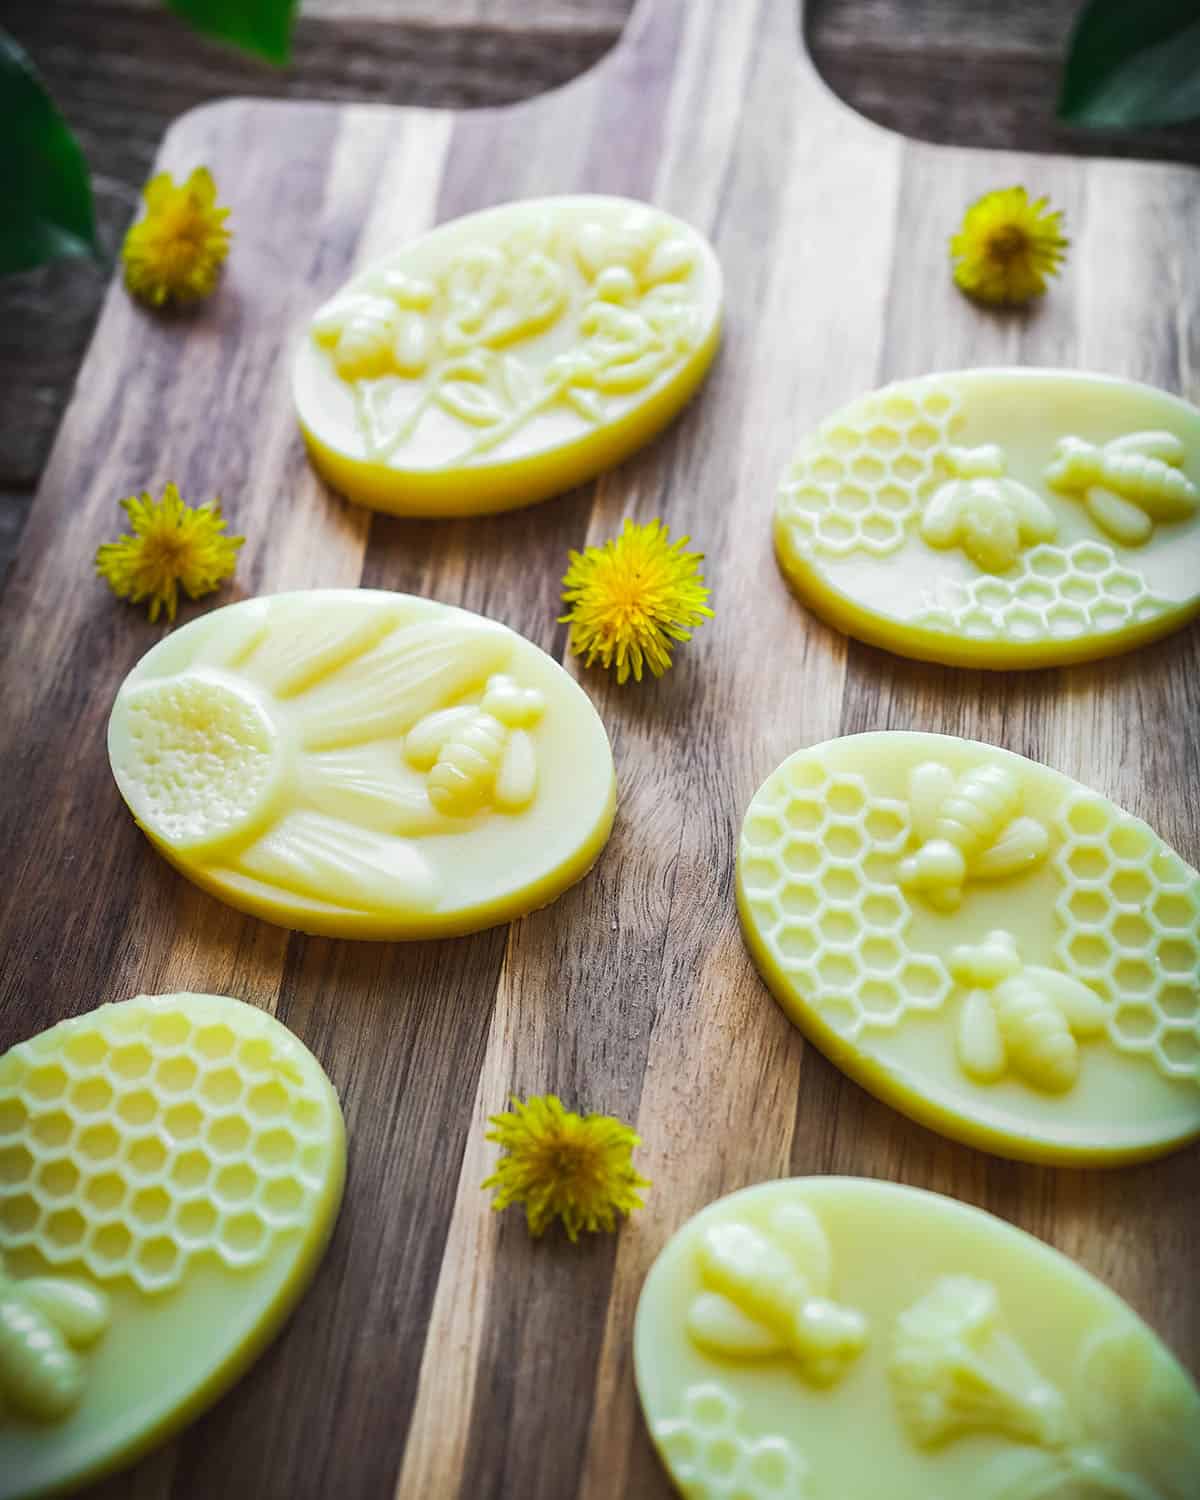
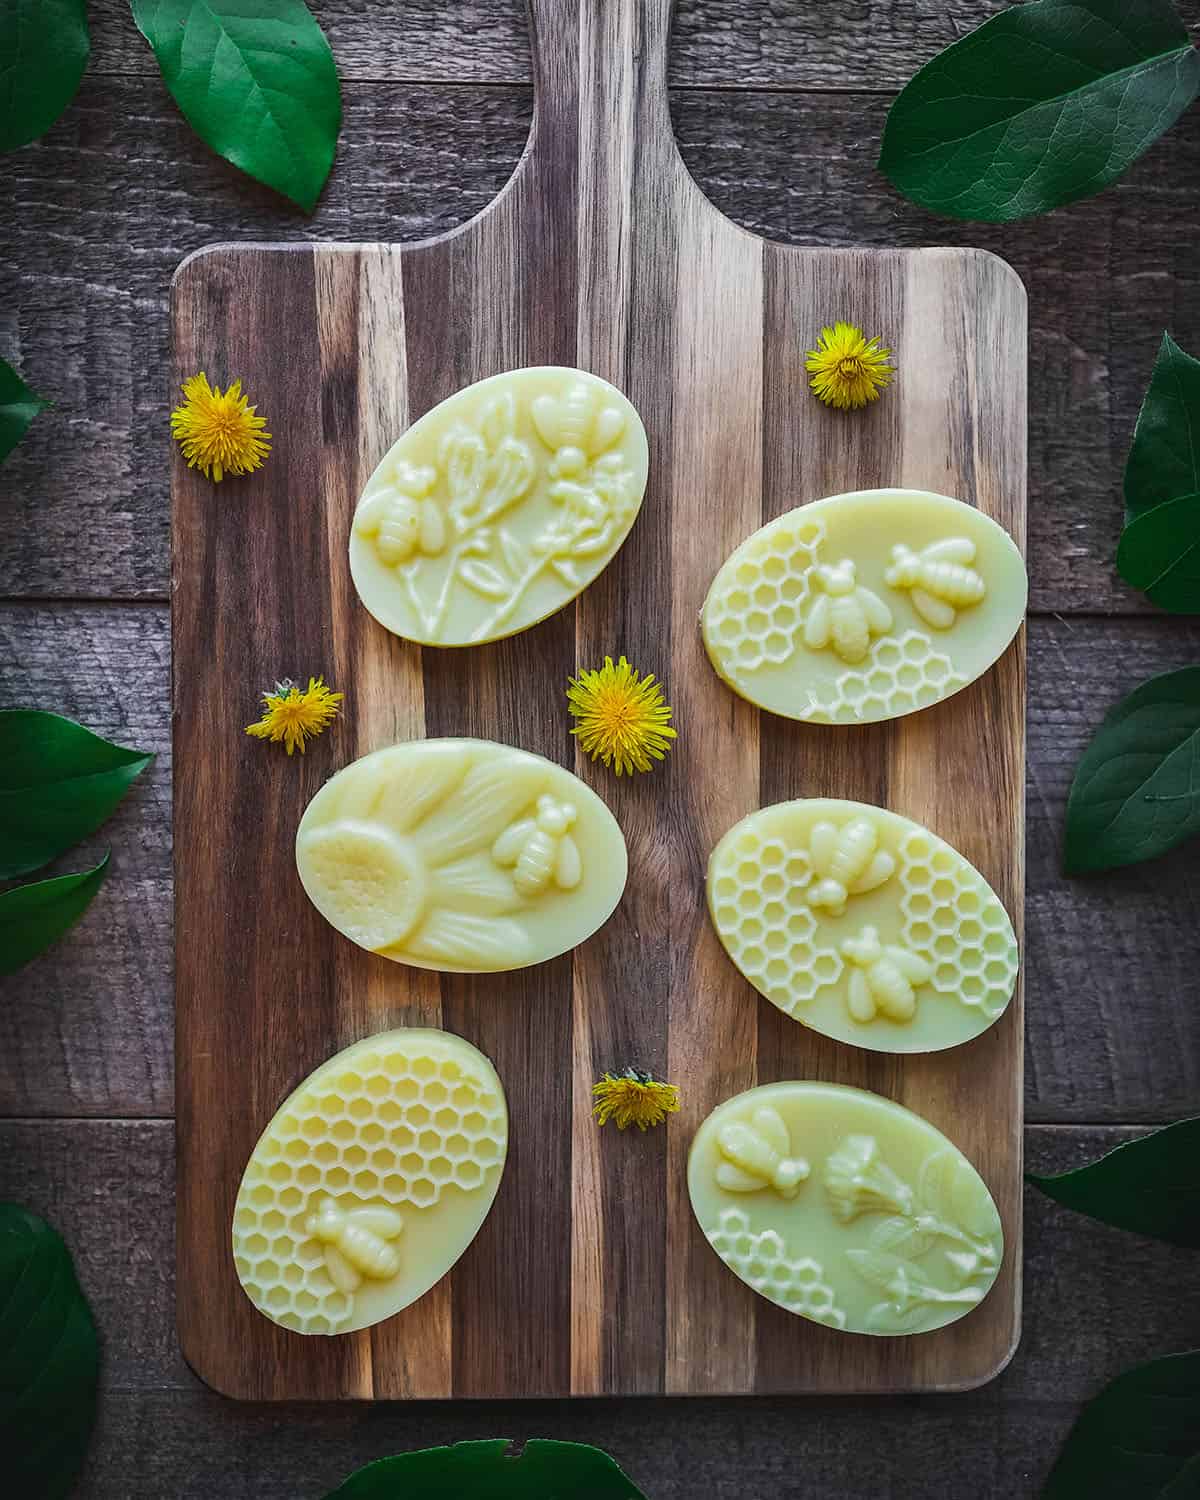
Once everything has fully melted, pour the mixture into silicone molds.
I like using silicone molds because there are some great designs out there, and they keep the integrity of the design when you remove them.

Once the mixture has hardened completely and is cool to the touch, remove the lotion bars from the molds. Usually around an hour of cooling time is sufficient.
If necessary, dipping the mold side in warm water will help loosen them just enough to get them out easily and in one piece.
Depending on the size of the mold you use, this recipe makes about 6 lotion bars.

How to Use Dandelion Lotion Bars
Glide these lotion bars all over your skin whenever you have dryness, rashes, or redness. The benefits of dandelion will give needed healing and care.
A lovely time to use these lotion bars is when your skin is warm right out of a bath or shower. They are silky smooth, non-greasy, natural, and will soak right into your skin.
One of the best things about lotion bars is that they travel well and hold up in hot weather keeping their shape.
Store them in tins and keep them in your bag, in the kitchen, or in the bathroom. Keep one wherever you need to access it regularly!
More Dandelion Recipes
- Dandelion Mead Recipe
- Infused Dandelion Vinegar
- Dandelion Pesto
- How to Make Dandelion Tea
- Dandelion Jelly: Low-Sugar or Honey
- How to Make Dandelion Salve
- Dandelion Soap Made With the Whole Plant
- Dandelion Root Muffins (paleo & gluten free)
- Dandelion Salad
- Dandelion Cupcakes with Lemon Buttercream Frosting
- Dandelion Kombucha
- Dandelion Fritters
If you love lotion bars, try these calendula lotion bars or these rose lotion bars!
Dandelion Lotion Bars
Equipment
- Silicone Mold or honeycomb and bee mold
Ingredients
Dandelion Infused Oil
- 1/2 cup foraged dandelions
- 1/2 cup olive oil
- 1/4 cup coconut oil melted
- 1/4 cup sweet almond oil
Dandelion Lotion Bars
- 1/2 cup dandelion infused oil
- 3 oz beeswax pastilles
- 4 oz shea butter
Instructions
Dandelion Infused Oil
- Wilt fresh dandelions on a drying screen for 24 hours, without letting them puff into seed.
- Combine wilted dandelions with olive, coconut, and sweet almond oils in a jar. Cover with a lid and shake to blend.
- Cover the jar with a lid and let the infused oil sit for a week or so in a dark place out of direct sunlight. (See notes for other infusion methods).
Dandelion Lotion Bars
- Strain the dandelion flowers from the oil infusion with a fine mesh sieve. If the coconut oil has solidified in the infusion, put the jar in a pan of warm water to gently melt the oil prior to straining.
- Use a double boiler, or a makeshift double boiler by putting a smaller pan, bowl, or glass measuring cup in a larger pan that has an inch or two of water in it, and bring the water to a simmer.
- Measure out 1/2 cup of the dandelion infused oil, reserving the rest for other uses.
- Put the oil and beeswax in the double boiler and heat until they are completely melted together. A wooden skewer works perfectly to stir.
- Stir in the shea butter until it is completely liquefied. Remove the pan from the heat.
- Quickly pour the liquid into the silicone molds, before it begins to solidify.
- Let the lotion bars cool and solidify fully, it will take several hours. Once set and cooled, pop the lotion bars out of the molds and store in tins or other containers.
Notes
- Since the dandelions are not completely dry do not let the oil sit for more than about 10 days to avoid mold from forming.
- To infuse with a dehydrator, I recommend using an Excalibur dehydrator (or a similar box dehydrator with temperature control). Set the temperature to 100 degrees F, and place the wilted dandelions in oil in the dehydrator for 24-48 hours.
- Alternatively, you can also do a quick heat infused oil method on the stove, but be sure to not let the oil get too hot.

Can the flower heads be crushed or ground with mortar & pestle before infusing the oil? I’m aware that might change the color of the oil once it’s strained but would that increase the bio availability of its nutrients in the final product?
It may help release more compounds into the oil, but I haven’t tried it myself. Just be sure to avoid grinding them too finely, since that can make straining difficult. Whether or not it’ll make the nutrients more bioavailable, maybe only slightly. What matters most is how long you infuse.
I foraged some dandilions and let them sit as you had mentioned, for 24 hours before infusing the oil. I have noticed a bunch of tiny bugs crawling all over the dandilions. They look like thrips. I dont think i can get them all away from the dandilions before adding them to the oil. Do you have any suggestions what to do?
Thank you!
Usually insects vacate the flowers after they die. You could try submerging them under cold water to see if that causes them to leave or die off.
These turned out SO GOOD!
The recipe worked perfectly for me. I used a daisy shaped mold and they’re so cute!
Wonderful. I’m so glad to hear you loved these lotion bars! Enjoy!
If you have extra dandelion-infused oil, how long does it keep for, and under what conditions?
It’ll last a couple of months refrigerated.
Could you substitute cocoa butter for Shea butter?
Yes.
I have made these and think they are great! Thank you! I am from Europe though, so I am a bit confused about the “OZ” in the recipe. Is this ounces? And it is possible to convert it into both deciliter and grams, but the amount between these two is very different. Do you know, for your european readers, which one we should convert it into? :) I thought I used way to much beeswax, in grams, but not sure.
In advance, thank you for the help!
Hi Grethe. I’m so sorry, typically on the recipe card under ingredients there’s a link to convert the recipe to metric, but I forgot to add it to this one. It’s there now, if you want to try it out.
The article states “I like to use a blend of olive, sweet almond, and coconut oil in equal parts for my dandelion oil infusion” but then the recipe below shows they are actually not equal parts (1/2 cup, 1/4 cup, 1/4 cup). Which is correct?
Thanks for pointing that out! Please use the amounts listed in the recipe.
Where did you find the bee molds? Do you have an affiliate link? Would love to purchase them. Thank you!
Hi Jennifer. In the “equipment” section of the recipe card, there is a link to the molds!
Are you using just the flowers?
Yes, just the flower heads.
I’ve been reading several recipes. Do I measure the dandelions before or after drying???
Before drying.
Made them last night, following recipe exactly but they didn’t solidify, have a rather runny consistency. Thinking of remelting it but should I add more of beeswax or shea butter or both? Not sure how much so may have to repeat it few times, hope that won’t affect anything?
Hi Becky, it sounds like you probably didn’t add enough beeswax, or added too much oil. It shouldn’t be runny at all. I would try adding more beeswax and see how it goes!
Hi Colleen,
We made these with our Sprouts! We have a nature-immersive, outdoor preschool (mixed ages 3-6) on a farm in MA called Sprouts Farm and Forest Kindergarten. The children gathered dandelions and dried them overnight on a screen. We infused organic olive oil for about a week and then melted the beeswax they grated (a gift from a Sprout family’s grandpa who is a beekeeper) and shea butter over our firepit, poured the mixture into silicone molds (hearts and stars) and let them sit to harden. They loved every step!! I’d love to share pictures. Thank you! Hopefully now an annual experience🌼
Hi, Lisa! Thanks for sharing! I’m so glad you enjoyed this recipe and found a new spring tradition!
I bought the bee molds and I can’t wait to make these! Where would you get the oval tins to put them in? I also ordered your book and can’t wait to get it!
Thank you!
You could try looking for some at Mountain Rose Herbs or any other online retail store.
I cannot for the life of me find a suitable tin for the shape and size of this mold. Cute molds, but no such luck on any wholesaler/retailer of the tins– either a hint too small or way too big. I just haven’t found the Goldilocks fit for them. Any suggestions are welcome!
this isn’t much different than the dandelion salve. Can you use the salve as a soap and vice versa? I want to make the salve but the soap sounds interesting also.
Hi Patty. I’m a little confused by what you mean by using the salve as soap?
Hi What kind of Shea Butter. Refined or un-refined ? I’m finding all kinds of Shea Butter on line !
Thank You
Patti
I use refined shea butter because it has no odor.
I have unrefined shea butter can I use that instead of refined? This is my first time making it so I wanted to double check.
Yes, you can. I only suggest refined because it has no odor.
Thank you for sharing this! I have a LEVO machine and can’t wait to use it for this! <3
You’re welcome. Enjoy.
Would adding an essential oil (for fragrance) to the recipe be acceptable?
For sure!
Hi. I’m interested in making these sometime and my husband is wondering how long the shelf life is for the bars? Thanks :)
They can last a year a longer in a cool, dry place.
Do put the jar of oil/dandelions in the dehydrator (removing all your screens first?) Where did purchase the bee themed moulds?
Is there a vegan alternative to the beeswax that you would recommend? Maybe soy? They look so lovely!
Soy, candelilla, and sustainably-harvested carnauba are all popular vegan alternatives.