
Many years ago, when I first started making my own sourdough, I decided that I must put some sourdough starter in ALL the things. This was a good thing because sourdough only makes things better! When I first made the leap to make sourdough tortillas, my mind was blown!

Want to save this post for later?
Sourdough Discard Recipe
I had been making flour tortillas from scratch for a while and one day I decided to add a bit of sourdough starter and wow, what a difference it made. If you’re on the search for sourdough discard recipes, these sourdough tortillas are perfect!
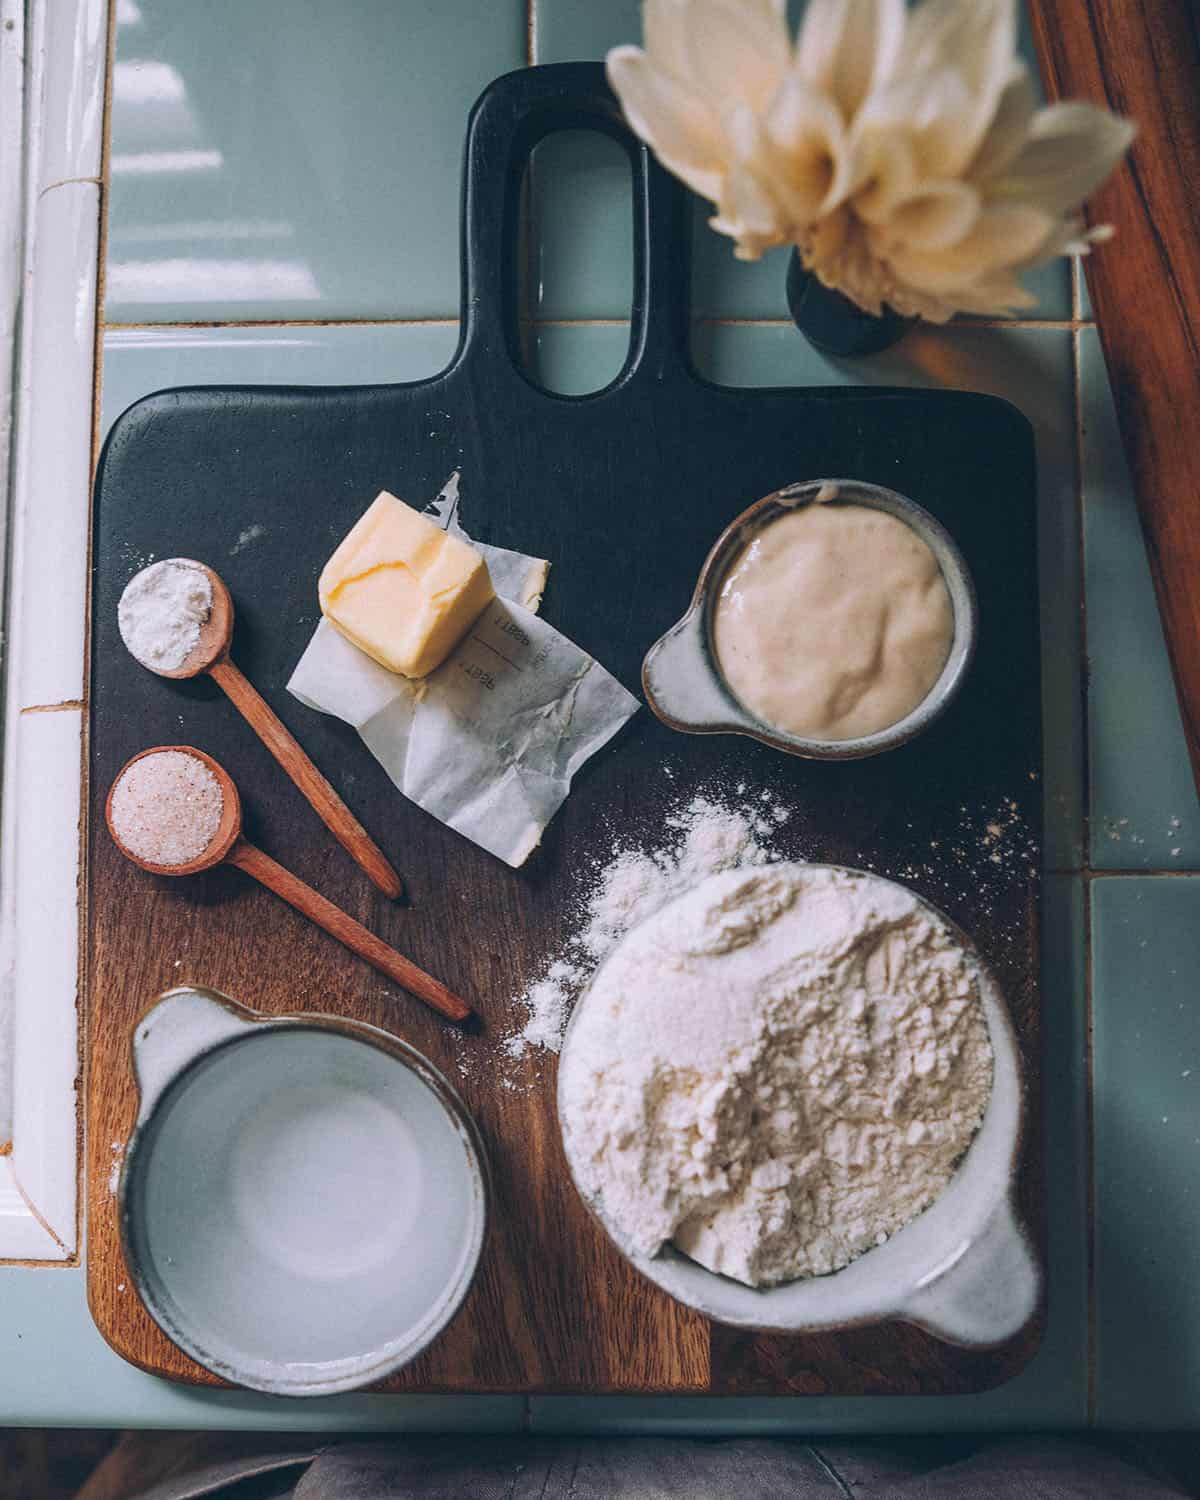
Ingredients
All-purpose flour: I use organic for this recipe, and another option is to swap out one half cup of all-purpose flour for whole wheat flour if you like that texture.
Butter or ghee: Using saturated fat for this recipe makes the tortillas more tender, I get great results with ghee and butter. Feel free to substitute with coconut oil or a high-quality source of lard if you have access to it.
Sourdough starter: This is the star of the show! It’s ok to use discard, too. If you’re wondering the best way to make homemade tortillas taste better, it’s sourdough!
How to Make Sourdough Tortillas
Now I will show you how to make these super easy and wonderfully tasty sourdough tortillas! Keep in mind that you’ll want to start this recipe at least 4 hours ahead of time and up to a full day ahead of time.
First pulse the flour, salt, and baking powder in a food processor, then add the butter or ghee.

Pulse in the fat. Of course, you do not need a food processor to do this, it will just take a bit more elbow grease to do it by hand with a fork.
Next, add the sourdough starter and pulse that in.
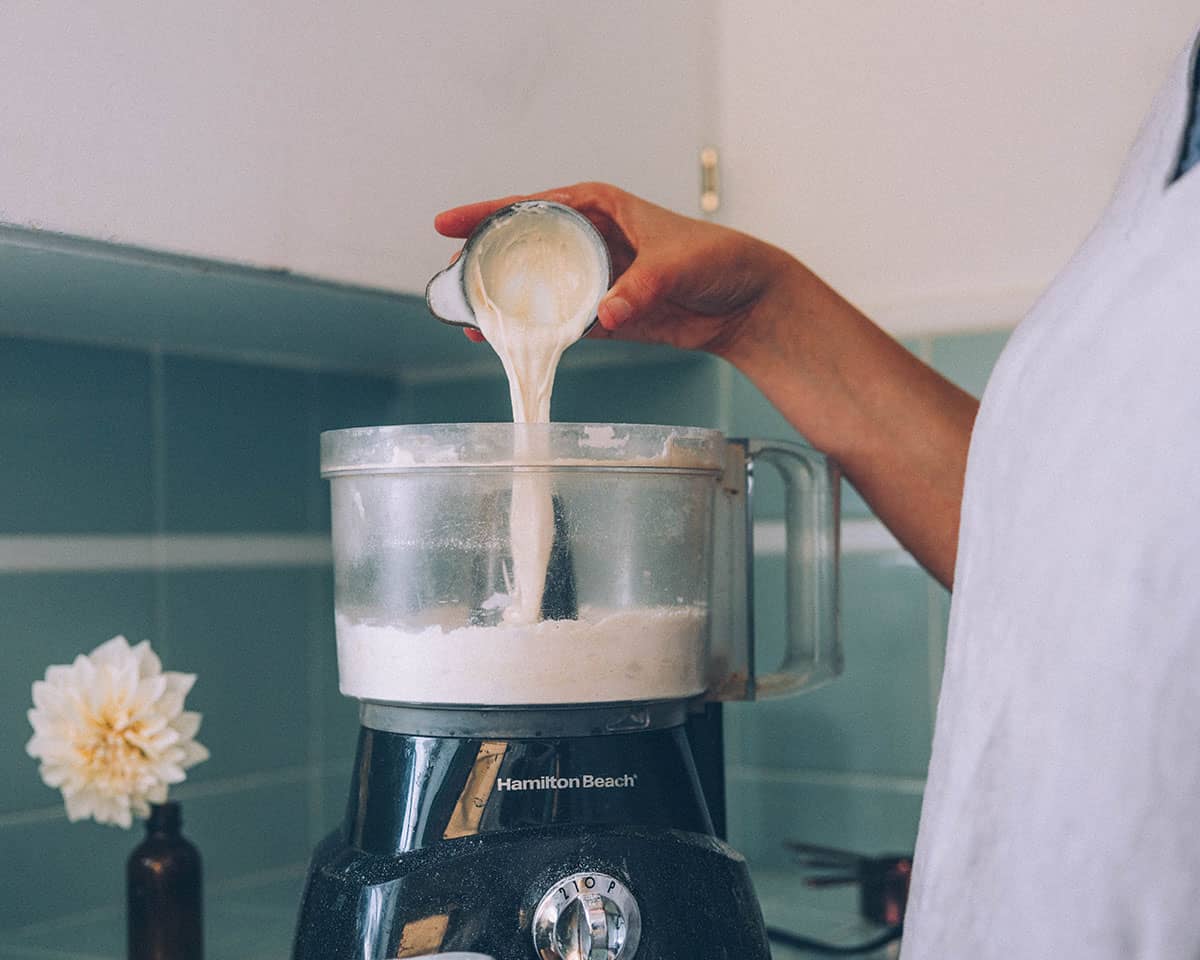
Then turn the food processor on and slowly drizzle in the warm water just until a dough ball forms. NOTE: You might not need to use the entire half cup of water.

Then turn the dough out onto a floured board and give it a few kneads until it is soft.
Wrap the dough in plastic wrap (or better yet, homemade beeswax wraps) and let it rest for at least 4 hours to 24 hours.

The dough can rest for even longer, up to several days. Keep it in the fridge and take it out for a few hours to let it come up to room temperature before you roll the sourdough tortillas out.
When it’s tortilla making time, divide the dough into 6 roughly equal size pieces (or 12 if you’ve doubled the recipe).

Flatten each of these into small round discs.
Stack the dough discs except for one on the side of your board, then roll the one out very thin. Make sure to keep flour at hand as you will need it to keep the tortillas from sticking to the board.
If you have a tortilla press you can use it instead of a rolling pin, but it is not necessary.

Heat a large cast iron skillet, or another heavy-bottomed pan, on medium heat. The pan should be dry, with no oil at all.
Once your skillet is hot, put the rolled-out tortilla in it. It should start to bubble rather quickly.
In the meantime, start rolling out your next tortilla.

After a minute or two, flip the tortilla in the pan.
You should see a few nice little brown spots and it will probably bubble a bit on the second side as well. This side takes less time, maybe a minute, but no more.

Take it out of the pan and put your next rolled-out tortilla in. Repeat this until you’ve cooked all of your tortillas. You are probably covered in flour by now! This, my friends, is a good thing.
Stack up your cooked tortillas on a plate or board. Revel in the awesomeness that you just created.

You just made tortillas! So easy, with just a bit of forethought, yet without all of the preservatives and hydrogenated oils that most regular store-bought tortillas contain. Plus, sourdough!

The perfect vessel for your next taco of choice, just add some shredded pork shoulder or slow-cooker shredded chicken and the rest of the fixings you like.

Eat and Store Sourdough Tortillas
I’m always surprised by how easy making things from scratch really is. At first, it may seem daunting, but once you actually do it you realize that it’s not only quite simple but much tastier too!
The most important step in all of this is planning. If you know that you’re going to make tacos for dinner, then you can plan to make these sourdough tortillas. Making your own tortillas is totally worth the few extra minutes it takes.
This recipe is great to make a double or even triple batch! If you’re making them, you might as well make enough for a crowd. Then you’ll always be well prepared for taco night!
Store sourdough tortillas in an airtight container at room temperature for 3-5 days, or up to a week in the refrigerator. If you make a large batch, they freeze well too. Just thaw them out and warm them before eating to prevent cracking. Enjoy!
Here are a few of my other favorite, delicious sourdough recipes:
- No-Knead Sourdough Bread
- Sourdough Rye Bread
- Sourdough Pizza
- Sourdough Blueberry Pancakes
- Sourdough Naan Bread
- Mini Sourdough Appetizer Pizzas
- Sourdough Flatbread
- Sourdough Discard Bagels

Sourdough Tortillas
Equipment
- Plastic Wrap (or reusable beeswax wrap)
Ingredients
- 1½ cup all purpose flour
- ¼ tsp salt
- ¼ tsp baking powder
- 2 Tbsp butter or ghee
- ¼ cup sourdough starter
- ½ cup warm water
Instructions
- Place the flour, salt, and baking powder into a food processor and pulse to combine.
- Add the butter (or ghee) and pulse until coarse crumbs form.
- Add the sourdough starter, and pulse until combined.
- Turn on the food processor and slowly drizzle in the warm water just until a dough ball forms. You may not need to use the entire half cup of water.
- Turn the dough out onto a floured board and knead a few times until it's soft.
- Wrap the dough in plastic wrap (or beeswax wrap) and set aside to rest at room temperature for at least 4 hours and up to 24 hours.
- When you're ready to make the tortillas, remove the dough from the plastic wrap and divide into 6 roughly equal sized pieces.
- Flatten each dough piece into a disc, then roll the disc into a thin tortilla, using a sprinkle of flour to prevent sticking if necessary.
- Heat a cast iron skillet over medium high heat. Allow it to get very hot. Then, place a tortilla into the dry skillet and cook for 1-2 minutes until bubbles start to form. Flip and cook on the other side for an additional minute.
- Remove the tortilla from the skillet and repeat the rolling and cooking with the remaining discs.
Notes
- You’ll want to start this recipe at least 4 hours ahead and up to a full day ahead of time to allow time for the dough to rest.
- This recipe can easily be doubled if you need more tortillas.
- 1/2 cup of the flour could be whole wheat

Hi, thanks for sharing. Can it be done by kitchen aid mixer instead of food processor?
This is what I’ve been doing and it’s worked okay.
I made these last night, they tasted amazing, followed the recipe exactly (made the dough in the morning for dinner). My discard must be just too active (it’s kept in the fridge) because after the rest, it had risen quite a lot in and poked through the plastic wrap. I used my tortilla press and despite flouring my disk very well, they still stuck horribly to the parchment paper, and when I put them on the skillet, they puffed up like flat breads and were definitely more ‘bread’ than tortilla. They were delicious but definitely not what I was expecting.
Any ideas? Probably just overactive starter (I did omit the baking powder)
Hi! Can you use discarded starter for this? Thanks!
What is the hydration % of your starter? Thanks!
Any thoughts how I would make flavored ? Like sun dried tomato or garlic ? Would I just fold into the dough ?
So easy and turn out great!
Adding on To my earlier question.. my dough is very sticky. Thoughts anyone?
What fat/oil are you using?
Hi there, I made my dough 2 hours ago, wrapped loosely In Saran and left in on the counter. It is very soft and is sort of spreading out Is this sounding like anyone else’s?
This recipe is so easy, tastes great. I did double sour dough starter and use 1/4 cup less flour.
Thank you for this recipe, my family really likes it. Do you know the carbohydrate count?
Perhaps it’s me, my starter discard, or something. The recipe, the prep all went well. But the tortillas were not pliable at all. They kind of disintegrated with use. The flavor was ok.
Do you have to add the baking powder? I am trying to just use the sour dough as a starter so as to avoid the phosphate chemicals in the baking powder. I am allergic to phosphate chemicals and the only bread that I can eat that does not make me ill is San Luis sourdough which has no baking powder in it and so I wish they made tortillas as well, but maybe I can just make my own. I would also like to make a sourdough cake like this as well.
I don’t use baking powder but rest the dough overnight. Works just fine.
Hi! I notice several ladies struggling to flatten out the tortillas. I have found two great methods:
1. The most obvious and easiest, invest in a tortilla press. Amazon sells them very reasonably priced.
2. The frugal/I don’t make tortillas very often method is to take two pieces of waxed paper and place one on the counter. Then place your ball of dough in the center of the waxed paper. Cover with second piece of waxed paper and use a heavy pie plate, preferably glass, so you can see the dough spread, and press on the bottom of the pie plate to make a very flat and uniformly shaped tortilla.
Hope these methods help! Be well!
What is your point to have them rest for so long?
I think it’s just so the sourdough starter has time to ferment the flour to breaks down the gluten and phytic acid, making it easier to digest.
Don’t forget the improvement in flavour. When it comes to sourdough (or any bread) more time = more flavour.
I just made these for dinner with tacos, oh my so good. I made four batches and have a few leftover is there a better way to store them? I love recipes that you can whip up in a food processor, so easy and tasty.
I love wraps, but the store bought ones have so much stuff in them and always make me bloated afterwards. So happy to have these in my life. Made them last week and they were a huge hit! Making them again this week. Doing a double hatch and will freeze half.
Very easy to make!
#1 in the description says baking soda but the rest of the recipe says baking powder. Is it soda or powder? Thanks!
It should be baking powder, sorry about that and thanks for letting me know – I’ve updated the recipe!
Love this recipe. I up the starter and lower the flour to get a faster ferment and my family LOVES these for make your own pizza night! They are a total hit. Thank you!
Awesome, I love the idea of using them for pizza!
what is the diameter of the 6 tortillas you made? I would like to double the recipe, do you know how much warm water I need to add?
Wow! So simple and great taste. Made with half butter-half bacon fat. Great aroma. Then tried all coconut oil. Just as good but no bacon aroma, but vegan so that is good too.
Looking forward to making these tortillas… Can you give me an approximate size to go for please?
Just used your recipe this morning to have our deer taco/wraps tonight I’m so excited as I can see they are going to turn out excellent already! Recipe is simple and easy to follow, thank you Colleen I’m sure this will be part of my weekend ritual to use during the following week :)
Hi
I love this recipe so much. I make it at least twice a month. We eat them warm with stews and curries. I use them as crepes filled and warned through in the oven and as wraps for lunch.
Thank you!
I made these and they turned out well. I used butter for the fat. Thanks for posting it and I will definitely make again.
Is it possible to make these up in bulk and freeze them?
I’ve never tried it, but I don’t see why not.
Fed or unfed starter?
Sarah, I had the same thought. Have you tried it and how did they turn out?
Hubby and I recently ventured into tortilla making and have tried 5 different recipes. This is the hands down winner for taste and longevity. All white, all purpose tortillas mold in a Ziploc baggie, in a dark cupboard within 1-1 1/2 weeks. This sourdough version has lasted 3 weeks+. And yes! They freeze great! Just put a sheet of waxed paper between each tortilla and slide the stack into a Ziploc bag. And for those who have asked, we are getting 5 1/2 tortillas at 11″ per batch. Perfect for breakfast burritos, lunch time wraps and dinner time chicken burritos. Tortillas are no longer a food delivery vehicle but now a staring part of the meal.
How is this Gluten Free
It’s not…
These came out great! I just omitted the backing powder and I used more whole wheat flour.
Thanks so much for this! These were honestly the best tortillas I have ever made, and I’ve tried a lot. The wine bottle trick was amazing.
I have another trick to add (I learned it making pie crusts)- put the flattened disk in a plastic bag (a grocery bag works well, but should be clean!) and roll it out with the wine bottle. No need to flour anything. When it’s as thin as you like, cut the sides of the bag with scissors and peel the bag off one side. Then put it in the pan while peeling the other half of the bag off. You can get it really, really thin this way without flour or trouble handling it. This same trick works for pie crust where you press it into the pan and then peel off the other side of the bag when you are happy with the shape.
I’m so glad that you like them… and thanks for the tip!
Should the starter be fed or unfed, or does it matter?
If you leave your starter out on the counter it should be fed at least once daily, less if it’s kept in the fridge. I try not to use freshly fed starter in my sourdough recipes, I usually like to give it a least a few hours to do it’s thing. But if your starter is well established, I don’t really think it matters a whole lot either way.
Mine stays unfed in the fridge for weeks and it comes to life happily. I have a similar tortilla recipe to he above, however I only have to leave it on the bench for 1/2 hour and then cook, so it is very quick. I use hot water in the receipt in the food processor.
I’ll give this a try! I’m horrible at getting flat tortillas, although I’m on a mission to try. I love the wine bottle idea, I’ll have to give that a try.
Which means, of course, buying a good quality glass bottle.
I love sourdough tortillas! So simple to make and so tasty and not as hard as I used to think. I make them for seven hungry people and we all love them.