Learning how to make a sourdough starter is the first step to baking any delicious sourdough bread that the heart desires. This is a simple process that takes minimal effort, and the main ingredient is time as with all fermented foods. Using some sourdough starter in bread recipes is a healthy alternative, as it improves digestibility, is more nutritious, and provides good gut bacteria!
Want to save this post for later?
Sourdough Starter for Your Health
Think of a sourdough starter as an important beginning for your health. While there are some people who genuinely need to avoid gluten completely (here is a gluten free sourdough starter recipe), for the rest of us it makes sense to ferment the wheat (or other grains) before eating to aid digestion.
It’s true that grain in its natural form isn’t the best food for humans. Grain is coated with phytic acid and many other anti-nutrients. But, humans have learned over the millennia how to make that grain more digestible by fermentation.
Fermentation is almost like a magical second stomach, predigesting and adding all kinds of beneficial bacteria for us before we even put it in our mouths!
Once a sourdough starter is bubbling and ready, it can be used for every single wheat flour recipe you want to make. Bread is the most common way to use it, and I have wonderful recipes for no knead sourdough bread and no knead sourdough rye bread.
I love to use some sourdough starter in many of my recipes, from sourdough blueberry pancakes to sourdough tortillas to sourdough naan bread.
Once you get this sourdough starter going and bubbling away, you’ll be able to make all sorts of healthy and yummy bread recipes!
How to Make Sourdough Starter
All this recipe requires is flour, water, and time. A warm room helps, and a little love of course!
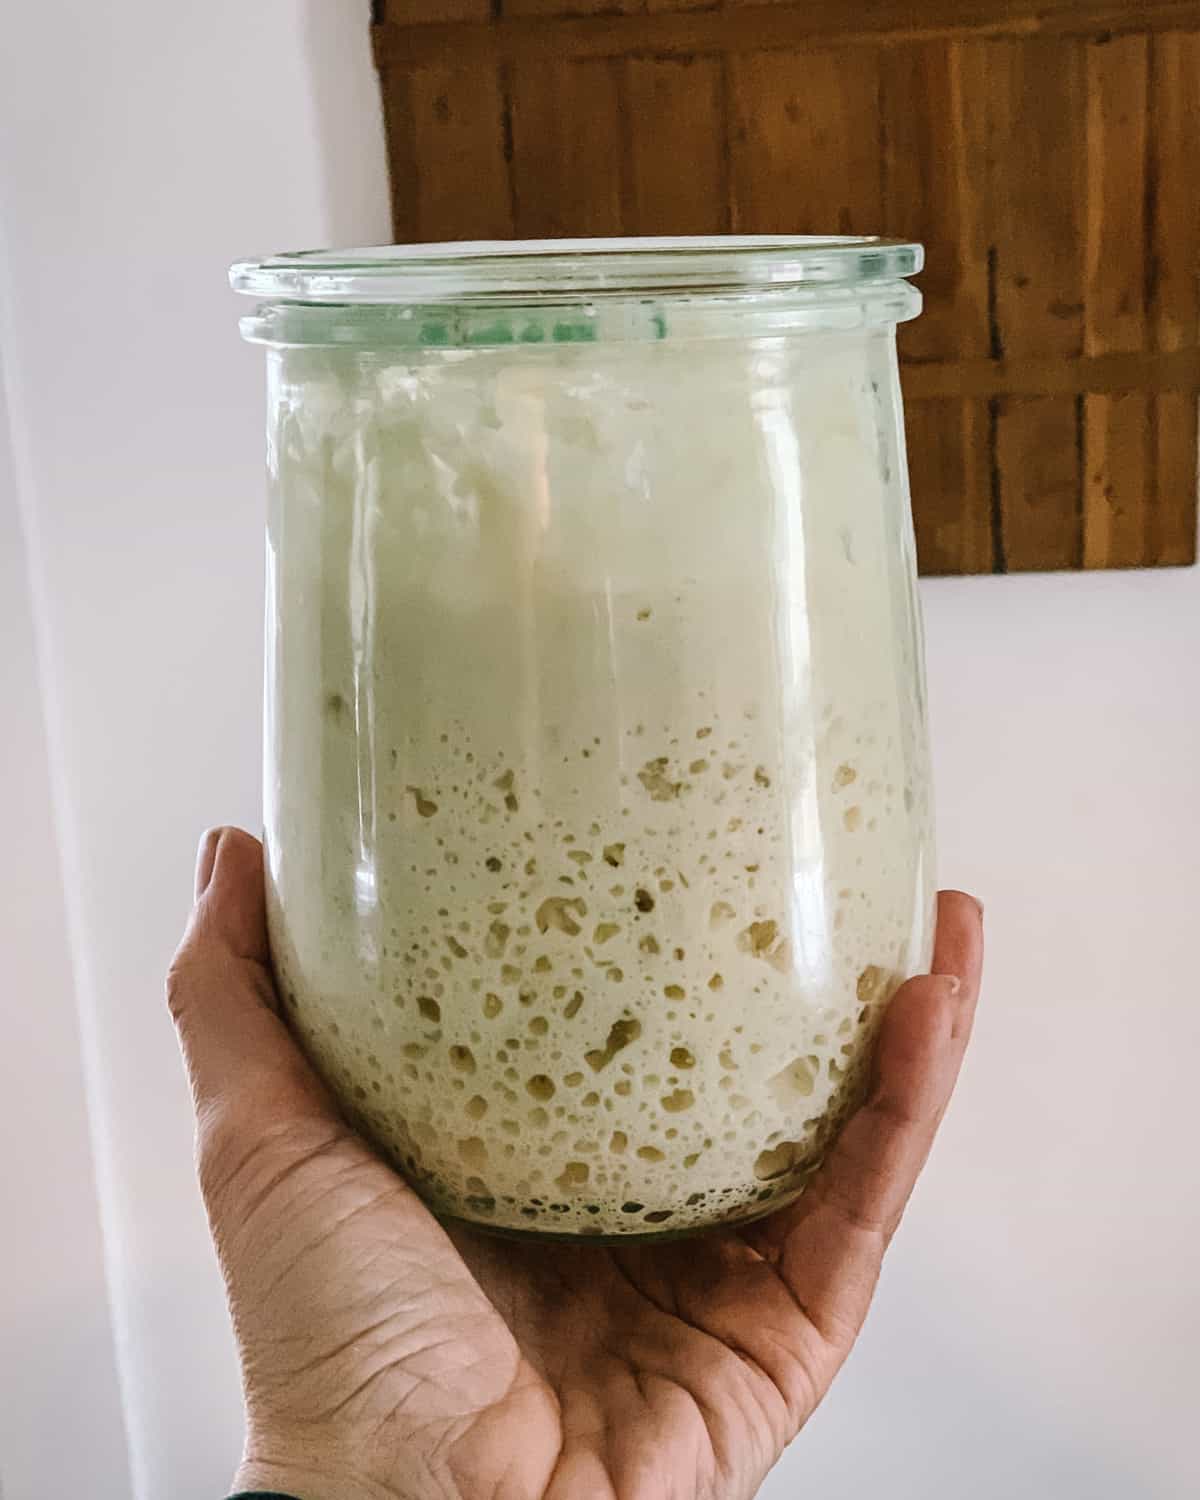
A quart size wide mouth jar is also needed. Weck jars work nicely and come with a glass lid that works well, but a regular mason jar works as well!
If you have a friend that has an active sourdough starter, you can take some discard to help get yours going a little quicker. Just add a tablespoon or so to the mixture on day one.
For the first day I find that it’s best to start with rye flour. It has more nutrients and tends to get the starter going quicker. You can try starting with regular bread flour if you’d like, but I always seem to have better results with rye flour.
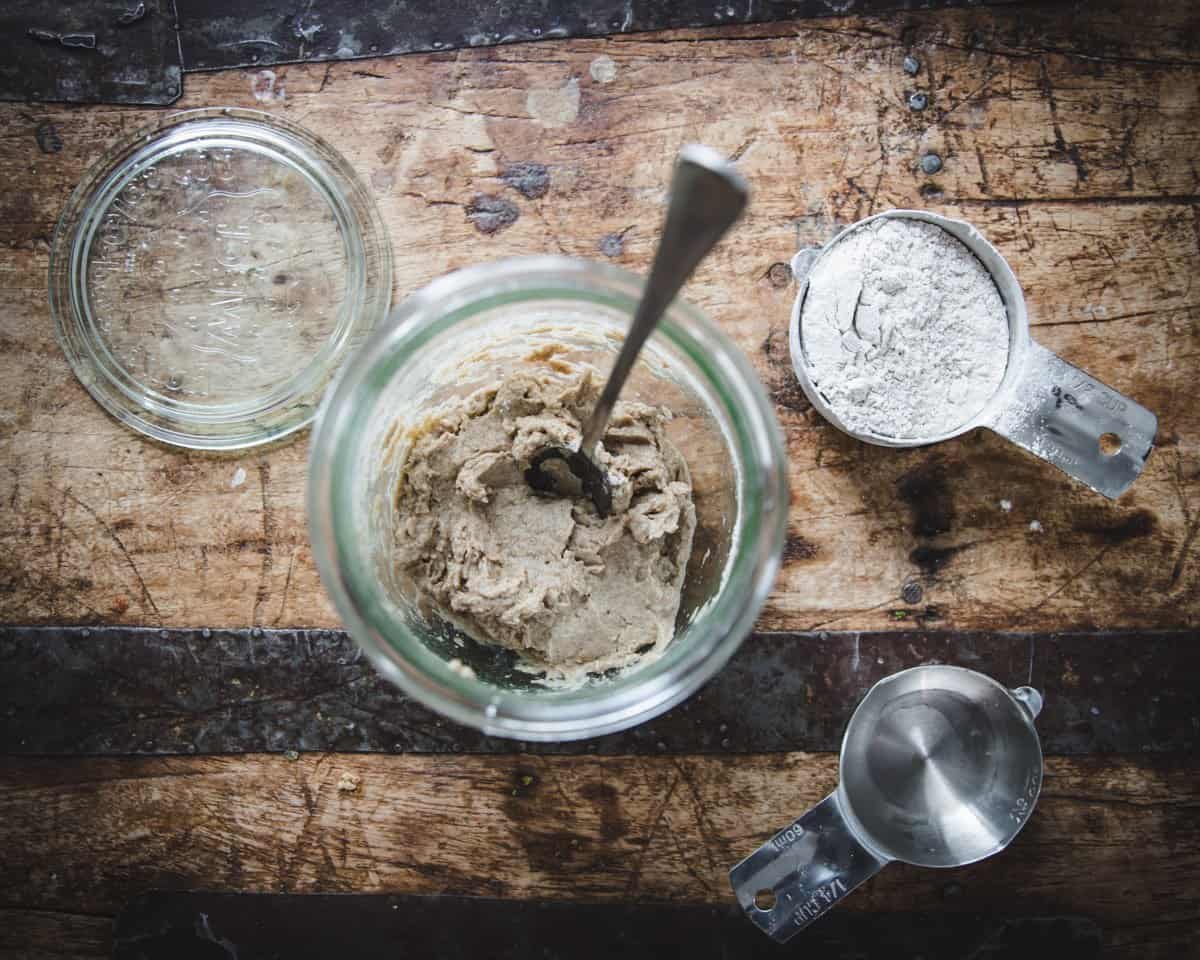
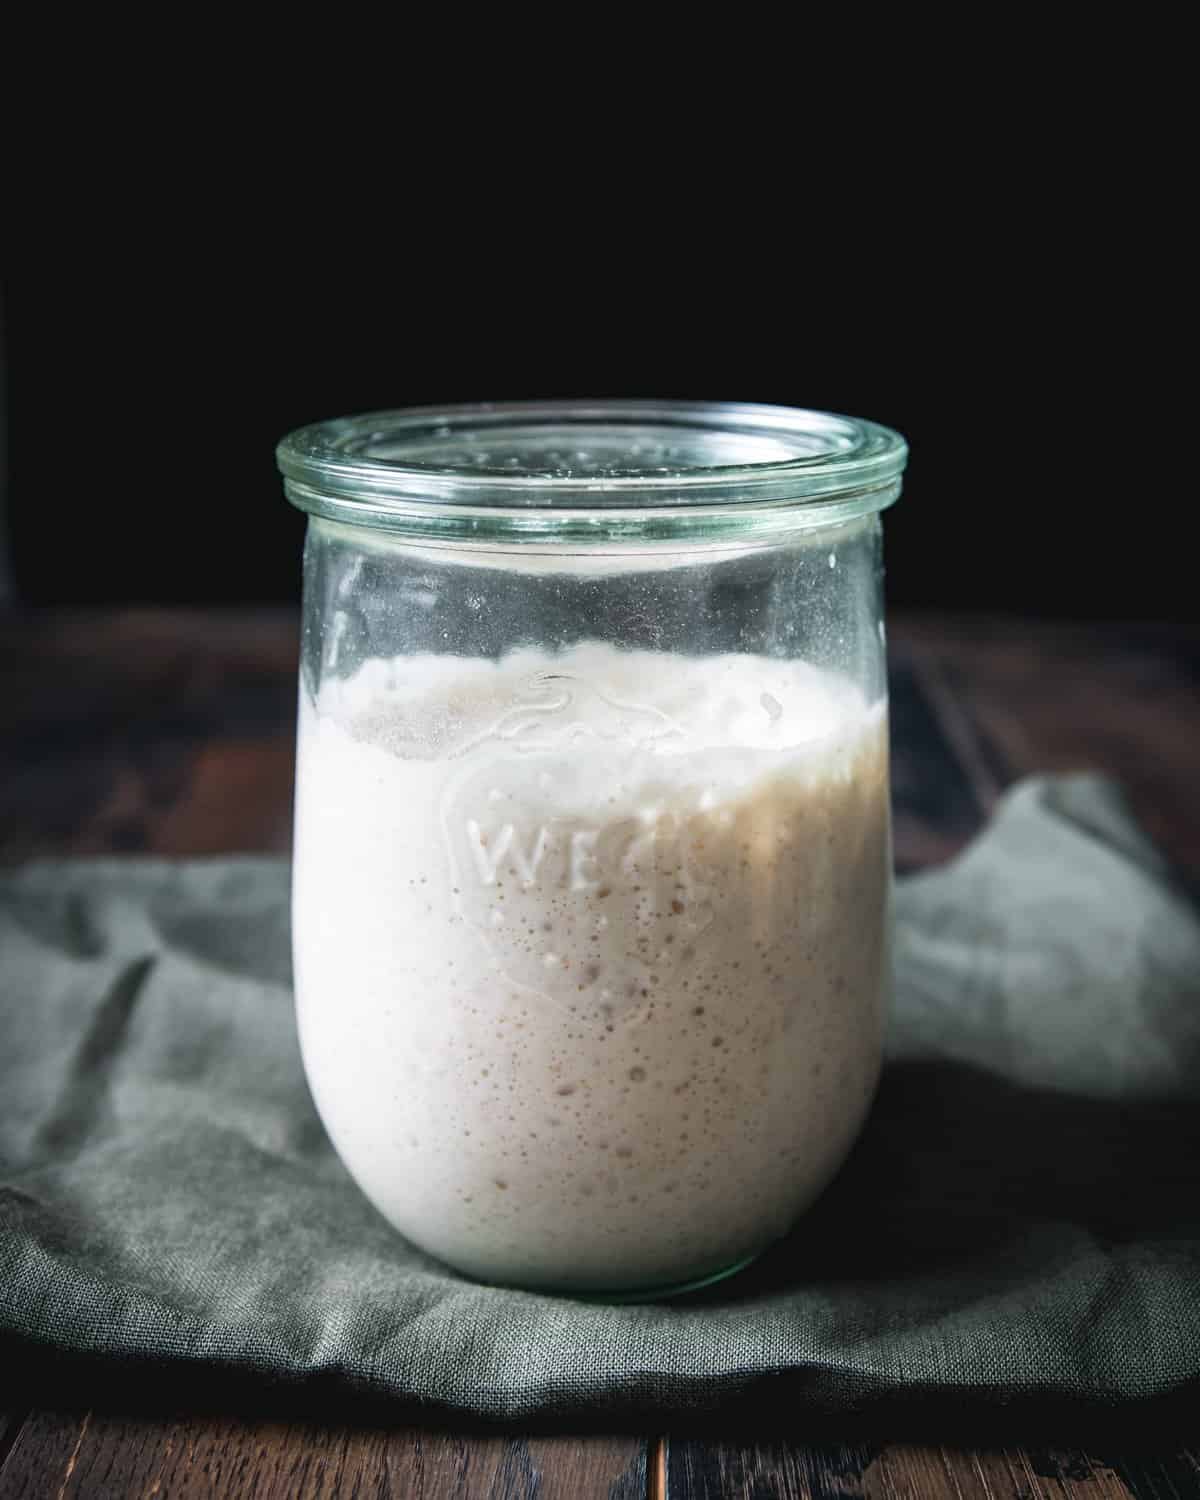
Day 1: Mix, Rest
First, mix together 1/2 cup rye flour with 1/4 cup room temperature water in a glass jar, until it is well incorporated and there is no dry flour remaining.
If needed, a little bit more water can be added to be sure all of the flour is wet.
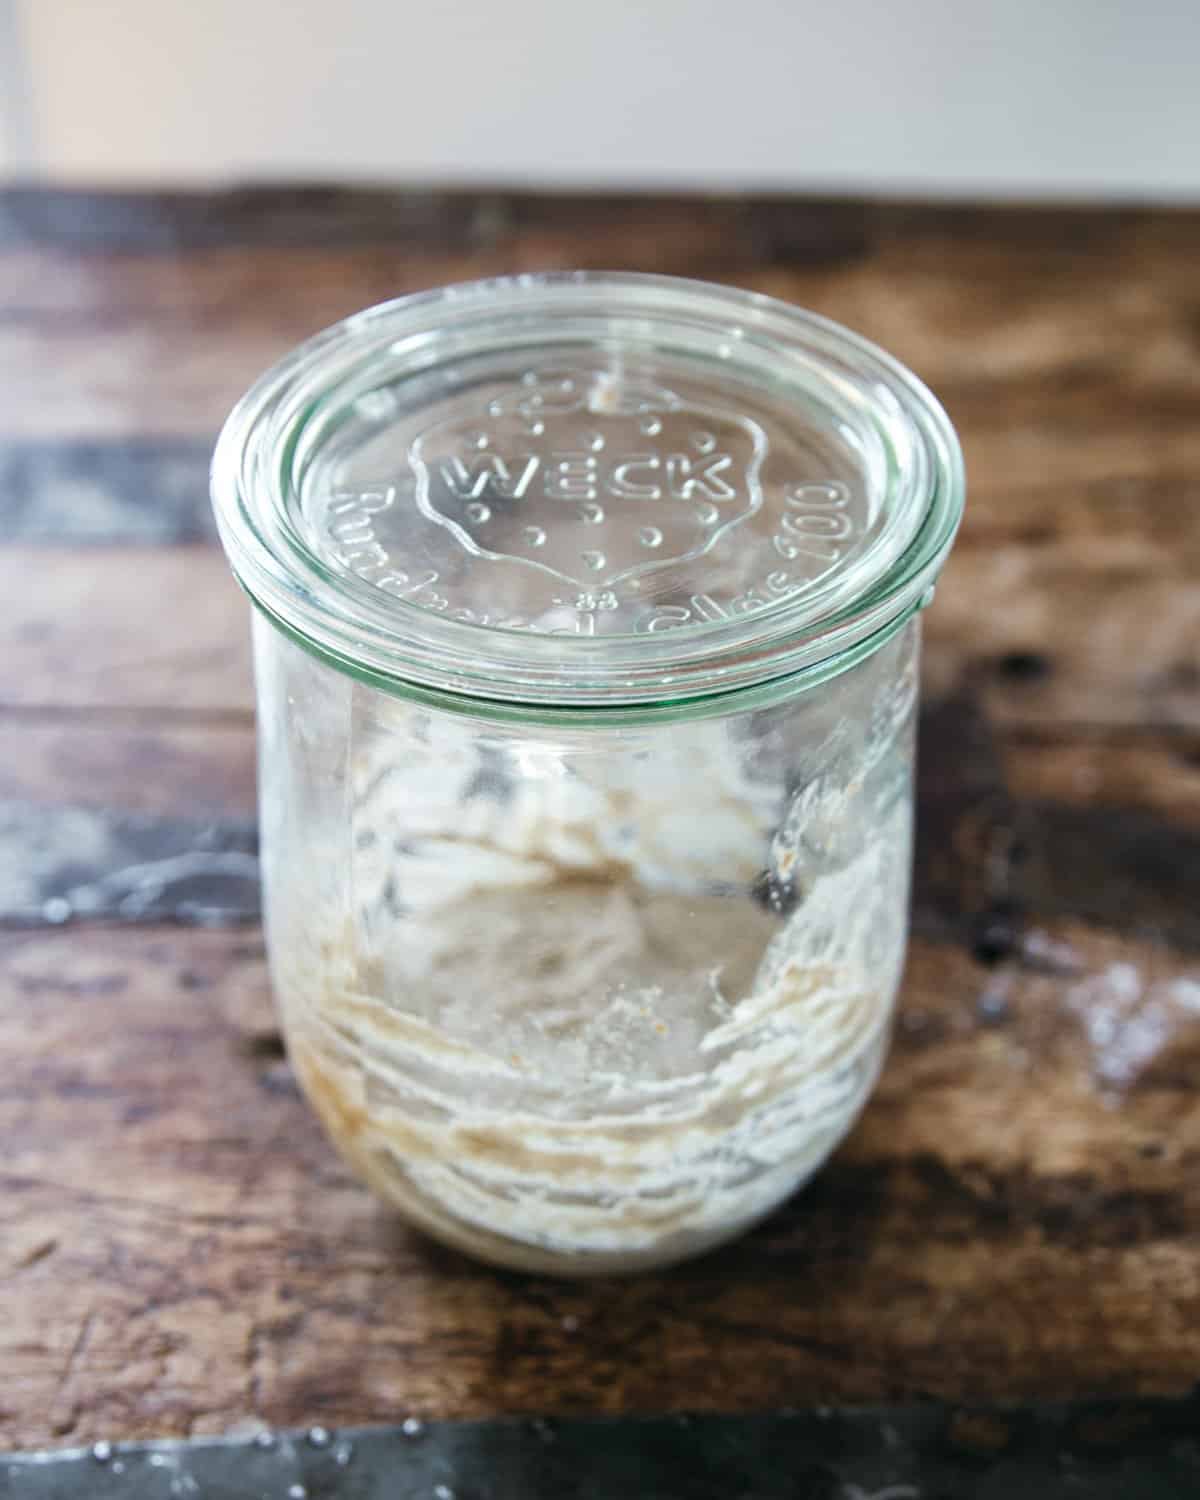
Cover the jar loosely with the lid or a towel and let it sit in a warm non-drafty room temperature place. On top of the refrigerator tends to work well!
Let it sit for 24 hours.
Day 2: Add, Mix, Rest
After 24 hours, take a look at the starter. You may or may not see bubbles, if not that’s ok! I usually don’t see any yet at this point.
Feed the starter a 1/2 cup of bread flour, and another 1/4 cup of filtered room temperature water. Stir it until combined, adding more water if necessary so there is no dry flour left.
Cover the jar, and tuck it away in the perfect warm-ish and non-drafty spot you found to rest for another 24 hours.
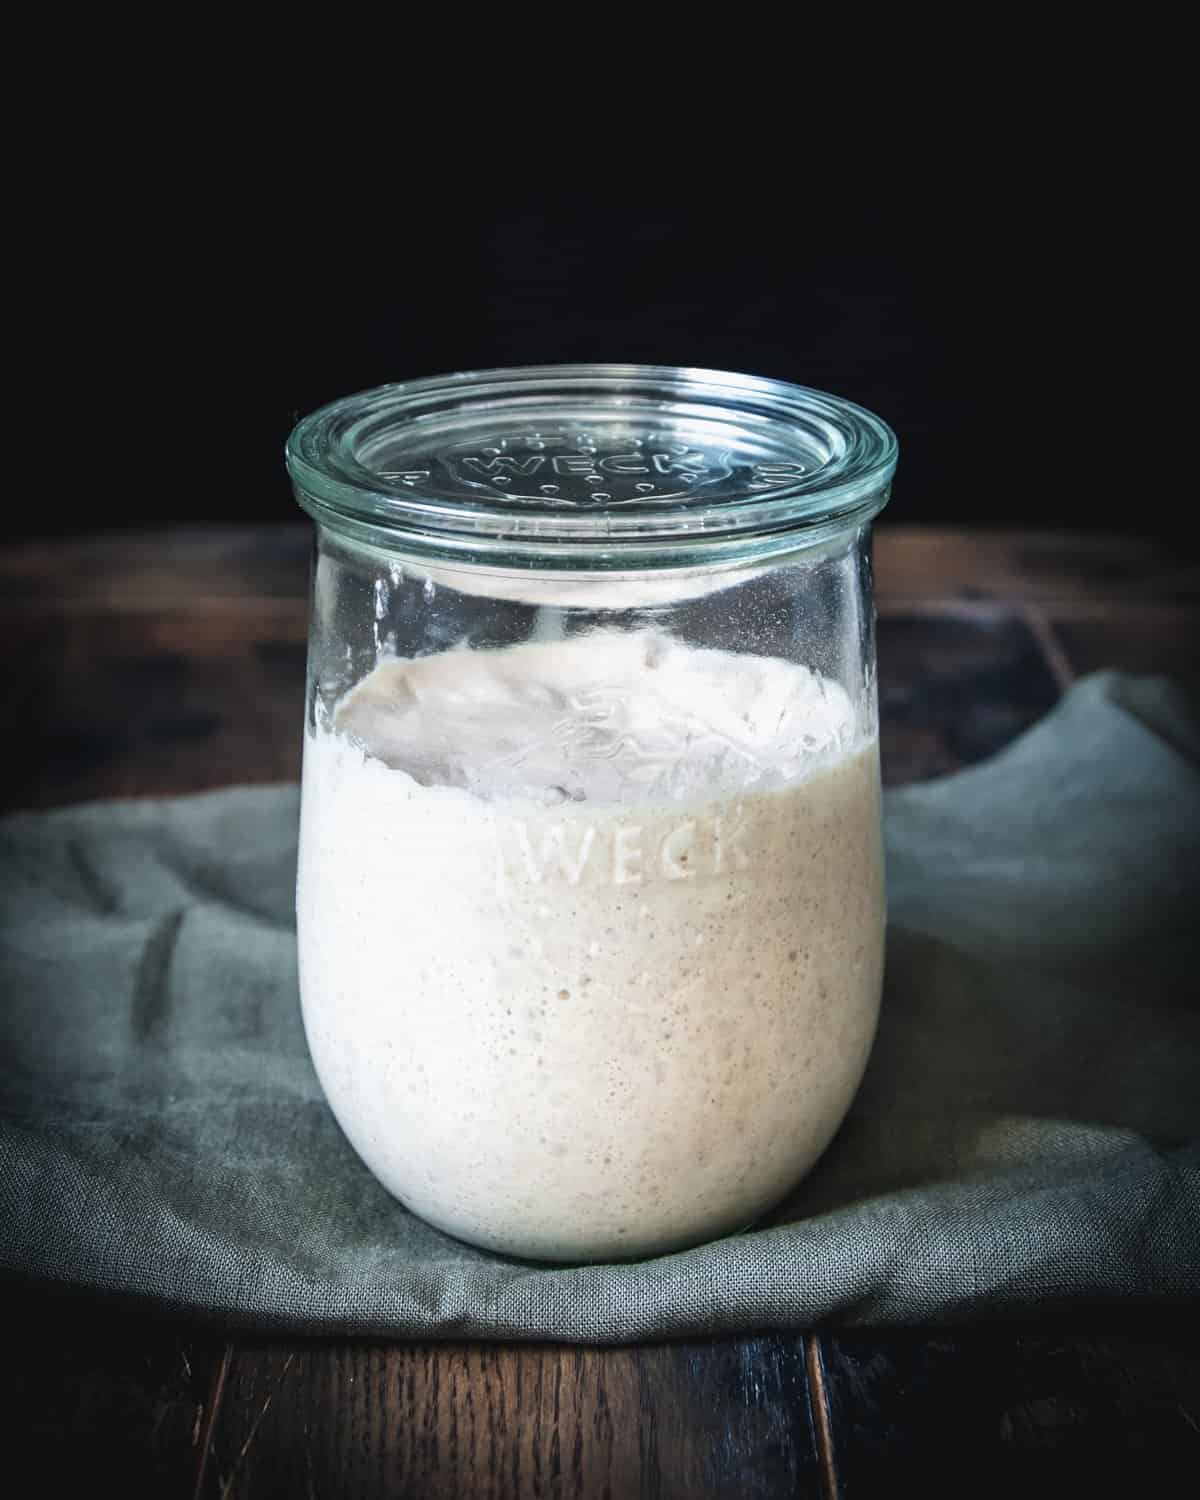
Day 3: Discard, Add, Mix, Rest
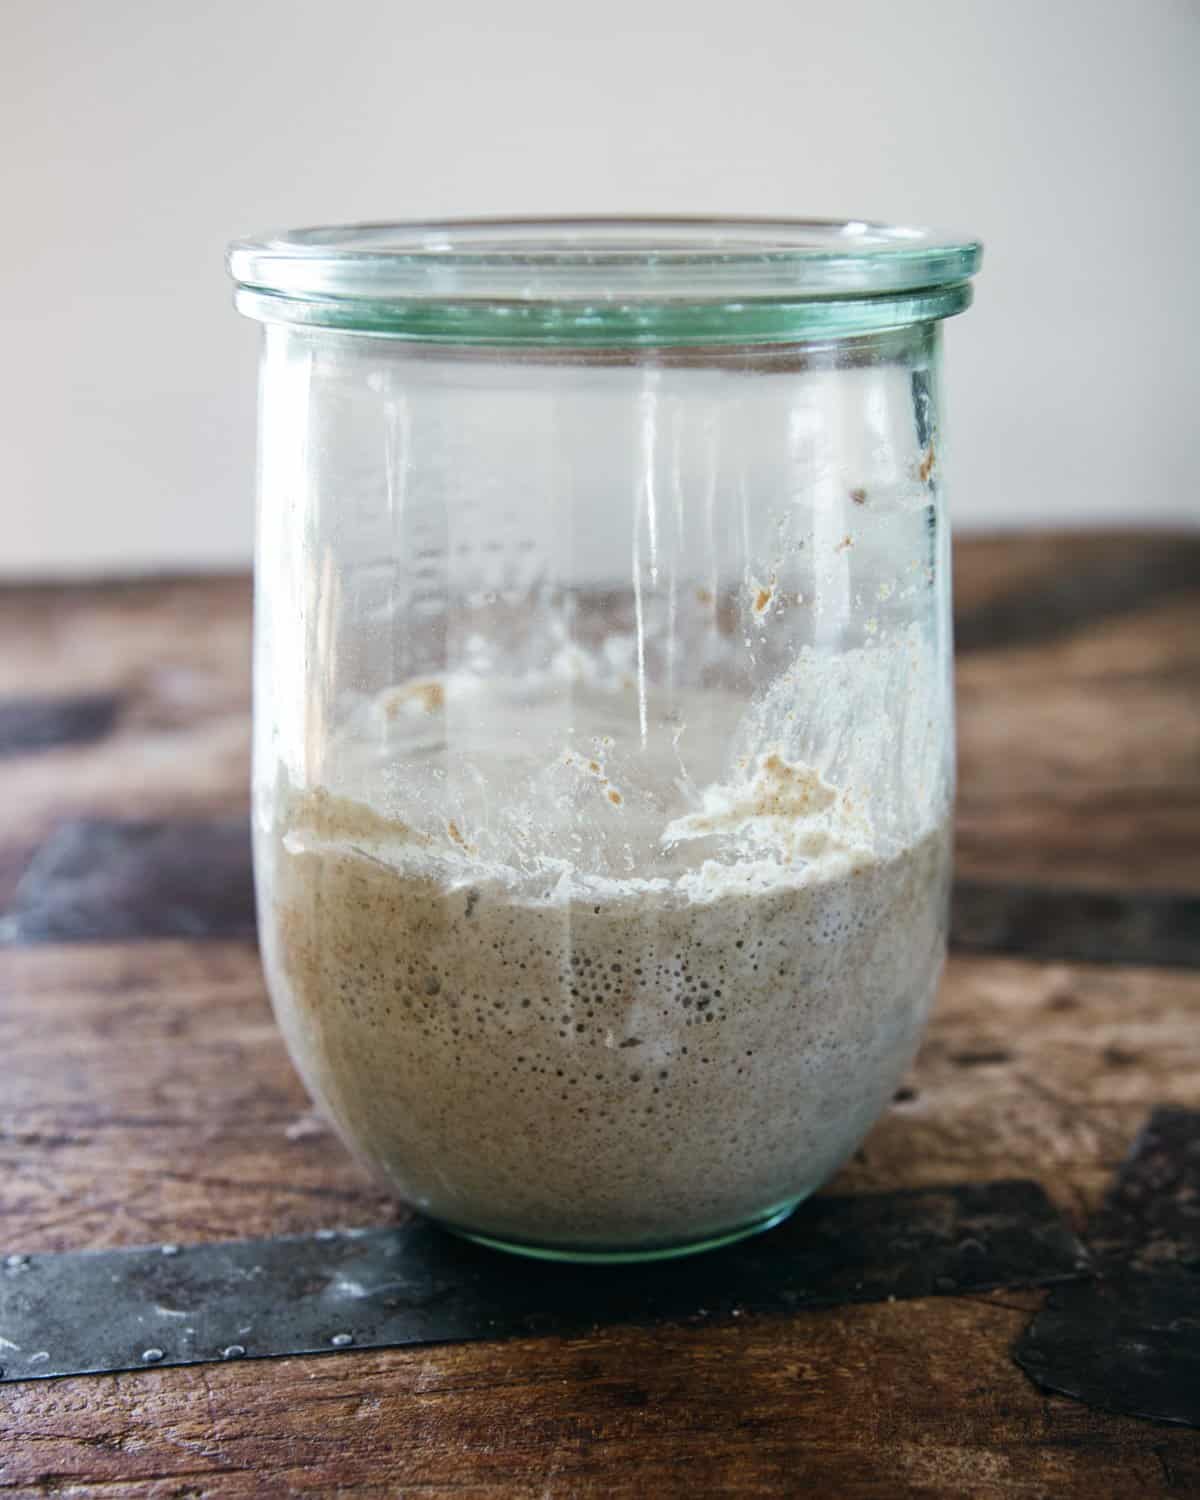
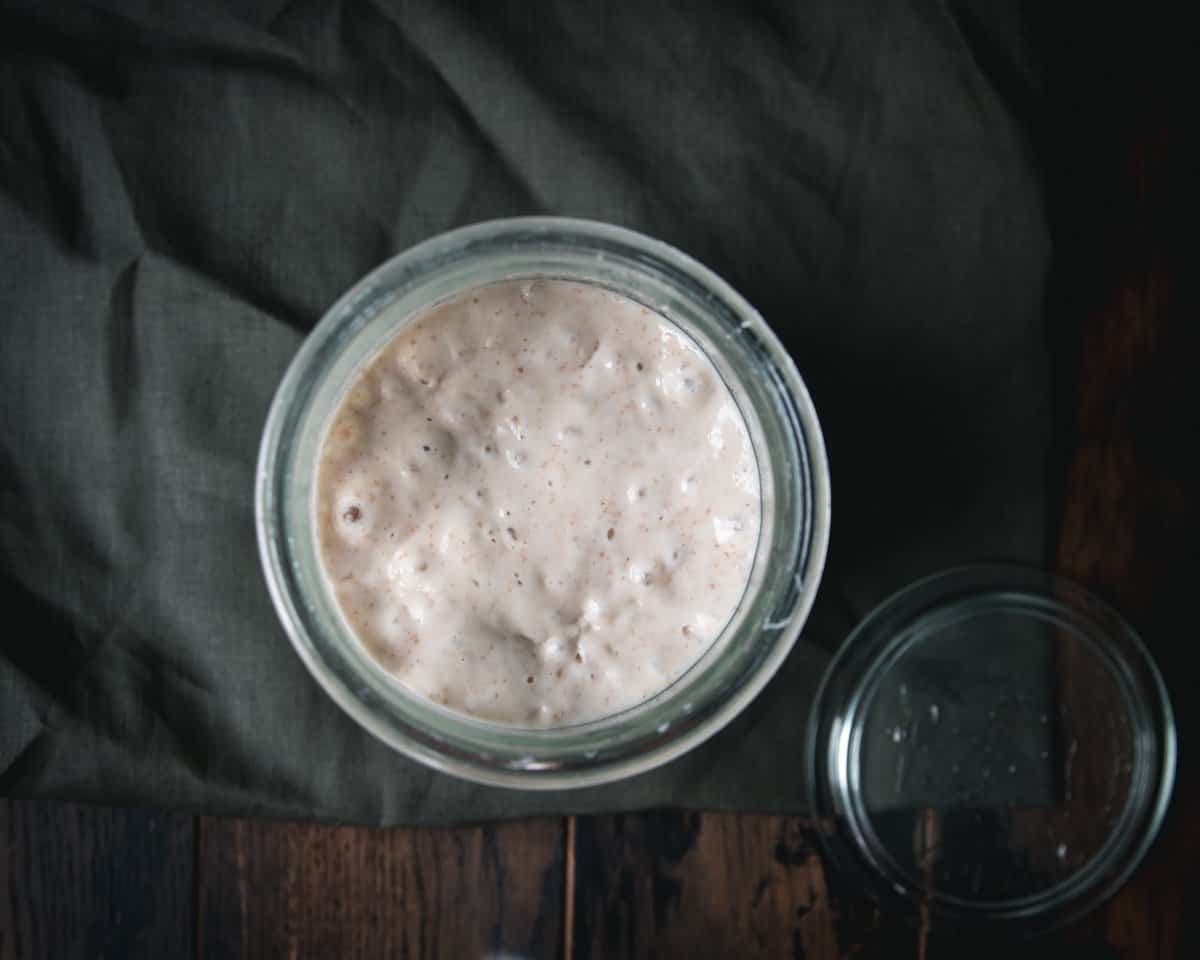
Usually, by day 3 small bubbles will be forming in the jar if they haven’t already. Again, don’t worry if they haven’t.
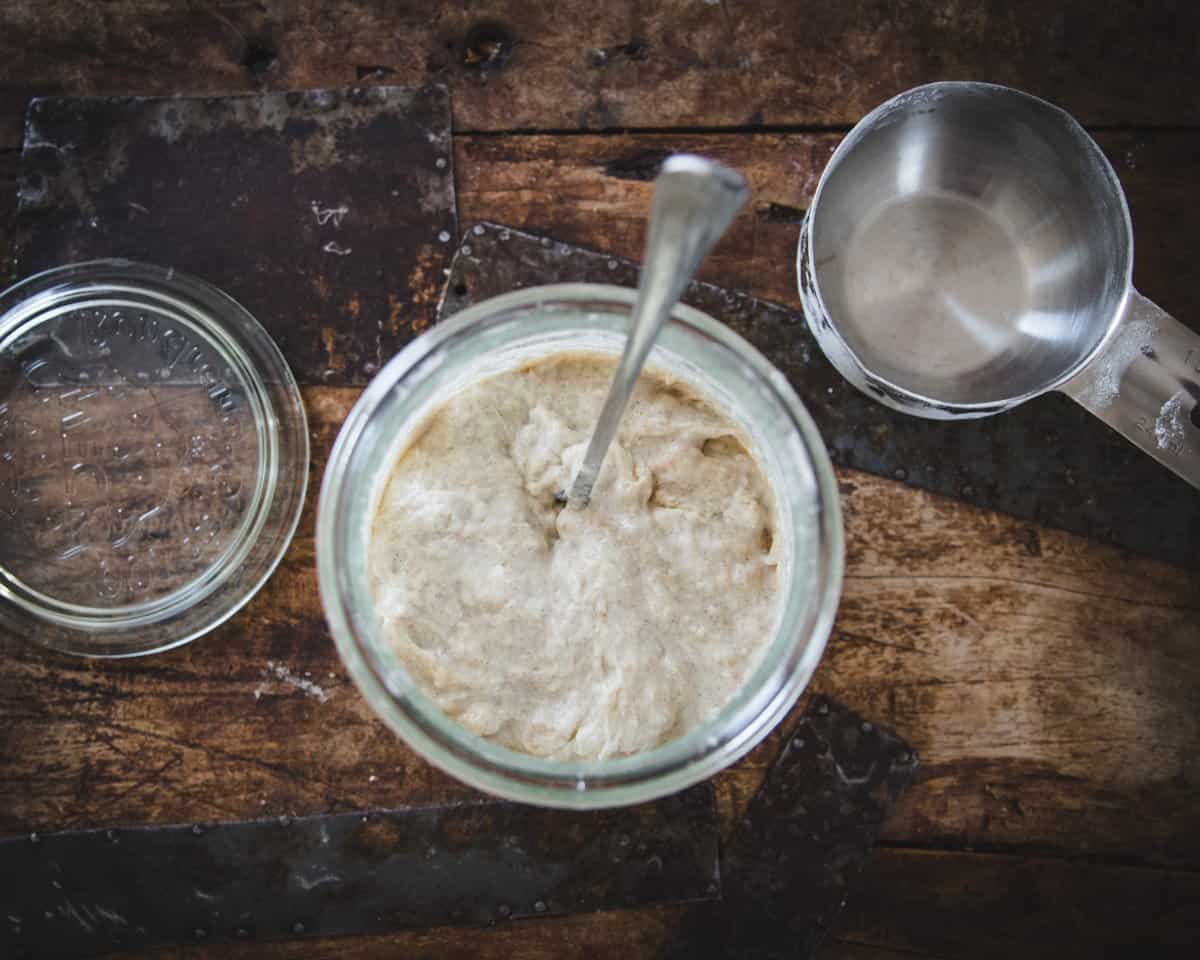
Discard about half of the starter (the discard can be composted). Feed the remaining starter with another 1/2 cup of bread flour, and 1/4 cup room temperature filtered water, stirring to combine into the existing starter.
Cover, and put it back to rest for another 24 hours.
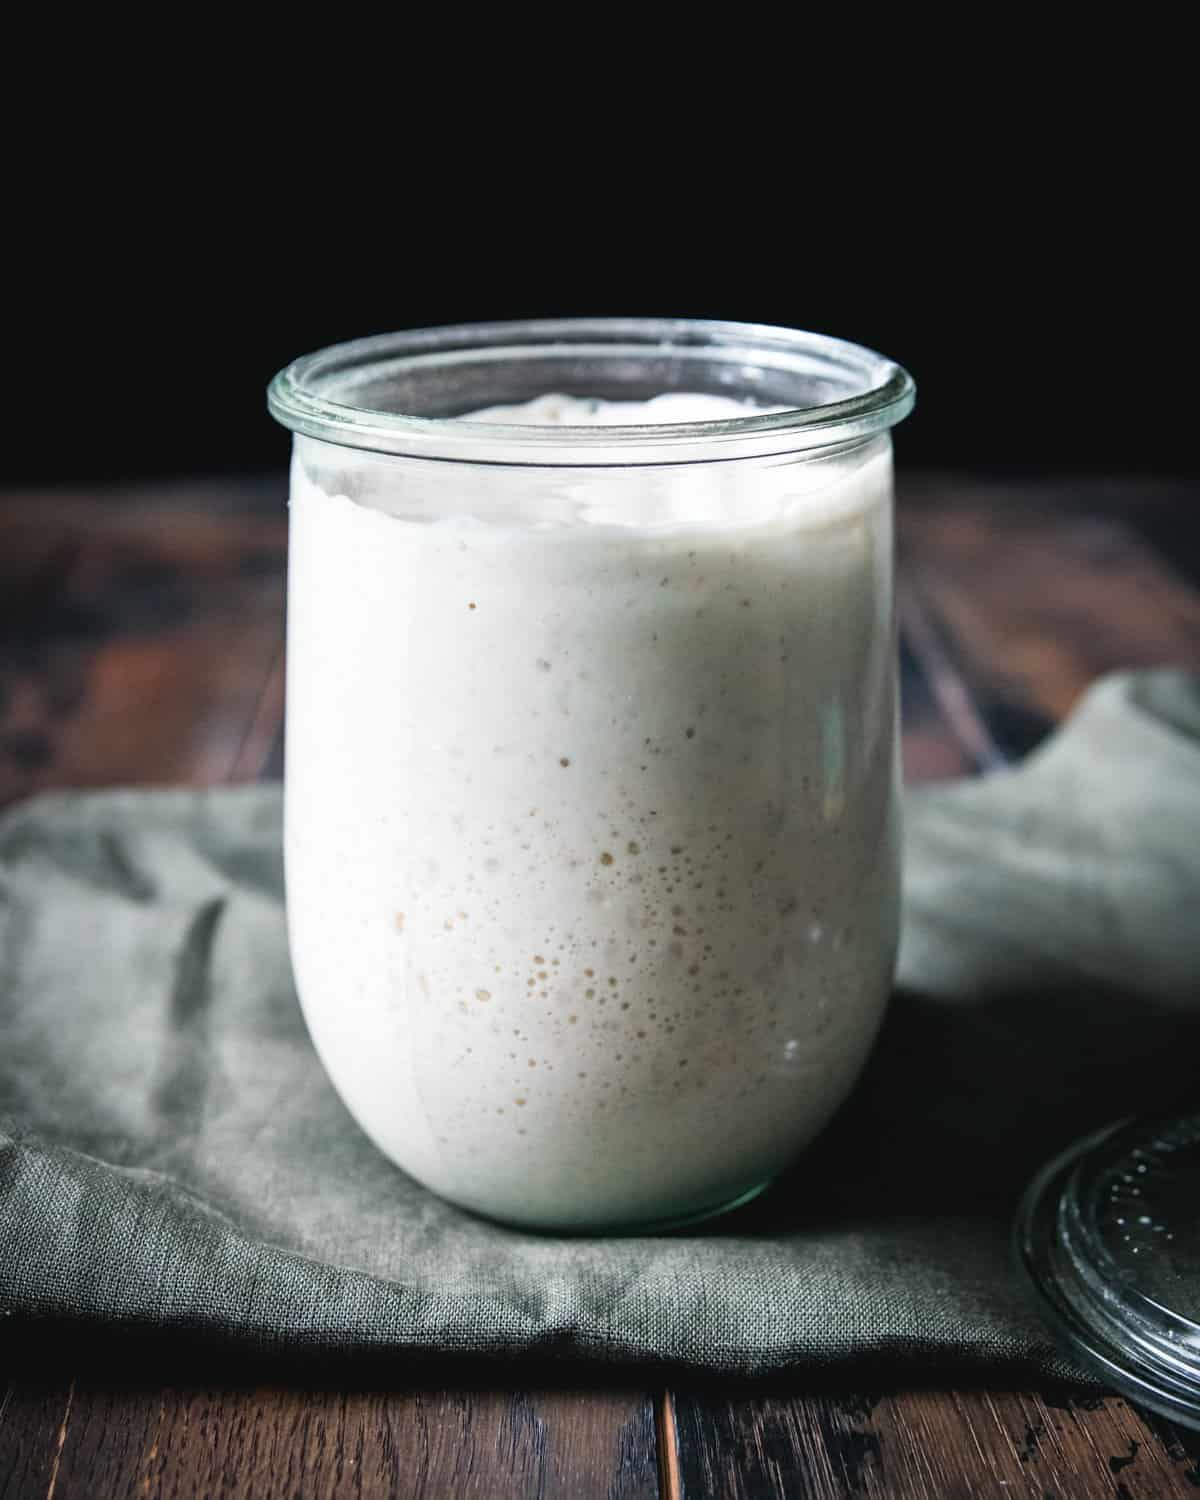
Day 4 and Beyond: Discard, Add, Mix, Rest
Feed the starter with 1/2 cup bread flour and 1/4 cup room temperature water every 24 hours, first discarding around half the amount of existing starter every other feeding.
Note that if your house is very warm, you may need to feed it twice a day as it will produce quicker. On a similar note, if your house is very cold, it may take a while to get bubbling since it will produce slowly.
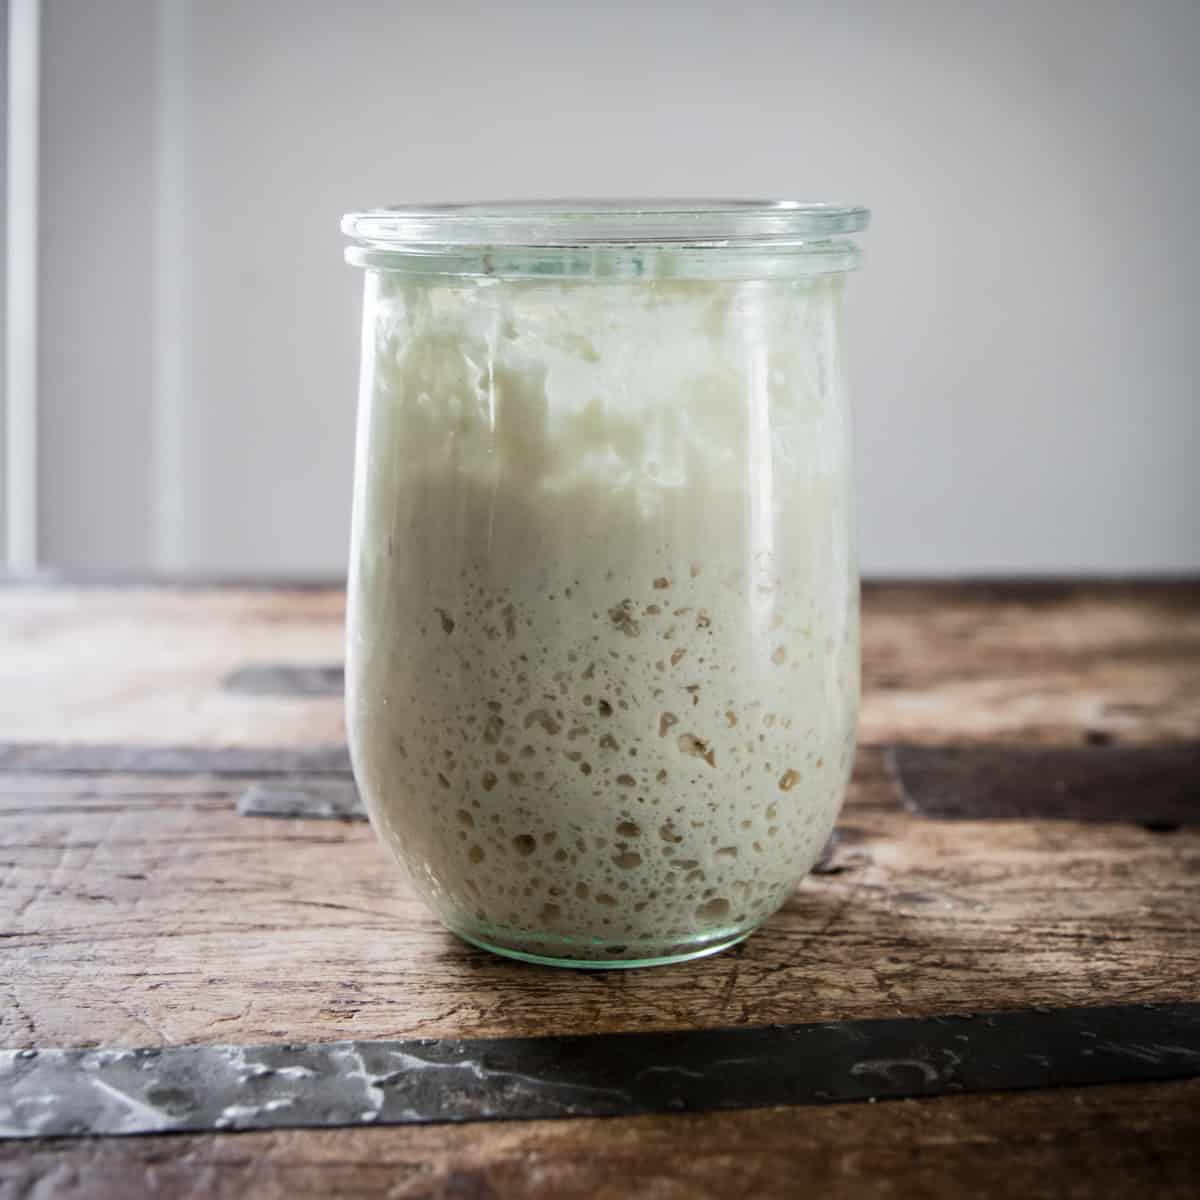
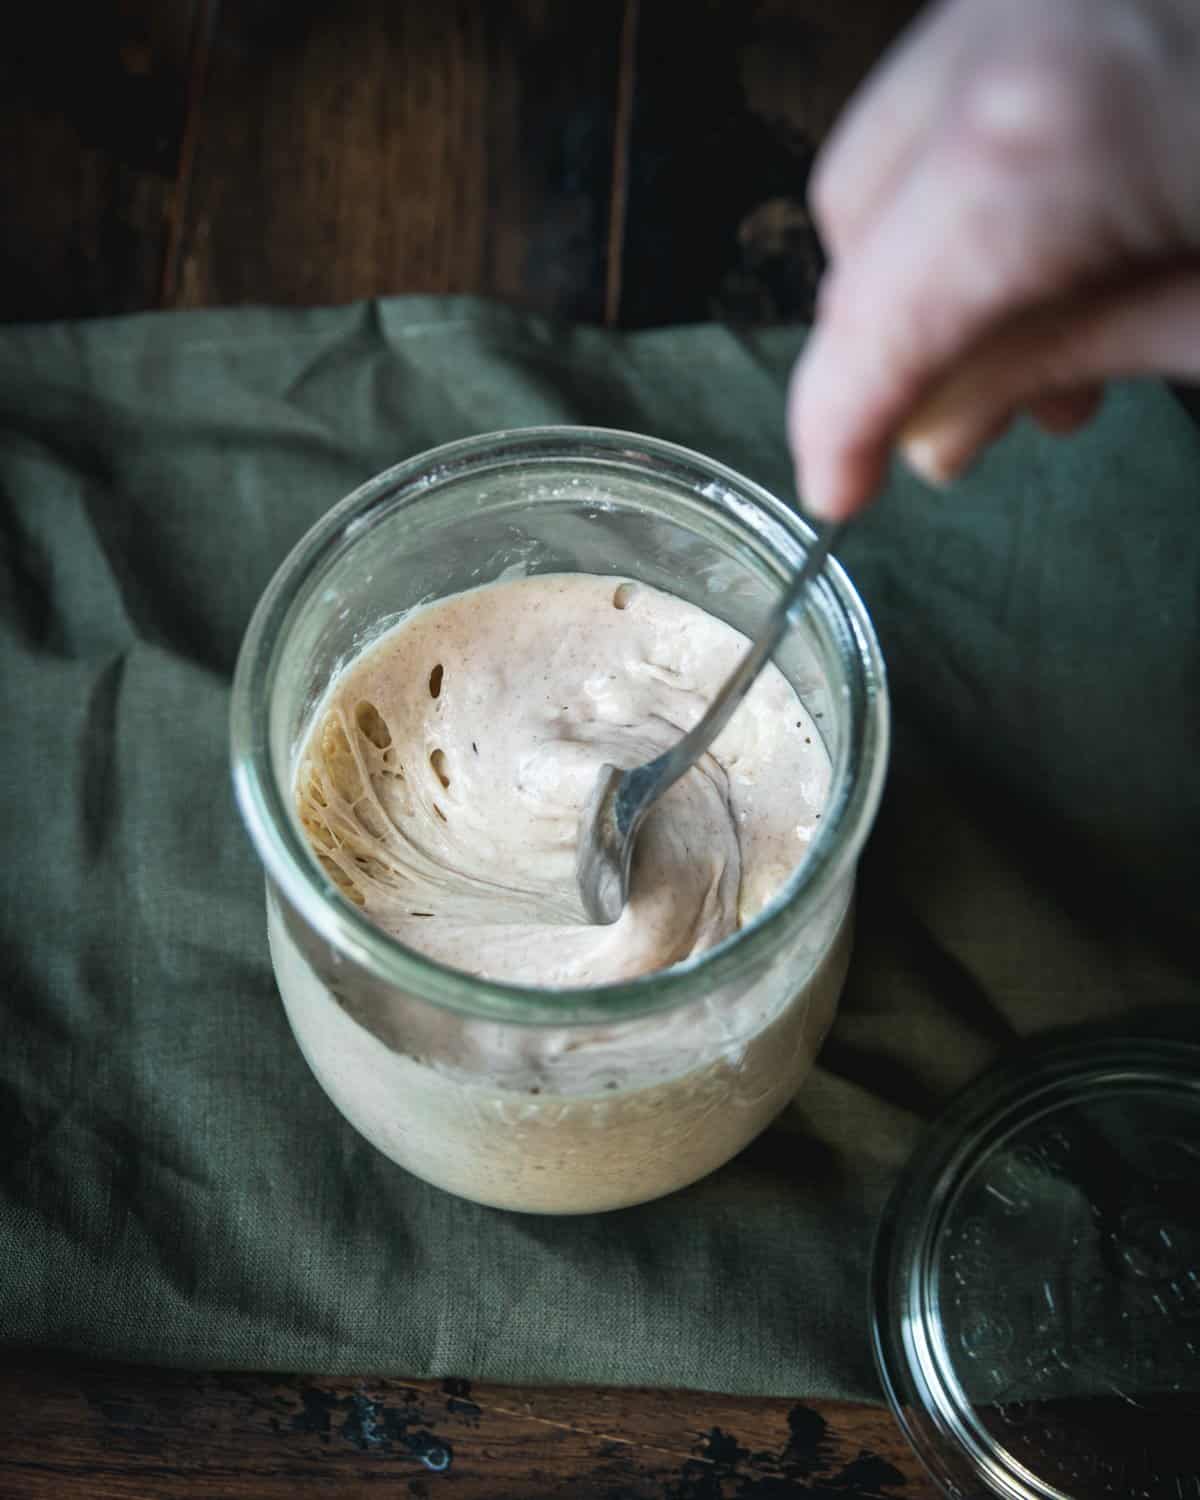
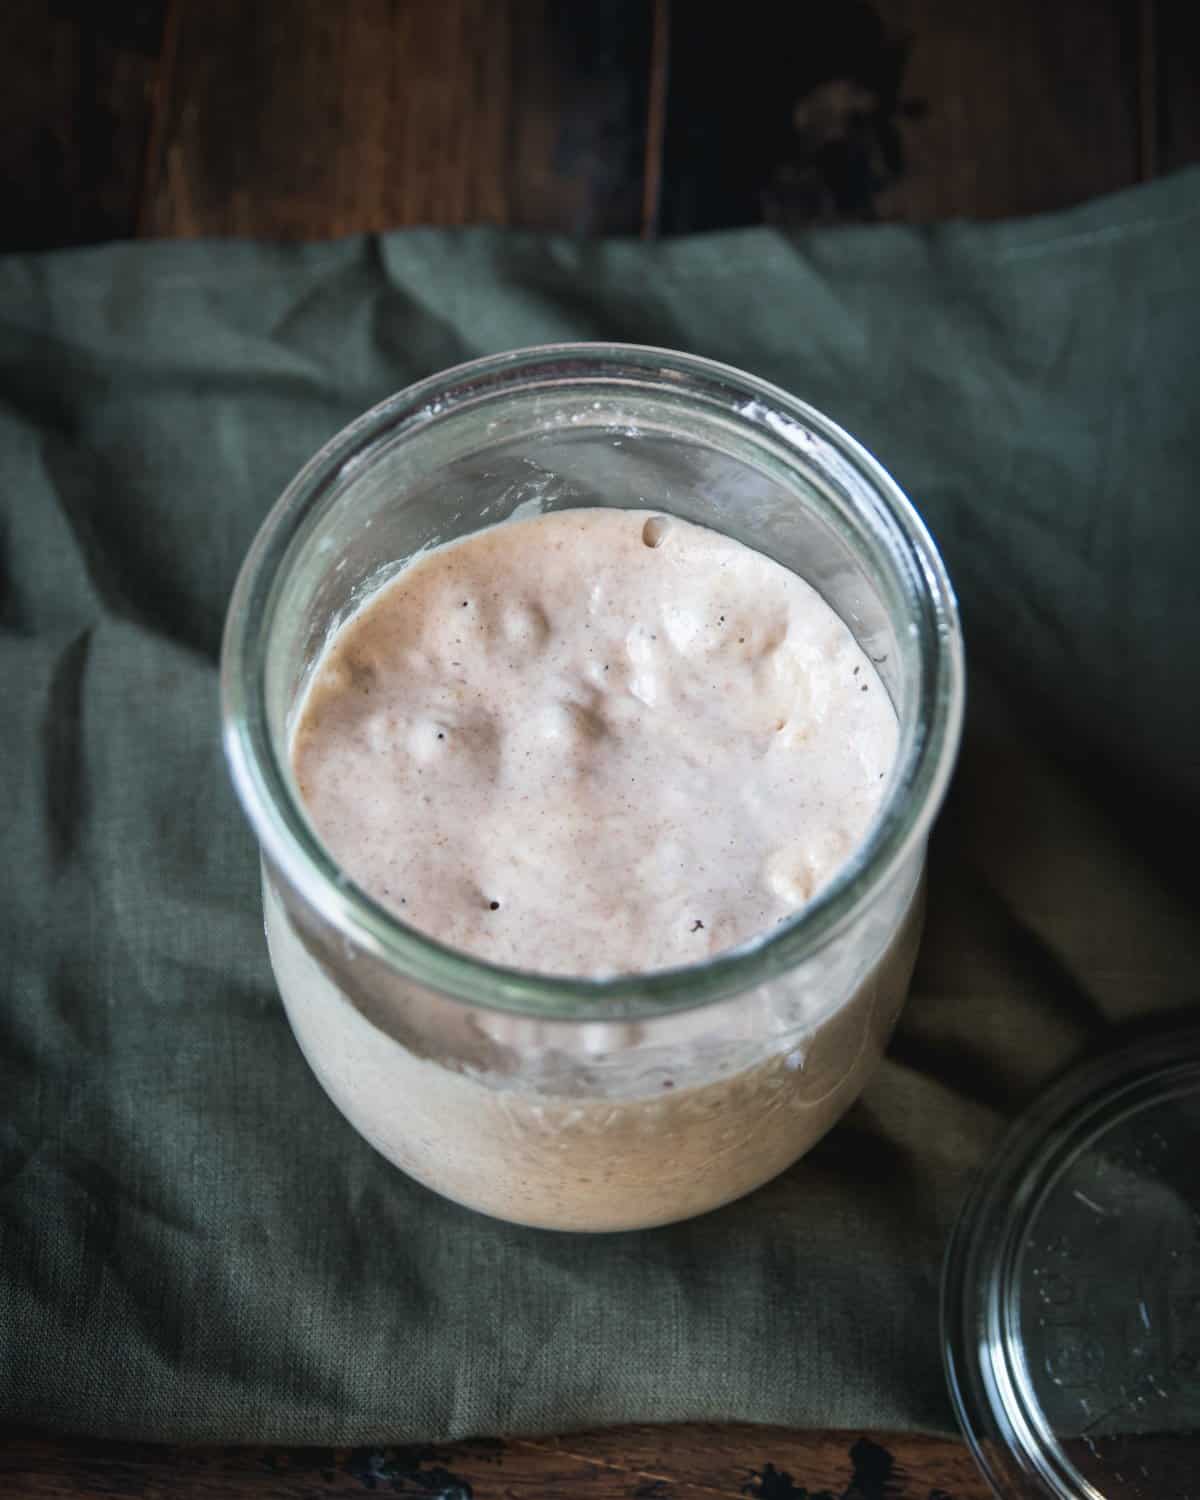
Once your starter is bubbling after every feeding, it is ready to use in recipes!
How to Feed and Maintain a Sourdough Starter
To Feed:
To keep your sourdough starter bubbling away, you still need to “feed” it on a regular basis.
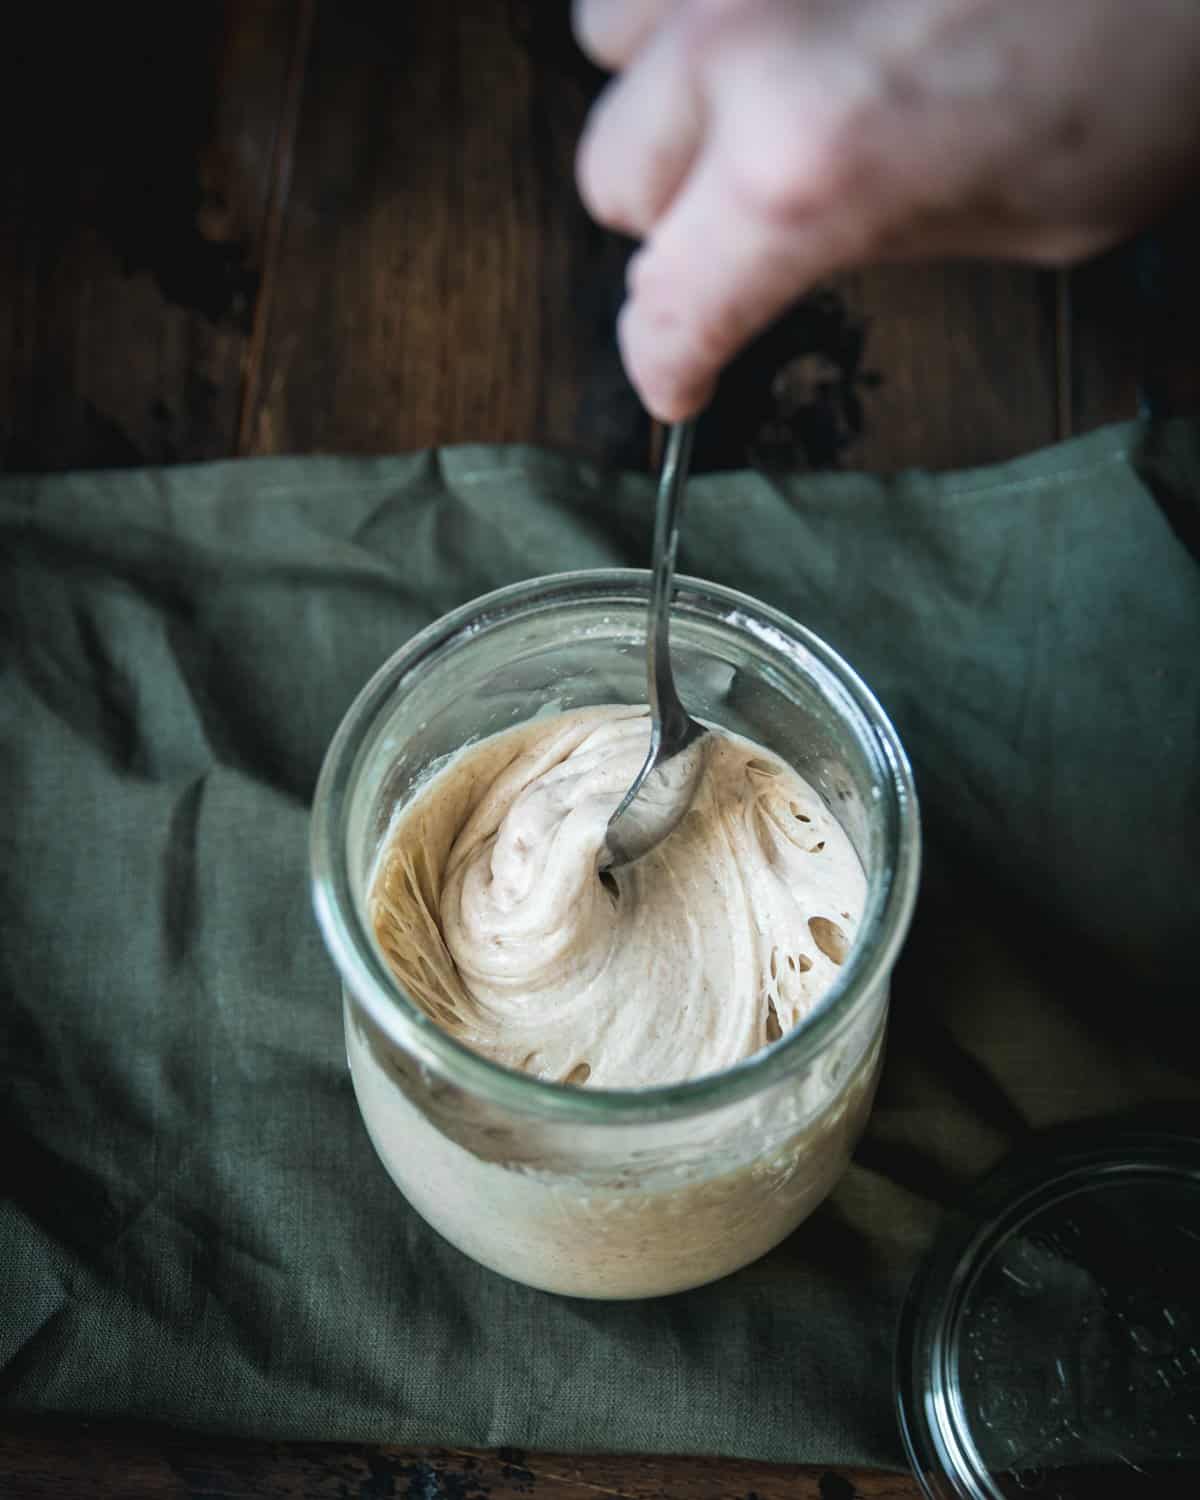
To feed the sourdough starter, continue to add 1/2 cup of flour and around 1/4 cup of room-temperature water every day. Stir it up vigorously (a whisk works well) to distribute all of the wild yeast that is forming.
Discard about half of the sourdough starter every other day, prior to feeding. The discard can be used in sourdough discard recipes or composted. I try to plan my sourdough baking schedule around my discard schedule (or vice versa) so that less goes to waste.
It’s good to keep in mind that sourdough starter, like all fermented foods, has kind of a funky or vinegary smell. It may even smell slightly alcoholic. This is normal and means it’s working!
Sometimes a sourdough starter may take a few weeks to really come into its own. Hone your patience if it feels like a slow beginning. Bake-able bubbling goodness is the goal!
As long as it’s bubbling, everything is ok. Just follow your nose and continue to smell it. As soon as it gets that wonderful pungent sour smell, it’s ready for baking all of the sourdough goodies!
To Maintain:
If you are a die-hard sourdough baker who is using your starter multiple times throughout the week, the best route is for you to keep your starter at room temperature on the counter somewhere out of the way and continue to feed it on a regular daily schedule.
If you are using it less regularly, but would still like to keep it around (some have been passed down generations!), it is safe to store it in the refrigerator. This way you can feed it just once a week.
The refrigerated starter should rest on the countertop to warm up to room temperature for a couple of hours before each feeding. Then discard and feed as usual before putting it back in the fridge, unless you will be using it for baking.
For forgetful folks, such as myself, a weekly phone alarm reminder is great for this! Out of sight out of mind is a true phenomenon, and your starter won’t yell “Feed me Seymore!” from the refrigerator. It is important to remember to feed it if you want to keep it alive, healthy, and usable.
If you opt for refrigerator storage, when you take it out for use there may be some clear liquid on top. This is called “hooch” and isn’t harmful, you can either pour it out or stir it in, whatever floats your boat.
To use your refrigerated sourdough starter, remove it from the refrigerator and feed it once. Then let it sit overnight (or about 12 hours) until it warms up to room temperature and begins bubbling again. Then it is ready for your sourdough recipe!
Sourdough Starter Troubleshooting
Sourdough Starter isn’t Bubbling:
If you’re having trouble getting your starter to bubble, start by doing a few feedings with rye flour instead of bread flour. That will often get it going.
You can try adding fruits that have natural yeast on them to the starter, like grapes, blueberries, or juniper berries (which work wonderfully in a wild yeast starter for homebrewing!). You only need to add 2-3 grapes or berries to do the trick.
Smashing the grapes helps by giving the yeast a little sugar to eat, which in turn makes it produce the lovely bubbles you are looking for! After a couple of days with the smashed grapes, remove them with a fork.
Another last resort trick is to add a tiny pinch of regular bread yeast (like a few grains) to the starter. Some people think this is “cheating,” but as long as you let it sit out on your counter and continue to feed it with flour and water it will still ferment and become sourdough. The yeast just gives it a bit of a head start.
I always like to try to get it started with wild yeast for a few days first, but sometimes it needs an extra boost.
The Sourdough Starter isn’t Progressing:
In colder regions and in winter months, it’s possible that your home is too cold at times for you to get a good bubbly starter going. I’ve found that if you feed it less flour (since it’s working slower), and use warmer than room-temperature water, it can do the trick to get it bubbling!
It’s also helpful to try to find the warmest place in your house, such as near a heater vent or wood stove (just make sure it’s not too hot).
Sourdough Starter Has Collapsed:
If your sourdough starter looks collapsed, small, deflated, or sad, usually the reason is missed feedings. Try getting back on a regular feeding schedule, or reviving it with the instructions you can find in the FAQ section below.
Keep in mind there is a natural process of growing and deflating a little in between feedings. If it’s minimal it may be nothing to worry about if you have been feeding it regularly.
Mold Growing on Sourdough Starter:
Although uncommon, if you live in a very humid environment, you may occasionally get mold on your sourdough starter. You can identify mold if it’s fuzzy, and tinged with peach or pink. If this is the case, you will need to start over and not use the moldy one.
However, mold is rare. If it’s not truly moldy, try to revive the sourdough starter (found in the FAQ section).
F.A.Q.’s
Is sourdough starter a fermented food?
Yes! Sourdough starter is a fermented food and is known for all of the same wonderful gut soothing bacteria that other lacto-fermented foods have. It also helps to break down the wheat in sourdough bread recipes, making it easier to digest with helpful probiotics.
How long does it take a sourdough starter to ferment?
A starter should be fermented, bubbling, growing larger, and ready to use within 5-10 days. It can sometimes take up to a couple of weeks if you are in a very cold climate during winter.
What is the best flour to use?
I find that starting with rye flour tends to work best as it has a high level of nutrients to help get the starter going. The most reliable brand of rye flour I’ve used for a sourdough starter is Bob’s Red Mill Organic Dark Rye Flour.
After day one I find that switching to bread flour works great. If your starter is not bubbling much or getting going as quickly as you’d like, you can always give it another feeding or two with rye flour. That tends to move it along faster.
Can I use tap water?
For city water, it’s best to filter it before using it in your sourdough starter. Regular tap water can be problematic as it usually contains some amount of chlorine, which can inhibit fermentation.
That said, I’ve had luck with using water straight from the tap, so it definitely depends on the quality of your tap water.
How long do I have to wait after I feed the sourdough starter before using it in a recipe?
The sourdough starter should be nice and bubbly when using it in a recipe. The amount of time this takes depends on several factors such as warmth and how active your starter is, but it’s usually 4-8 hours. For many recipes this doesn’t matter too much though and discard is fine to use.
How long will it take for my sourdough starter to become active?
You should begin seeing some bubbling starting within the first couple of days. However, it won’t be ready to use in recipes for about 5 days or more.
How do I know when my sourdough starter is ready?
You will know your sourdough starter is ready once it is good and actively bubbling after every feeding. It will also smell like sourdough.
Should I stir my sourdough starter in between feedings?
It’s not necessary to add an extra stir schedule on top of the feedings, but you can. Some find that the extra oxygen can help the process along.
Do I leave the lid of the container on or off?
When resting, the sourdough starter jar should be covered loosely with a towel or a jar lid. Make sure some air can still escape so it doesn’t build pressure.
Why does my sourdough starter have a fermented smell?
If the sourdough starter smells fermented, that is a good thing! The goal here is to ferment the flour into a sour, yeasty, bubbling, and living thing that will take your bread to the next level.
Should I feed and mix the sourdough starter before discarding some, or after?
Discard first, and then feed the starter mixing in with the reserved starter in your jar.
What is hooch and what do I do with it?
Hooch is a byproduct of fermenting yeast in a liquid form on top of your sourdough starter at times. It’s neither harmful nor helpful in particular, it’s fine to either stir it in or discard it.
How do I revive my neglected sourdough starter?
I find the best way to do this is to discard most of the starter, only leaving about a tablespoon of starter in the jar. Then feed as normal. It can be helpful to feed with rye flour to give it nutrients and jump start it again.
Can a sourdough starter be stored in the refrigerator?
Yes, once the sourdough starter is rolling and ready for use, it’s possible to slow its roll by storing it in the refrigerator. This is a good option for most people who don’t plan to use it multiple times per week.
Once refrigerated, modify the feeding schedule to once per week. Take it out to warm it up to room temperature for a couple of hours. Discard some if needed, then feed it and then return it to the fridge. Make sure to warm it to room temperature before using it in a recipe.

How do I use my sourdough starter?
There are many ways to use sourdough starter, but making sourdough bread is a great start!
Take a look at whatever sourdough recipe you want to make and determine when you should feed your starter so that it is nice and bubbly when it’s time to bake.
Then take out the amount of starter needed for the recipe, feed the starter again, and proceed!
Here are a few of my favorite, delicious sourdough recipes:
- No-Knead Sourdough Bread
- Sourdough Rye Bread
- Sourdough Pizza
- Sourdough Blueberry Pancakes
- Sourdough Naan Bread
- Mini Sourdough Appetizer Pizzas
- Sourdough Flatbread
- Sourdough Discard Bagels

How to Make Sourdough Starter
Equipment
Ingredients
Day 1
- 1/2 cup rye flour
- 1/4 cup water
Days 2, 3, 4 and Beyond
- 1/2 cup bread flour
- 1/4 cup water
Instructions
Day 1
- Stir together the rye flour and water in a glass jar until they are fully incorporated and no dry flour remains. A little more water can be added if needed.
- Cover the jar with a lid or a towel and leave it in a warm room temperature place away from cold drafts.
- Let it sit for 24 hours.
Day 2
- After the first 24 hours you may not see any bubbles forming and that is ok.
- Feed the starter 1/2 cup bread flour and 1/4 cup water and stir to combine well. A little more water can be added if needed so that there is no dry flour in the starter.
- Cover the jar and let it sit for another 24 hours.
Day 3
- At this time small bubbles can usually be seen forming in the jar.
- Discard approximately half of the starter and feed the remaining starter with 1/2 cup bread flour and 1/4 cup water and stir to combine.
- Cover the jar and let it sit for another 24 hours.
Day 4 and Beyond
- Feed the starter with 1/2 cup bread flour and 1/4 cup water every 24 hours, discarding approximately half every other feeding.
- If it is very warm in your house you may need to feed the starter twice per day.
- Once the starter is bubbling up after every feeding, it is ready to use in recipes.
Notes
- The sourdough starter can be kept in the refrigerator when not in use. Simply put the jar covered with a lid in the fridge right after feeding it. It will keep for about a week at which time it will need to be fed again. Bring the starter to room temperature and feed it before using it in recipes.
- Please see the full blog post for troubleshooting tips and FAQ’s.

Hi, I tried making a sourdough started using wild yeast from blueberries. After a week the sugar/blueberry water mix was bubbling and I added that in place of the 1/4 c water to 1/2 c rye flour. I’m following your recipe for the starter and all seems to be growing nicely. I’ll be baking bread with it in the next few days. Thanks for all your information.
Wow, thanks for sharing. I’ll have to try that.
Hi Sondra – I’m looking to make sourdough starter from junipers and noticed you did blueberries. But how did you do it? Did you just add the blueberry yeast water to your flour? Seeking more info on how to make sourdough starter using juniper berries. Thank you! Pam
Hi Pam. I’m not sure where you saw that I made a blueberry sourdough starter, but someone in the comments for this recipe did. It sounds like they made a wild yeast starter and used it in place of some of the water in the recipe. I haven’t tried this, but I know it can be done! Here’s my recipe for making a wild yeast starter with juniper berries.
How did you create the blueberry yeast?
I’m not sure where you saw that I made a blueberry sourdough starter, but someone in the comments for this recipe did. It sounds like they made a wild yeast starter and used it in place of some of the water in the recipe. I haven’t tried this, but I know it can be done! Here’s my recipe for making a wild yeast starter with juniper berries.
Why do you discard half of it and why can’t you just put half in another jar and then have 2 batches?
You can totally do that if you want to maintain two different starters.
Hey there,
I’m wanting to start the sourdough starter but I was wondering, with the parts you throw out or discard, can u make another starter with that? I’ve always found it a bit of a waste when i hear people say to discard it.
Thanks.
PS; I absolutely adore your page. You are super inspiring.
Hi there. Yes, that’s exactly what you’re meant to do. When you discard, always save enough to become your next starter. Also, if you look up sourdough discard recipes on Pinterest, you’ll find tons of creative ways to use it, from sourdough discard crackers to pancakes!
Can I do something with the discard dough?Since there are no organic grapes this time of the year,I am thinking to use raisins.Do you think this a good idea?
Saw on your juniper wild yeast starter that you can use it to help start your sourdough starter, which linked me to this article. I am not finding how to incorporate the wild yeast liquid into starting sourdough. Help please! I have a wild yeast juniper starter all ready to use! And I have a sourdough bread making class I am ‘attending’ next week. Here we go!
Hi Carla, I have heard about others that have had success with it, but I’ve never done it myself so I can’t really guide you on how to do it, sorry!
Trying sourdough starter, followed your recipe, but curious do I only lay a towel over top or can I shut the lid on the jar? Nowhere does anyone address this, but almost all jars I see recipe in have lids and they’re closed and latched. And how much flour and water daily; 1 tbsp and 1 tbsp?
I just place a towel over the top with a rubber band around the jar. It’s recommended to feed your sourdough starter daily with a ratio of 1:1 flour and water. You can use whatever amount you prefer.
I have a quick question – I have recently started my sourdough starter and things ARE bubbling! I read a trick which said you should throw a table spoon of apple cider or pineapple juice in at the very beginning to bring the PH down and help out the yeast so I did that and it’s already bubbling quite a bit after just 4 days of feeding. My question however is about the consistency of the starter. Mine is sorta doughy already – is it meant to be thick like a wet bread dough or thinner like a pancake mix kinda?
Need some advice – followed your recipe and have been feeding twice daily.
The starter smells sour but it is also separated with liquid floating out he top.
Is that ok?
Thank you!
Hi Colleen! When you are feeding it to get it started, you said feed it a spoonful of flour, I’m guessing a tablespoon? Also, how much water? Equal portions? Can’t wait to try this!
Thanks,
Pat
My Grandmothers recipe calls for potato water. Never heard of the grapes..going to try.
Can you tell me more about the process of “feeding” the starter? This is my first time with making my own. Do you just add flour and water? Does it have to sit at room temperature or do you just pull it out of the fridge and feed it and put it back? Any help would be appreciated! Thanks!
Got sourdough starter going. Been wanting to do this for years. Being retired I have spare time.
Remember reading about miner / prospectors in 1800’s. The kept their starter with them so it would not freeze,
Think it was Jack London books. Will have to look it up.
Really liking your sites.
Thanx
I can forage for some lovely juniper berries with white bloom on them. Grapes are an hour away. Is there any reason a tablespoon of them wouldn’t work also?
It would probably work, give it a try!
Diane,
Did the juniper berries work?
Hi, thanks for the good description! To maintain my starter (feeding it once a week), what is that water/flour ratio I need use? And I out it right back in the fridge after feeding? Or does it need to sit outside? Does the sourdough need to be taken out and come to room temperature before using it?
Sorry for all these questions, I’ve been baking according to Ken Forkish method and my bread turns out really well, but the timing for his breads is very different.
Thanks!
I can’t wait to try this, just have a question regarding the grapes. I have Concord grapes growing on my back fence but they won’t be really ripe until about October – do I have to wait until they are ripe for them to work in the starter?
As long as the grapes have some of that whitish bloom on them they should work whether they are completely ripe or not.
Great video! I was wondering about cabbage. I was reading an old 1800 cookbook and they were talking about getting yeast off of cabbage in the fall for baking. Did you ever do this and how do you do this. Thanks again; new subscriber; love your articles and how to videos. Bekki
I don’t have any grapes at home and want to start this. would a handful of organic raisins work to make the starter?
I’ve never tried it, but I’m thinking that it would probably work! Also, organic blueberries would work as well.
Hi Colleen how many days does this take please? I have Rice Flour, Buckwheat Flour, and All Purpose Flour but not bleached, I think I also have Coconut Flour? Would any of those work please? Thank you also for the recipes…
Everyone’s sourdough starter will take different amounts of time to make as there are several factors going on. I would say a week is a good guideline for it to get going, though. The only flour I would use for making the starter is regular all purpose (or rye if you have it), the gluten free flours won’t work as far as I know.
Where might we find an answer to the questions about amounts to add to feed starter and about the temperature?
….and I’m so in. You had me at “Ahwahnee”…I got to go on several trips to Yosemite and have eaten many times at the Ahwahnee Lodge, and everyone knows California has the best sourdough bread anywhere. (I grew up in the South Bay in Santa Clara Valley and am now all the way out on the east coast…and I miss authentic sourdough bred a LOT.)
I think you will enjoy having your own sourdough starter! When I smashed the grapes up a bit it seemed to really get it going good. Yosemite is awesome!
Great tutorial! It reminds me that I neeeeed to get a new sourdough starter going again :) Thanks for sharing at the Homestead Blog Hop!
The recipe I tried recommended rye flower and onion. It did bubble and smell of sourdough but the bread never really rose and was hard as a brick. I’ll try your’s as soon as I have my spring connected to the kitchen tap. Shouldn’t be long now…thanks for the passion and effort you put into these post.it benefits all of us.
Rye is difficult to work with because it has little gluten. So always do extra research when trying to work with rye. King Arthurs flour has many suggestions.
Thanks for these posts, I feel healthier just THINKING about miner’s lettuce and starting my own starter. I’ve convinced young James that sourdough bread is deeelish, so we should start making our own sourdough bread! I like how you write about these things–keep it up!
Thanks, glad you like it! I have a sourdough bread recipe in the works right now (just came out of the oven and smells amazing, actually) and will be on the blog next week!
Thank you so much for this! I thought it was going to be intimidating, but, just like all of your other posts, it seems manageable and fun. You have a wonderful blog!
Thank you! I really try hard to make these things accessible to everyone because they really are easy! I’m glad that you are liking it :)
I also shared this on Facebook. There are so many people who love to bake and brew and hope this helps them have great fun playing with this yeast recipe. Thanks again for all your hard work; greatly appreciated. Bekki.
This blog would make anybody want to have a sour dough starter in their kitchen!
amazing about the grapes…good job Colleen!