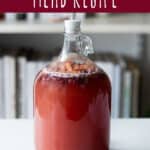


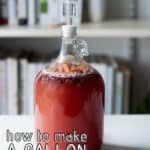
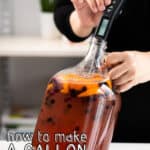

You may have heard of mead before or maybe you haven’t, but one image that always seems to come to mind when mead is mentioned is Vikings drinking their grog. I don’t know a whole lot about Vikings, but I do know a bit about mead! Mead is a fermented honey and water mixture, some call it honey wine, and it is quite possibly the first fermented drink that humans purposefully made. Luckily for us, it’s quite easy to make your own mead! I’m going to show you how to make one gallon of mead with this simple blueberry orange mead recipe.

Want to save this post for later?
Simple Mead Making eBook
Want to learn more about making mead? I have a Simple Mead Making for Beginners eBook just for you!
It has ingredient and equipment checklists, detailed instructions for brewing and bottling your mead, and simple mead recipe ideas! Be sure to check it out if you’re new to the mead making process and want a step by step guide.

One Gallon Mead Recipe
Here is my simple method for making one gallon of mead!
What is Mead?
Mead is a fermented alcoholic beverage that is traditionally made with just honey and water, and maybe some yeast (wild yeast is often used).
Whenever you add fruit to mead it’s technically called a melomel rather than mead. I still usually default to calling it mead, though.
You could also use apple cider instead of water and then you’d have what’s called a cyser. If you add herbs and spices or other flavorings it’s called a metheglin.

Mead Equipment and Ingredients
There is some special equipment and ingredients that you will need to make this mead.
Rather than list it all here, I’ve created a page that has links to all of my favorite mead ingredients and equipment: Mead Equipment & Ingredients: Everything You Need to Get Started.
There you will find links to the sanitizer, brewing jugs and buckets, airlocks, yeast, tubing, bottles, and honey and I recommend!

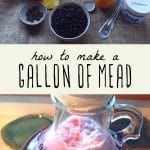
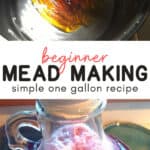
How to Make Mead: One Gallon Mead Recipe
Alright, let’s get started on making this mead!
This is a recipe for one gallon of mead, but I’m always of the mind that if you’re making one you might as well make two.
You can split a package of brewing yeast up between two jugs (one package can make up to 5 gallons of mead).
Sanitize Everything
The first thing to do is sanitize everything that will be used in the brewing process: the jug, airlock, big pot, spoon and funnel.
Simply follow the directions on the sanitizer and don’t throw it out until you’re totally done (just in case your dog licks the funnel or you drop your spoon).
Make the Mead Must
Once everything is sanitized, put about 1/2 gallon of non-chlorinated (filtered) water in a large pot on medium heat. When it’s warm, but not boiling, add the honey and stir until it dissolves.
Using two pounds of honey will make a very “dry” mead (not sweet), while three pounds will create a sweeter mead.
The type of yeast you use will also affect how dry or sweet the mead is.

Turn the heat off. It may be a little foamy, but that’s ok.
In the meantime, put the berries (or any fruit of your liking), orange slices (skin and all), and raisins into the one gallon jug.
Raisins are added as a natural nutrient for the yeast. You will not notice any flavor from them in the finished mead.

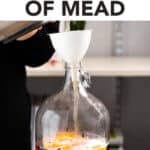
Then, using the funnel, carefully pour the honey water mixture (technically called “must”) into the jug.

Top off the jug with cool non-chlorinated (filtered) water, leaving at least 2 inches of head space on top.
Then put the lid on the jug and gently mix everything around a bit. If you bought a jug that came with an airlock it may not come with a lid, so you’ll have to find a lid that fits or improvise a bit here. A solid cork (without a hole for the airlock) would work.
Pitch the Yeast
The next step is to add the yeast, but you need to make sure that it isn’t too hot, which will make your yeast inactive. It should feel lukewarm, no more than 90° F (32° C). I recommend using a thermometer before adding the yeast to be sure.

Once it is less then 90° F you can pitch the yeast into the jug.
You don’t need to use the whole package of yeast for one gallon, 1/2 package is enough (it doesn’t have to be an exact measurement). Store the opened yeast package with the remaining yeast in an airtight zip top bag in the refrigerator for later use.

Now the fermentation fun can begin!

Once you’ve pitched the yeast, put the lid back on tightly and this time you’re really going to shake it up for several minutes.
It’s a good workout for your arm muscles, so you can skip the gym on days when you make mead!

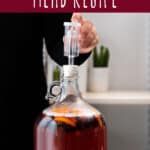
Add the Airlock
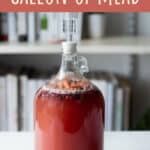
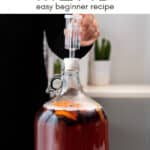
Put a little water in the airlock to the line, then put the rubber stopper into the jug.

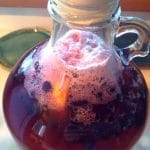
In a few hours you should start to see bubbles forming in the jug and in the airlock.

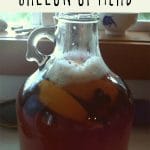
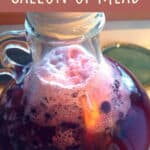
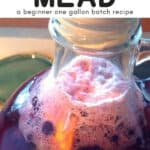
After several hours or overnight, you may see a lot of bubbles rising up the neck of the bottle! The whole top might get a little foamy at first, but things will settle down.
Don’t worry if the bubbles rise up into the airlock for the first couple of days, that just means that you have a very active (and happy) batch of mead! You can periodically remove the airlock to rinse it out, then replace it back into the jug.
I love watching all the little bubbles! Fermentation is so cool.

Set Aside to Ferment
Keep the jug in a cool (not cold) dark place out of direct sunlight to ferment.
Mead can take longer to ferment than hard cider or beer, depending on the ambient temperature it will take anywhere from 3-6 weeks.
I usually give it 5-6 weeks before bottling to be on the safe side, as you don’t want any broken bottle explosions! I’ve definitely had some very champagne like mead before.
You want to wait until you don’t see any bubbles in the jug and your airlock is still before bottling.
Bottle the Mead
Bottling one or two gallons of mead is the same process as bottling hard cider. Follow my tutorial there to get a detailed process.
You may want to wait a while to drink your mead as it definitely gets better with age.
I often drink it “green” (young) as I enjoy it either way. It is fun to save a couple of bottles for several months, or even a year, just to see how the taste changes with age.
More Mead Recipes
Now that I’ve shown you how to make this simple one gallon of mead recipe, chances are you will want to make more soon!
I have written posts on How to Make 5 Gallons of Mead and How to Bottle 5 Gallons of Mead if you want to try making a larger batch.
I have one gallon mead recipes for Wildflower Mead, Dandelion Mead, Blackberry Mead, Elderberry Mead, Elderflower Sparkling Mead, and Maple Orange Mead that are all delicious and follow this same basic mead recipe.
See my post on 15 Easy Mead Recipes for Beginners for even more!
If hard cider is your thing, see my posts on brewing hard cider and making hard cider with wild yeast.
Be sure to check out my Simple Mead Making: A Beginner’s Guide to One Gallon Batches eBook for more detailed information on brewing, bottling, and recipe ideas!
Cheers and happy mead making!
Simple One Gallon Mead Recipe
Equipment
Ingredients
- water non-chlorinated or filtered
- 2-3 pounds honey depending on how sweet you want to end product to be.
- berries or fruit of any kind fresh or frozen, about a cup
- 1 orange
- 10 raisins
- 1/2 package champagne yeast or other wine yeast
Instructions
- Sanitize everything that will be used in the brewing process.
- Heat about 1/2 gallon of non chlorinated water in the pot on medium heat. Once it's warm, but not boiling, add the honey and stir it so it all dissolves. Turn off the heat.
- Put the berries or other fruit, orange slices (skin and all), and raisins into the one gallon jug.
- Use the funnel and carefully pour the honey water mixture into the jug.
- Top off the jug with cold (preferably filtered) water, leaving at least 2 inches of head space on top. Put the lid on the jug and gently mix everything around a bit.
- Make sure that the temperature of the must is below 90°F, then add 1/2 packet of champagne yeast. Put the lid back on tightly and this time shake the jug for a minute or two to distribute the yeast.
- Put a little water in the airlock to the line, then put the rubber stopper end into the jug. Put the jug in a dark place. It should start bubbling within 12-24 hours.
- After about 4-6 weeks of fermenting, once all bubbles have stopped rising in the jug and airlock, the mead can be bottled and aged.
Notes
- Please see my Mead Equipment and Ingredients page for a detailed list of what you need to get started.
- Use my tutorial on Bottling Hard Cider to bottle the mead - the process is the same. The flavor of homemade mead will improve after bottling and aging.
- My Simple Mead Making eBook is a helpful resource if you are just getting started with making your own mead.

Hello Colleen,
I am on my 4th week of fermentation. Instead of 1 gallon, I used a 5-gallon carboy (14 lbs of honey, no fruit). So far so good. It’s still bubbling. I’m gettin ready to purchase my bottles and an auto siphoner (lots of bottles). I haven’t bought the bottles yet, because I wanted to have your advise on the type of bottle topper first. Synthetic corks v. real cork, screw tops, or cork lids? Also, how necessary are cap shrink capsules?
I think I found a new and delicious hobby! If this batch works out, I am proudly making more for Christmas presents.
Hi Joan! Glad you are enjoying the process. I prefer flip-top bottles as they are the easiest to use.
Hi there!
Not sure if I missed it, but what was your alcohol content of your final product?
Hi Chris, you can use a hydrometer to find out the ABV% of your mead.
I am a first timer with this. Everything else I read talks about a secondary fermentation and then bottling.
How come this step is forgone?
Also how do I measure the alcohol content?
Hi Don, you can transfer your batch to another vessel for secondary, but it’s not totally necessary. To find your ABV%, you’ll need to use a hydrometer.
Hi Don … I’ve been making mead for several years now. I’ve found that to avoid sediment in the final bottling, I have to rack (decant) into a new clean container at least once and sometimes 3 or 4 times to ensure a clean/clear product. Once fermenting stops, all the dead yeast sinks to the bottom of the primary jug and it’s best to get your finished product off of that sooner rather than later. If you’ve used any solids, like fruit or herbs, you’ll want to separate from those also.
There are auto siphons available for cheap and with a piece of silicone hose, the job is simple and clean. Bonus …. you can also taste at this point to get an idea …. but you’ll want to bottle and let it rest for a bit. Some of mine are going on 2-3 years.
I tried reading through all the comments, love your site by the way! So day 1 I left a 2 inch space and my baby is bubbling all over the place is that normal? There is overflow seriously
That’s totally normal and can happen when you have a very active ferment.
I started this recipe and so far so good! I’m excited, this is my first mead attempt. I am curious, as I’ve looked around the web…at what point should this begin to clear and will it clear prior to bottling? 2 weeks in and the bubbling has slowed down a bit, so I’m simply curious as what to expect. Thanks!
Patience Drew …. patience … clarification depends a bit on what you’ve added to the must … fruit, herbs …eventually (and it may take some time) things will clear up. You can use food grade bentonite clay to speed things up a bit . But bear in mind, you’re going to let your ferment sit in secondary and then in bottles for a fair amount of time.
Hi Lisa, followed your method for making Mead using additional fruit ( Oranges, Strawberry’s and a small amount of mint). I’m into my 4 week of fermentation and my airlock has gone still. However, it put my demijohn need additional heat and it seems to be showing activity again. Is this normal or should remove the fruit and have a secondary fermentation?
Hi,
What do you mean? Keep it in a cool (not cold) dark place. 60 OR 80 F?
Thanks!
I fermented at 66 F. From May 21 to June 28. M05 MEAD YEAST got really very dry. Stored at 63/64 F.
Hiya my meads using your recipe came out ultra bitter. Still drinkable but harsh! So this time i am playing around with varying the use of citrus, omit the peel and purhaps try one with less yeast? I make 5 demijohns each time :) I didnt notice your soap recipes last time so YAY i will give that a try too. I have been brewing the petals of marigolds and chamomile for months now :)
thankyou and big gratitude
Hi, I bought your ebook and I am really excited to try making mead this weekend! One thing I missed in the directions was sanitizer (I knew I needed it but it didn’t occur to me to need to buy one). Is there a replacement one instead of One Step? By the time it gets here, it won’t be in time to make. Is there a substitute sanitizer I can either go buy at like target or something that’s around the house? Can I dilute bleach?
Thanks!
Hi Christian! I wouldn’t use diluted bleach. If it were me, I would just wash everything very thoroughly with hot soapy water and rinse very well. I think that will be sufficient! But if you get the One Step in time for bottling, which I assume you will, then definitely use that on your bottles.
If I might Christian… there is an inexpensive and simple sanitizer called “One Step” … you can find it on line or directly through a brewing supplier. It’s a no rinse sanitizer and simple to use. It won’t impart bleach flavor to your treasure. Use it for all your equipment.
I have one going that has consistent baby bubbles in the liquid but no bubbles coming through the airlock yet. The other I have going with fruit in it has been bubbling like crazy from the beginning. Should I pitch more yeast in the first or just leave it be?
Been making a lot of wine but plan to try this recipe next!
Luckily I already have 3lb of honey to use up!
Can’t wait to try this. Bookmarked for later!
I am a Home Brewer. I really like the simple approach you have laid out. I was going to make a Mead once and got all bogged down with the Purist type Mead Making. Never did it. This I can do. I will take gravity readings though and use a conical 2.25 Gallon Plastic fermentor with a Spigot. Make 2 Gallons. Bottle wand fits with a piece of tubing right on the spigot. I currently have a 20% ABV Bragott carbonated on tap. Project with a buddy from the home brew club. It took some work to get it Brewed, but it is awesome. 6 Gallon Batch. I bought your Book too.
DB
How do you keep the siphon from clogging up with the fruit pieces? Halve of the strawberry’s and most of the raisins are still floating.
I just got all the stuff needed for this recipe. I know I read somewhere about a fermentation bucket but I can’t find it now. Did I get the bucket for a secondary ferment? How do I do it? Do I just autosiphon the mead after 6 weeks from the glass container into the bucket for another 4 weeks and then after that I siphon into the bottles?
Hi Cori, my simple mead making method does not use a fermentation bucket. If you wanted to use one, you would do the primary ferment with the fruit in the bucket, then siphon it off into a jug for the secondary ferment.
Hi Lou, the auto siphon has a piece on it that doesn’t allow large chunks of fruit to go through the tube.
Lou, it happens … just shake them off. If not, no damage … just siphon down to above the dead stuff. Don’t try to get all the ferment out … leave the garbage.
So I did two gallons, each one with a different honey, but the same yeast. I’ve followed every other aspect of this recipe, however both gallons are still bubbling consistently after 6 weeks. How long can I let it go? Will it be okay to let it sit longer in the jugs with the airlocks?
This is my second attempt at mead. First attempt I did with friends and tried to make too much at once so we didn’t have enough honey and it was awful.
What this recipe does not mention is a “secondary”. After your ferment slows, but does not have to stop, transfer your mead into a second sanitized container for roughly 30 days. When you transfer, be sure to not transfer any of the sediment or particles from your initial ferment container. After the transfer your mead may pick up a brief increase in fermentation gasing, but it should slow and stop within a couple of weeks.
Thanks for the recipe . One question if I don’t have an airlock like yours , what do you recommend to use instead ?
Thanks again
Hi Sam, yes you can let it sit longer than six weeks, that is not a problem. If it is cold out it may take longer for it to ferment. You could also transfer to a secondary as TJ says, but it’s not completely necessary.
It’s been 12 days and my mead is only bubbling once every 30 seconds or so. Is that normal?
Hi Josh, that sounds normal!
After bottling after the six weeks How do I store it to age and how long will it last? Can I let it ferment for longer than six weeks?
Can I use the fruit mixture after I have bottled my mead for another batch
Hi William, I wouldn’t reuse the fruit, it’s usually pretty well disintegrated and not much life left in it after the ferment!
Hi Joe, the bottles can be stored in a cool and dark place until ready to drink. Yes you can let it ferment for longer than six weeks if you’d like, but usually it is close to done by that point.
I have a 5 gallon glass carboy, can I use that for 1 gallon of mead or will the extra space cause a problem?
You should have no real problems, but just understand that the extra space can make it look like your ferment isn’t taking of like you’d think. It will take a while for the gases to fill the extra space, and start your water lock bubbling like it should.
How long is this mead good for once The 6 weeks is up and you have bottled it?
Many mead recipes call for an aging time of 6-12 months. I usually age mine at least 9. With that said, I’ve got a collection of meads I’ve made since September of 2015, and the oldest batch still tastes great.
I just tried this recipe a couple weeks back – although I went my own way and added the entire packet of yeast and fed it some yeast energizer to help it out. It finished early, and ended up semi-dry with a pleasant zip and a final ABV of 18%. Green it’s pretty good, I’m interested to see how it develops with age.
As this was my first go, I didn’t add any flavorings, but since I have a freezer full of hops, my next batch will probably feature it prominently.
Greetings,
I might have messed up…. I made this recipie and let it set for 4 weeks as in my head I thought it said 4 weeks and or when clear and fruit is falling to the bottom…. over axnious I guess. I then strained it through cheeze cloth and bottled it. First bottle fairly clear coming more cloudy with each bottle. The taste of it is dry and perhaps I over did the cloves – not sure on how its suppose to taste….. no bubbles.
Have I messed up?
Will a second fermenting set it right? or makes no differnce at this point?
Comments – suggestions appreciated,
Thanks, Lisa
Hi Lisa, you may have bottled a bit early, but every batch is different so it’s hard for me to say without seeing it. The main issue with that is that it could still continue to ferment in the bottles and they could potentially explode. The reason the mead is cloudy is because you didn’t use an auto siphon to bottle it. Straining with a cheesecloth does not remove the lees, which makes it cloudy. Totally safe to drink though!
Lisa … I’ve had that problem with cloudy bottles. One solution I found was to stand them upright in the refrigerator for a couple days. The cold help the lees precipitate out. When you pour, pour gently and try not to disturb the sediment. I found most of my mead tastes better chilled anyway.
Thank you so much for this recipe! I just tried this out two days ago, fermentation is going great. I was wondering what is the purpose of the must? Is it just to make it easier to dissolve the honey?
The must is your wine. It’s the total volume of liquid that you’ll be keeping. The lees is the gunk that forms on the bottom.
Hey there – followed this great and mercifully simple recipe (bought the eBook too!) This is my first batch and I really can’t tell if it’s working right after 3 days. I followed the instructions as close as I could but am using a plastic fermentation bucket instead of a jug.
My main concern is that I’m only getting 1 bubble in the air lock every 12-15 seconds. This has been pretty constant since day 1. I live in a very remote area of Costa Rica so any trouble shooting suggestions that are special material or tool dependent are probably not options for me.
What’s normal at this stage for bubble rate? And is there anything I can do to fix it if it’s below normal? I’ve read other recipes online that suggest frequent aeration and opening up the bucket. The recipe here doesn’t recommend that so I’m holding off.
Any feedback on what’s normal at this stage, and (if I’m abnormal) how to trouble shoot would be super appreciated!
Thanks!!
Hey there! As long as you are seeing some bubbles in the airlock then I wouldn’t be concerned at all with the bubble rate. You could open the bucket up to check on it to just make sure that it is bubbling to ease your mind (I’m sure that it probably is), but it’s not necessary. It sounds to me like everything is just fine! Happy Mead Making!
Just bottled and tasted of course my first gallon of mead. I chose to use oranges with cranberries since we’re so close to Christmas. I love the tart dry taste and will be making this again and again….😉
Great info here ! I have made a couple one gallon batches of plain (just honey) mead. Turned out great. I have a batch going now with strawberries in it, after 2-3 weeks the floating berries are looking like a reddish-brown goo. Kinda gross actually. Is this normal ?
How did this turn out ? I’m about to start a strawberry batch and never considered the time the fruit sits.
“Grog” is a British naval drink. British sailors received a daily rum ration which they mixed with water to make the water potable. Their water would go stale and had germs in it. Sometimes they would have a higher rum to water ratio, so they would get “groggy”. Some would skip the water altogether.
Not quite the right explanation of Grog matey. Junior ratings were issued Rum at the age of 20. The most usual measure was done by Chief Petty officers and the duty Officer of the day, just to make sure the measurment was adhered to. Main shore establishments measure was 3/1, that is 3 of water and 1 of rum. Before this the rum was neat, and then came along an admiral, would you believe his name was “Grog”. He said the crew were getting to drunk to work in the afternoon, so he had watered down. Only Petty officers were allowed “Neat ” rum. But ! they were not allowed to bottle it ?
The lads at sea had a better deal, their measure was 2/1, unless you were on an aircraft carrier which was considered a floating shore establishment. If you were lucky enough to be drafted to a minesweeper on active duty, like I was during the Malaya Conflict of the sixties against Sukarno president of Indonesia. We had a measure of 1/1. A magic measure as it helped us sweat more and didn’t need so many salt tablets. Better still when I was 21, I had to negotiate 21 tots. Not only that I had been badgering the Coxwaine for weeks to get a sip of his tot on the day. By the time my birthday had come around I had forgotten. I went past his mess to go to my mess and I was dragged through the door and orders to sit. “Eat that bread while your drinking that glass of neat rum”. I had 5 minutes. Then I was rudely shown the door. By the time I got to my mess I was slightly tipsy. I had no idea of the 21. How I didn’t end in hospital was a miracle. I survived to go ashore later to continue to celebrate my becoming of “Age”. Cant do that nowadays.
Great story, …thanks for serving!
It feels like a thousand years ago, but it’s only been 25 years since I made my own mead. I used a gallon of (unpasteurized) apple cider, about 3 pounds of honey, and wine or champagne yeast. I’d let it ferment for a few months. It was SWEET, but “kicked ass.”
I’ve never made mead before, but make a lot of beer and other fruit wines. I would go for secondary fermentation by adding sugar at bottling with beer, and would stop fermentation with a campden tablet with fruit wine, usually. What approach can be used with mead?….I figure as it’s mead I’d stop the fermentation. I ask because your illustration shows a flip top bottle of the kind I’d use for beer, because it can contain the pressure that builds up in secondary fermentation.
By all means, go to a secondary to get a clearer mead, but don’t add anything to the secondary container. Just siphon your mead into your secondary container, and let it sit for another 4 weeks or so. You’ll get more sediment in the secondary container, but your mead will clear up nicely, and you won’t have any issues with stopping fermentation as most of your yeast will have been eliminated in the primary to secondary transfer.
Just curious, what would this be called if it were distilled to a higher proof? Fruit wine is brandy, Rye or the like whiskey, Potato is Vodka…
I plan on making this, sounds Terriffic! Do you use brewersyeast, turbo yeast or what?
Thanks
I use Lavin D47. It’s a yeast that is made for sweeter wines and champagnes. It’s also great in the fact that the yeast tends to go dormant again once the ABV reaches around 14%. That makes it easy to regulate its potency without having to mess with a hydrometer.
I didn’t see the auto siphon with tubing get used at all in this recipe. Is it necessary?
Hi Jackie, the auto siphon and tubing are used in the bottling process, which you will see in my post on bottling here (the process is the same for cider and mead): How to Bottle Hard Cider
During the bottling step would it be beneficial to filter through a cheesecloth or similar?
No, I’ve tried it, and it actually doesn’t work very well. The sediment is sludge-like so barely goes through a filter or strainer. An auto siphon with tubing and bottling wand are best for bottling!